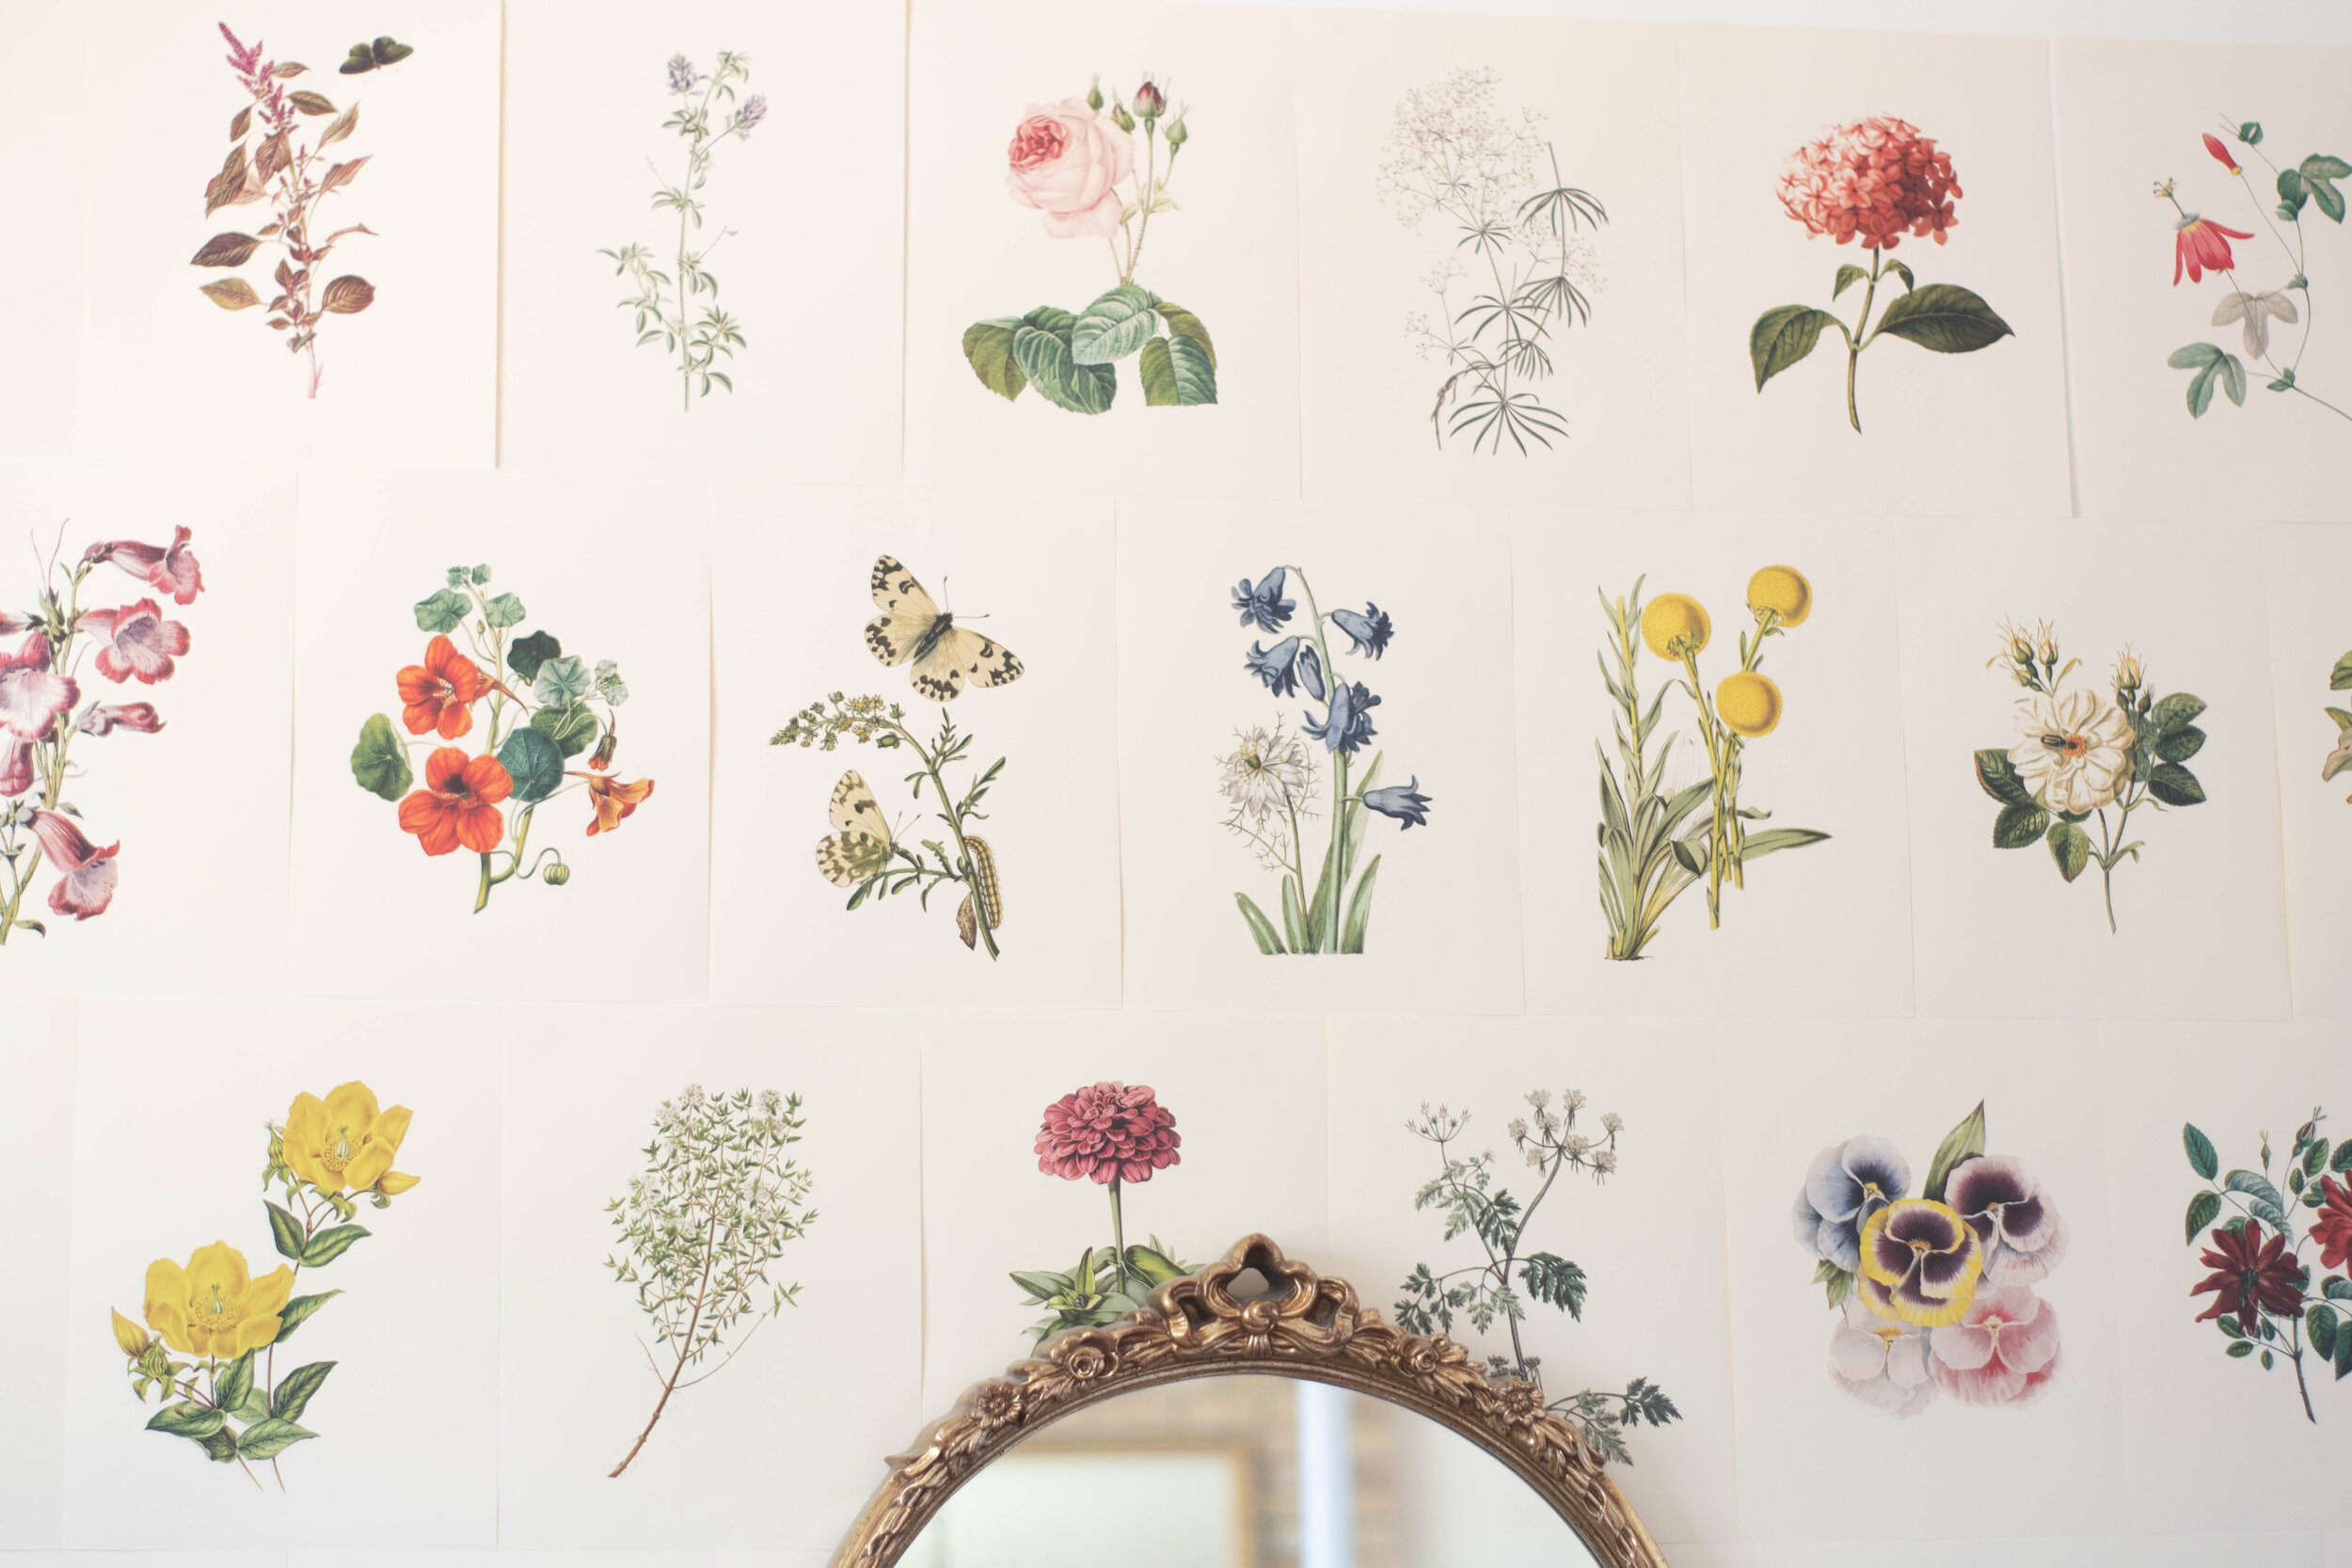
The Halden Botanical Collage Kit - A More Affordable/Less Permanent and Beautiful Alternative To Wallpaper

I’ve always loved vintage botanicals. There’s something about them that takes me to a world of warm slow days, beautiful books, antique shops and the wild fragrance of herbs and weeds and wildflowers.
About a year ago we completely renovated an old and tired house and woke it up to become our dream house. I poured all of my love for beautiful old and unique elements into the design of each room.
When we re-did our house there was tiny bedroom that I wanted to turn into an office, but I didn’t want it to feel cramped. The solution was a little crazy but it turned out so beautiful: an interior window cut into the wall uniting the living room and the little bedroom to open it up. To really emphasize the uniting of the spaces and to add interest, I really wanted to create a floor to ceiling collage wall of vintage botanicals and then work them into the design of our powder bath and other rooms. As I went on the search for a vintage botanical collage kit…it was REALLY hard to find what I wanted. In fact, I ultimately wasn’t able to find anything that really worked. There were some concepts but they were either a little cheesy or there were often only 6-12 in a set, not enough for what I wanted to do. A large set of vintage botanicals just wasn’t in existence so my walls remained bare for the next year.
Fast forward to when we started Halden. I began to design our seed packets and I was wowed by how gorgeous our botanical art is. I knew immediately that I wanted to use the images for our seed packets to create the affordable collage kit set that I had been searching for.
And thus was born the Halden Collage Kit.


It was A LOT of work to get these images ready for print and has involved months and months of editing. Huge thanks to Karely Brinton for spending hours and hours lovingly prepping this kit for production.
I love that you can use it like wallpaper but unlike wallpaper, if you want to switch up your space, you can. It’s really perfect for a rental situation or to add interest in different places in your home. Individual prints can also be framed for beautiful moments or individual prints can be given as gifts.
When I first received the proofs for the collage kit I let out an audible “awe” as I pulled them from their sleeve.

There are 150 full color quality images on 80 lb. 8 ½ X 11 paper. Each image has been handpicked for it’s unique beauty as a stand alone image and for it’s aesthetic in the collage as a whole. It is designed to be usable and durable but also thin enough to feel like it came from an old 19th century botanical book.
To those that purchase, I hope you love yours as much as I do. I’d love to know what you think in the comments below.
-Sara Haller (Halden Co-Founder)


How To Grow Iris
Bearded iris are one of the true glories of the late spring. A little effort to plant iris in the fall will give you the most incredible blooms every year for years to come.

1. Plant in a sunny location
Iris are grown in zones 5-9 and like a sunny area. They can tolerate some shade and afternoon shade might even be optimal in the south, but in most places you’ll want to give them as much sun as possible. Without sun they will struggle blooming. You’ll also want to choose a site that is not muggy. Iris are grown from rhizomes and if they are planted in a place with poor drainage the rhizome that sits on the ground will rot.

2. How To Plant Your Rhizome
When you unpack your rhizome you will find a strange tuberous thing dragging roots with some flat wilted growth coming out of the top. Don’t worry. These wilted looking creatures will become an incredible plant and flower.

Settle the rhizome in loose soil right at the surface with the roots pointed downward and the growth pointing upward. Make sure the roots are all covered tightly with soil, leaving the tuberous part poking out of the soil. Space every 12-18 inches.

3. Water
Water at the time of planting if the soil is extremely dry. During the winter keep an eye on your iris. If the soil dries out completely for a long period of time your rhizomes can shrivel up so water if they’re beneath an overhang or you go without water for a very long time. In most cases though the water from snow and rain during the winter will be sufficient to keep your rhizomes happy.
4. Spring Bloom
In the earliest spring your rhizomes will begin to shoot out flat spiky foliage. Iris often take a year to establish so don’t be alarmed if the first spring your iris don’t bloom. This is common as the plant works to establish themselves. By the 2nd year you will get beautiful blooms in late spring.
5. Maintenance
Each fall take sharp shears and cut plants down just above the rhizome. As plants get larger the rhizomes will become a little overcrowded. You can then divide tubers and replant them to get healthier plants with more blooms.
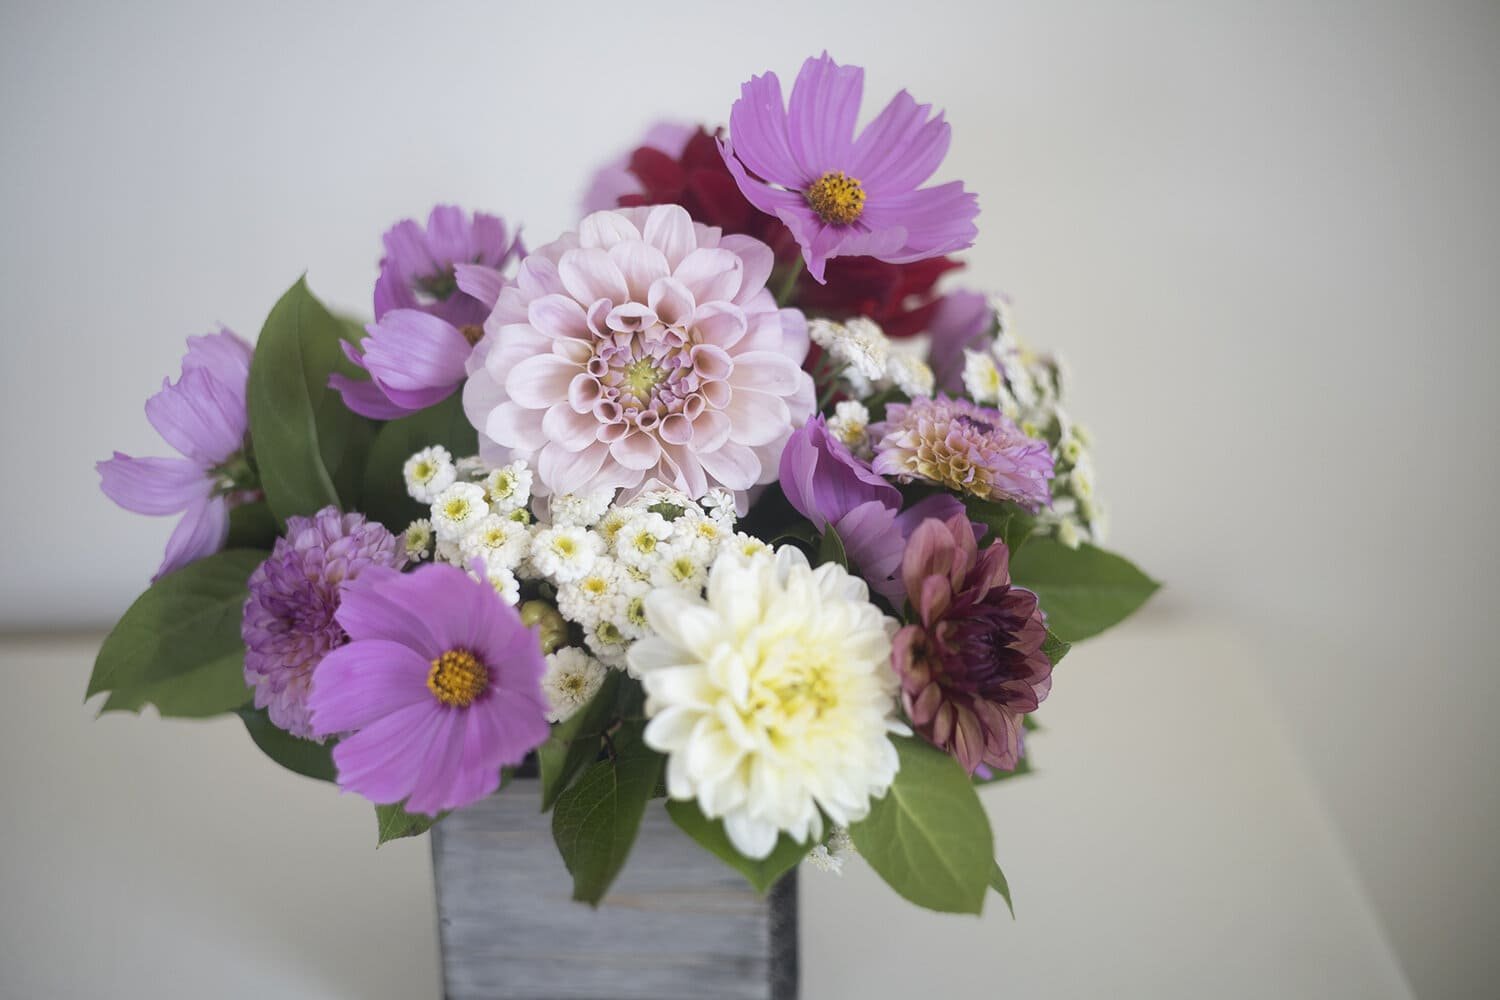
Iris are breathtaking in landscapes but can also be stunning as a cut flower and perform well in the vase. They are a really beautiful choice along a fence or driveway to add color in spring and texture all year.

6. Strong Performing Varieties
Iris in the wild are very small and come in limited colors. Over many years iris have been bred to produce large healthy flowers in a rainbow of beautiful colors. We have rounded up some of the most prolific and high performing varieties. These varieties can be purchased here at Halden Garden.
Cat’s Eye
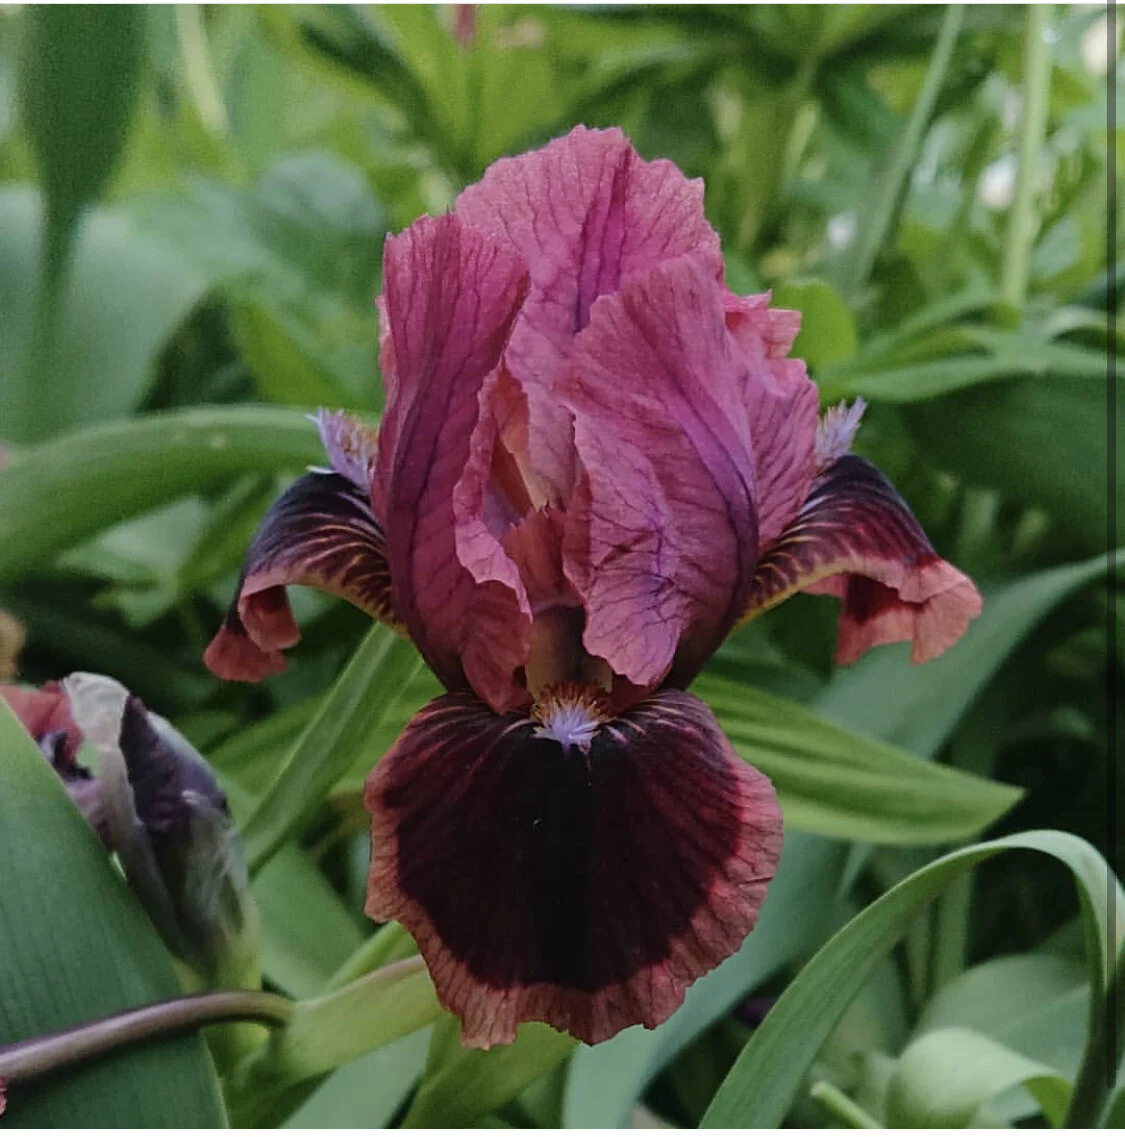
Photo by @aaron.immanuel_83
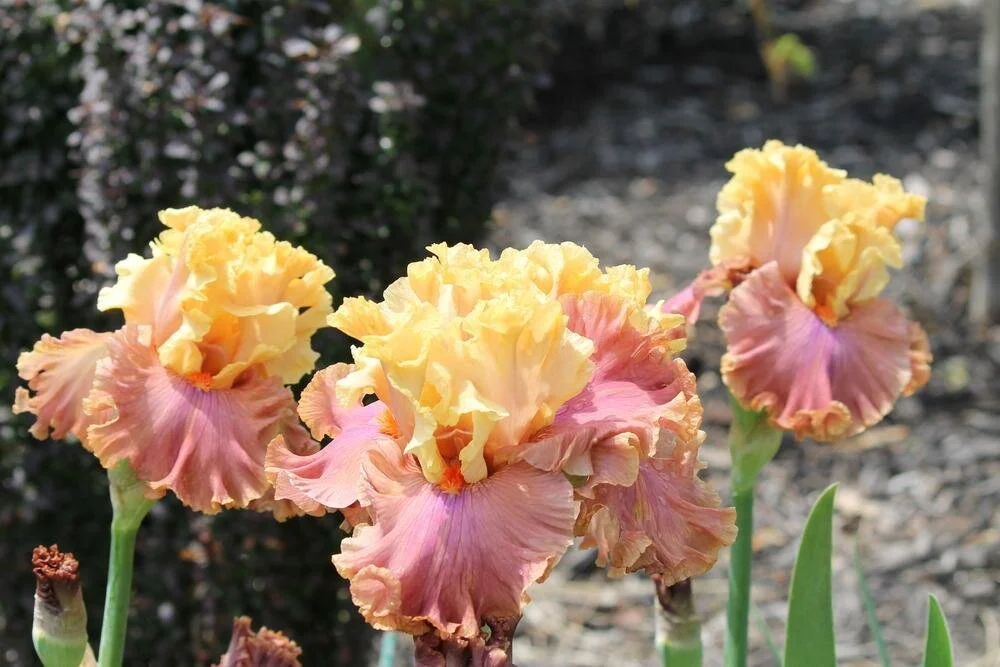
Dame De Coeur

Finishing School

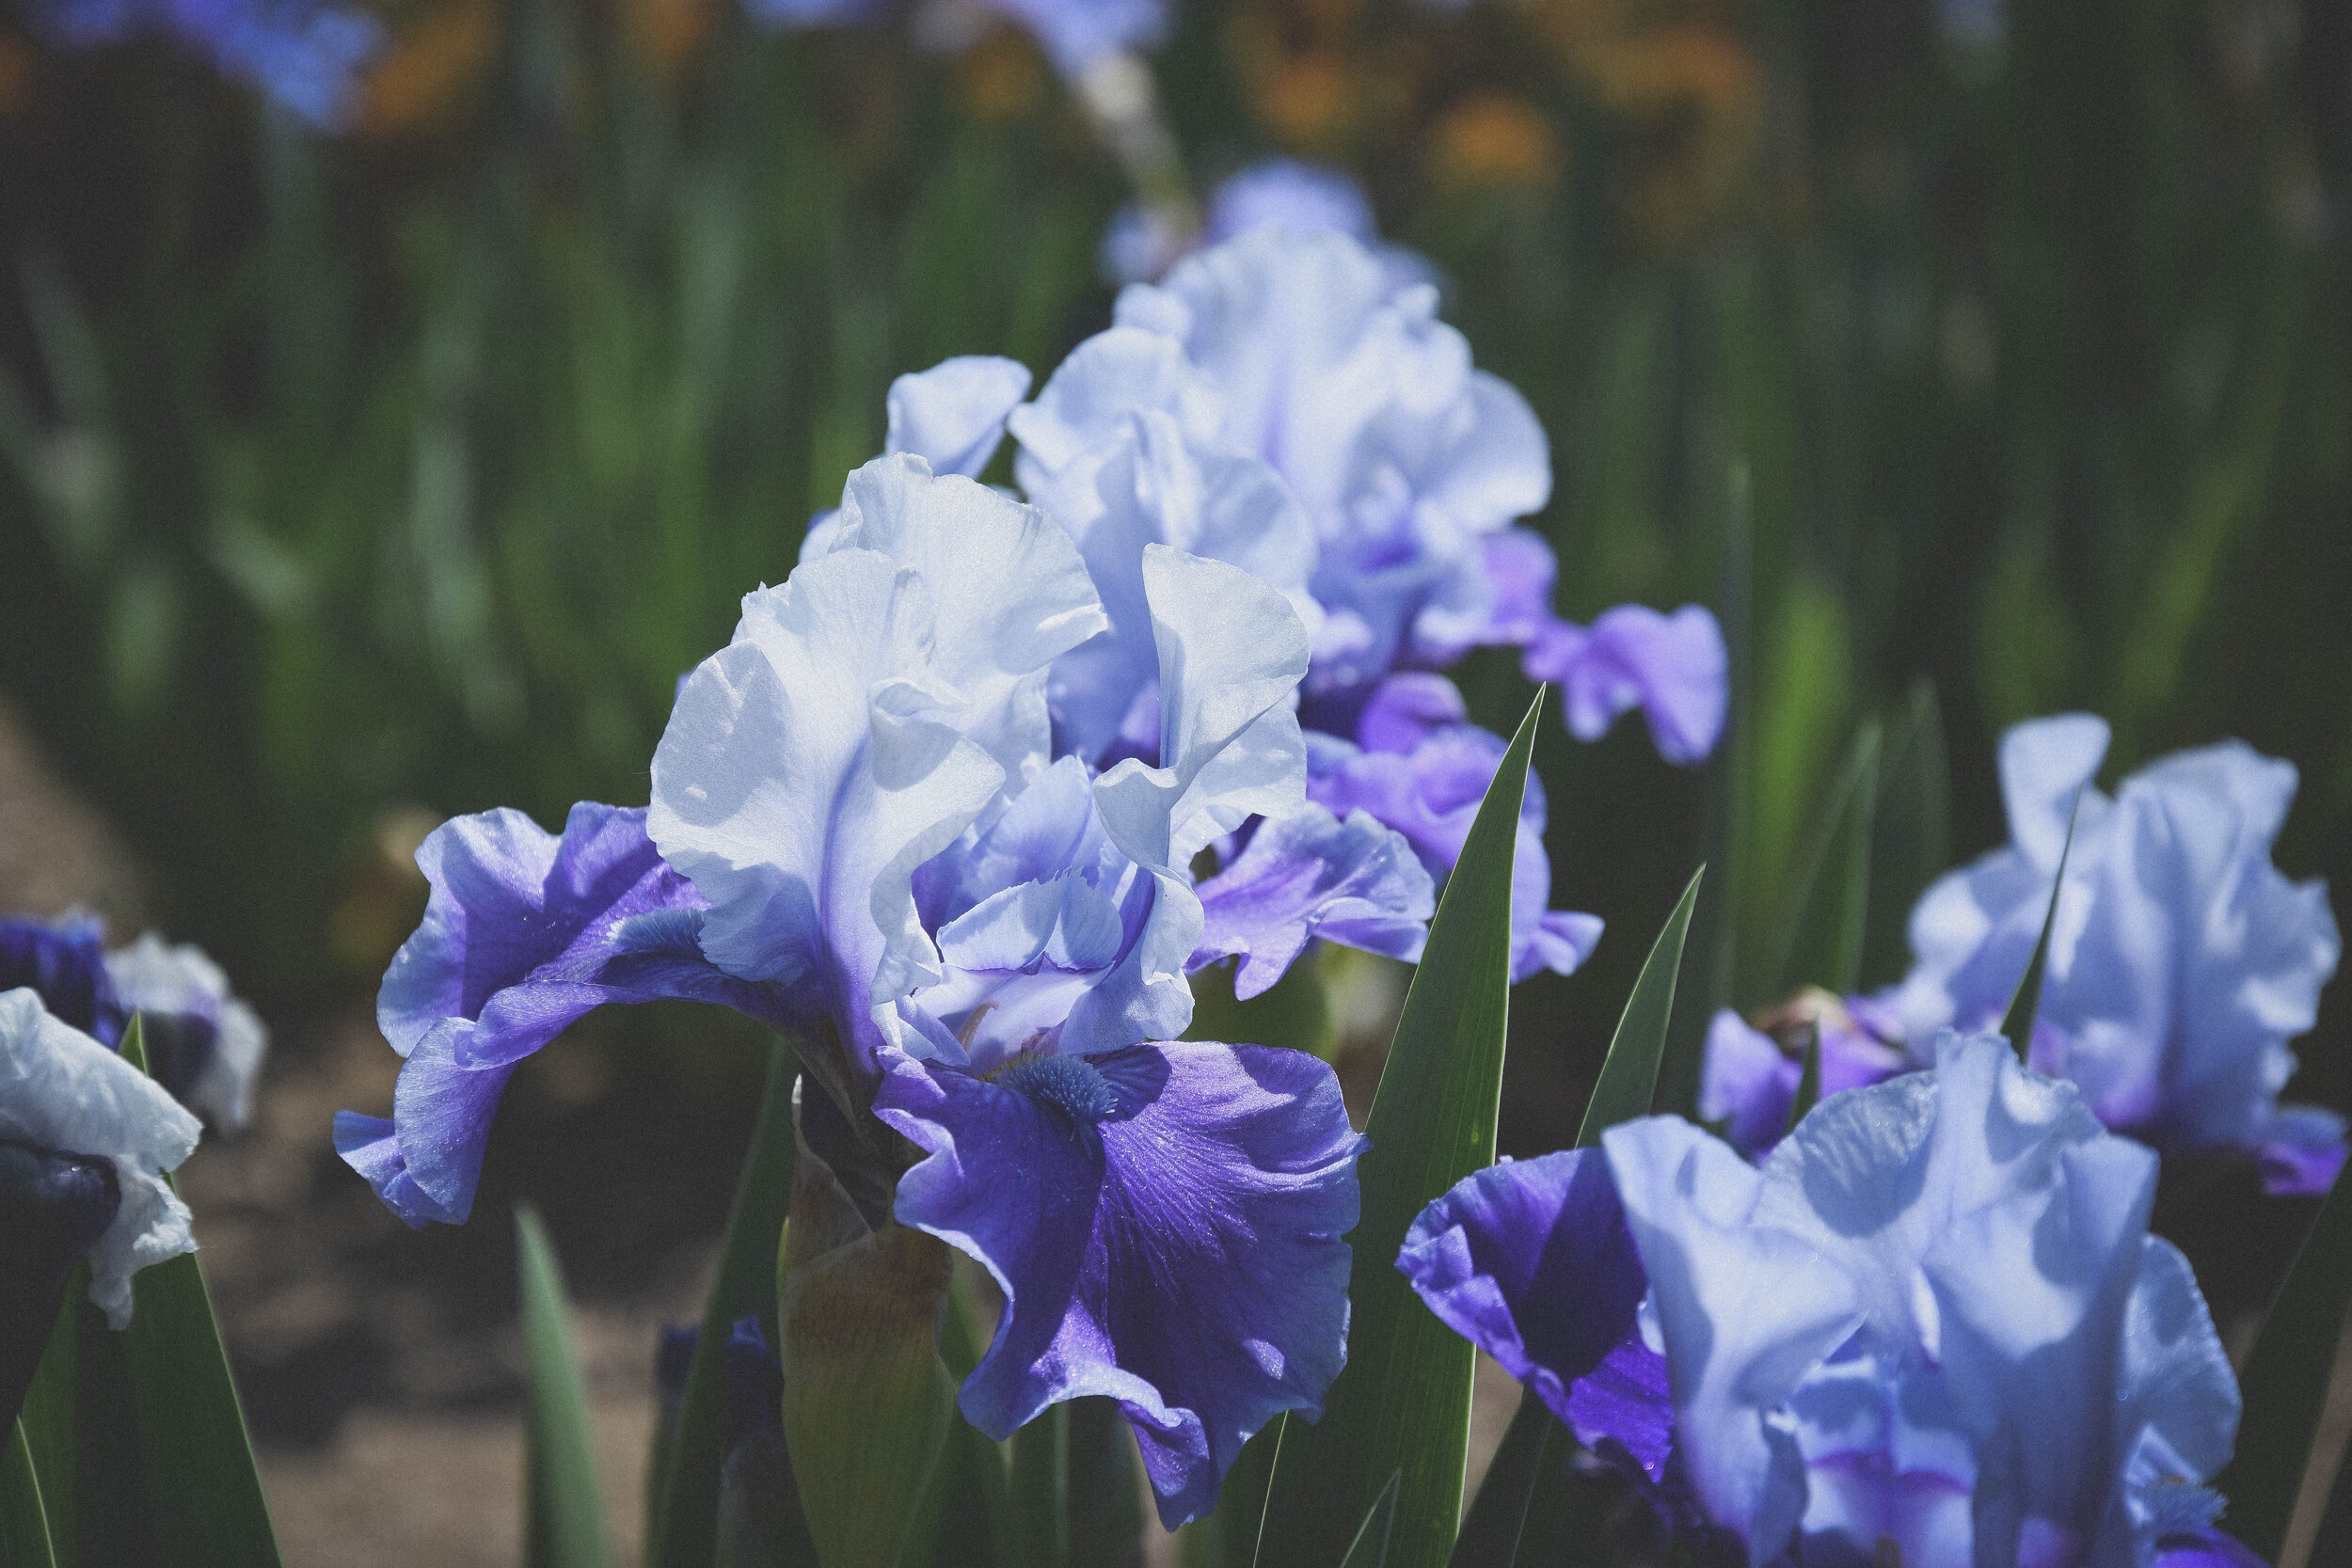
Forever Blue Dwarf

Glamazon
Harvest of Memories

Hermes

Immortality

Java Blue
Roaring Twenties


Any of these varieties can be purchased here at Halden Garden.
I sincerely hope that you include iris in your fall planting this year. Every year you will be so happy that you did. I know you’ll love them as much as I do.
-Sara Haller (Halden Co-Founder)
We send out an email once a week with garden advice from Sara. If you’d like to be notified we’re happy to have you join our email list. You can unsubscribe at any time. We don’t use the list for any other purpose.

The Halden Cut Flower Experience
We are so excited to announce our incredible cut flower class. We have put so much love into creating this.
Every month plants or bulbs will arrive at your house. We will walk you through how to plant and grow them, harvest, and arrange your very own beautiful blooms of all different kinds.


What you will need:
-A garden site that is 36 square feet (equivalent of a 4' X 8' space) of full or mostly full sun soil - The more sun you have, the more your plants will thrive.
-A water source for your chosen site. - A hose or sprinklers will work or we will teach you how to put together a small drip irrigation system.
Your first round of plants, seeds, bulbs or tubers will arrive every 30 days from the time you sign up!
-$17.95/month
-Every month you will receive either tubers, bulbs, rhizomes, seeds or plants that are tailored to the time of year.
-During December and January we will grow indoor flowers, start corms and seeds for the earliest spring, and bulbs for forcing inside.


What you receive and when will be according to your zone.


Anyone can join at any time of the year and they will just start onto the next shipment. Boxes will arrive every 30 days.
We sincerely hope that you will use this time of life to invest in your education and learn a hobby that will be a part of you for the rest of your life.


There is truly nothing like surrounding yourself with flowers. We hope so much that you will take this opportunity to be a part of the Halden Cut Flower Experience! We are so excited to be apart of your floral journey.
-Sara Haller (Halden co-founder)

Grow A Fall Vegetable Garden
By Sara Haller and Tegan Durfee
Certain vegetables need to mature when the weather is cool, after the heat of summer has passed, and so can only be grown in early spring or started in the summer so they mature during the cool fall months. Planting a late season garden is very rewarding because it’s easy to produce a lot of wonderful produce that is quick to grow and very usable in the kitchen. Cool season crops can withstand light frost. Some, like kale and cabbage, can even handle winter snows.
Crops for the fall garden include:
carrots lettuce broccoli kohlrabi
beets peas cabbage kale
turnips cauliflower radishes


Your first step is to identify your first frost date for the up and coming fall and winter. You’ll want to look up online when the first expected frost date is for your area, or in simpler terms, the first day of the autumn season where the temperature drops to 32 degrees (freezing) or lower. If you haven’t planted your crops soon enough for their needs, they could be too young to make it to maturity before consistent frost sets in for the winter.
Once you know the first frost date you will then look at the “Days To Maturity” on your seed packet and count that many days back from your last frost date. So, if your lettuce matures in 65 days and your first frost date is October 10th then you would plant around August 6th.


Once you’ve decided on your crops and figured out when that frost will come, its time to pick a good, sunny spot in your backyard with plenty of room for your garden. You’ll want to make sure the ground is tilled (broken up) and loose so you have no problem planting your seeds. Sprinkling some fertilizer or fresh compost onto this freshly tilled soil is a great way to get the most out of your garden. Something quick and easy from the store is just fine, fertilizers like MiracleGro Plant Food, and Osmocote Smart-Release Plant food work great!

When deciding which crops should go where in your garden, think about the end result of the crop itself and how large it will get. Taller plants should be laid out on the north end of your space so that they won’t shade shorter crops.
Get a paper and pen and draw out where each crop will sit. Look at packets for spacing recommendations. Carrots space 3-4 inches apart and ¼ inch deep with rows 1 foot apart, radishes space 1 inch apart and ½ inches deep, beets space 1-2 inch apart and ½ inch deep, lettuce (depending on the kind you choose whether it be leaf lettuce, cos and loose-head types, or firm headed) plant 4-16 inches apart in the rows and cover the seeds with ½ inch of soil, peas plant 2 inches apart and 1 inch deep, and finally kale needs to be planted 18-24 inches apart and ½ inches deep.
If you’re worried at all about how much spacing to give each crop, in each individual row lay out a measuring tape and sow your seeds matching the spacing for each crop.

Once your garden is sown, use a shower setting on your garden hose and gently water your garden so the soil is nice and saturated but don’t use a heavy stream on your hose setting or it can wash your seeds away. Depending on how hot it is you may overhead water for 5 minutes or so a few times a day until they germinate. Your seeds cannot dry out even once or they will not germinate so keep a close eye on them until they come - usually about 4-5 days. Once seedlings emerge you will begin to water less frequently until you eventually water deep once a week. At that point it’s optimal to water from below using drip irrigation or trenches with a soaker hose.
Watering is a balance. You don’t want to overwater or underwater. If you find your garden is looking a little drenched or dry, dig your index finger into the soil in the middle of your garden patch down to your second knuckle, if the soil down there still feels damp let your garden bask in the sun a little longer and dry out just a bit more. Overwatering plants can be almost as damaging as not watering them enough.
Once your plants are established, keep an eye on weeds and spend a minute each week keeping them down. You don’t want those little veggie seedlings to compete with anything for nutrients from the sun, water, or soil. It’s a great way to stay active and get outside.


Harvesting will begin in September and extend into October and anywhere in-between depending on the crop you’ve planted. Nothing feels better than the heft of a woven basket filled with hard work and fresh food.
In the above paragraphs we mentioned a few crops we’re focusing on, here is a quick view on when to harvest these: Carrots-harvest during a cooler time of the day, and when the carrots reach ½ in size in diameter. Radishes-harvest when they reach 1 inch in diameter. Beets-golf ball size or larger. Lettuce-harvest leaves when they’re full sized but just before maturity for the best tasting harvest, and start from the outside of the head and work your way in. Peas-Use two hands to steady the vine and pluck off the pod without damaging the whole plant and harvest early in the morning. Kale-The leaves will get around the size of your hand when they’re ready to be harvested, start from the lowest part of the plant and harvest fistfuls.


Pinterest Community Boards
I love Pinterest, and I use it all the time as a way to find and save inspiration for my garden, discover new varieties, learn how to grow a variety of things, and just in general see what other people are doing in their own gardens. I will also be using it to share what is happening in the Halden Garden world.

There’s something about flowers and gardens that is so exciting and beautiful. You immediately want to share what you’ve created with others. A lot of people on Instagram will direct message me photos of what they’ve grown that they love. I sincerely love seeing what people are doing in their spaces. Also, I’m lucky because I have an outlet where I can share photos of my garden with an audience.

SO, I had the idea of creating some Pinterest group boards where we can share with each other what we are growing in our gardens and things that are working for us. I have selected 5 boards to start. I wanted to make them pretty general so that they’d be pertinent to a larger audience. I will add more as I see a need. Here are the board categories:
Halden Flower Community Board - For photographs of flowers and flower beds that you love, new varieties you’ve tried, best practices for flowers, flower beds, flower farming etc. Basically all things growing flowers.
Halden Florist Community Board - A place where we can share our floral creations, arrangements, how to’s, D.I.Y.’s, color inspirations, and interesting floral combinations.
Halden Vegetable Community Board - This board can have vegetable growing advice, photos, suggestions, varieties you’ve liked, kitchen garden advice etc. All things vegetable.
Halden Landscape Community Board - I want this one to be a look book of scenes from gardens that you’re loving. Perhaps plant combinations that you’re liking, landscape advice, gardens you’ve visited, what you’re seeing etc.
Halden Garden Community Board - This is just a general board where you are welcome to contribute anything to do with gardening that you think others might enjoy or find helpful or beautiful. It’s just a catchall for all things garden.

If you would like to pin to these boards all you need to do is request to contribute to the board!
To request to contribute to a board on mobile, click on the board you wish you to contribute to and in the top right corner select the Join button.
To request to contribute to a board on desktop, click on the board you wish you contribute to and select Join next to the board's "Follow" button.
I’m excited to see what you are loving and what you have growing in your garden. Here’s a link to our main Pinterest page if you’re interested in following along!
*We ask that all contributors please be respectful of others. Any content that is inappropriate will be removed.

How To Make A Flower Crown

Flower crowns are much easier to make than you might think and are a really fun element that you can add to occasions or just create on a rainy day. They’re simple enough that you can do this activity even with very young kids and the results are unique and beautiful.
What you will need:
-Some stiff wire
-Snips or scissors
-Masking tape or floral tape if you have it
-Flowers and/or foliage with short stems


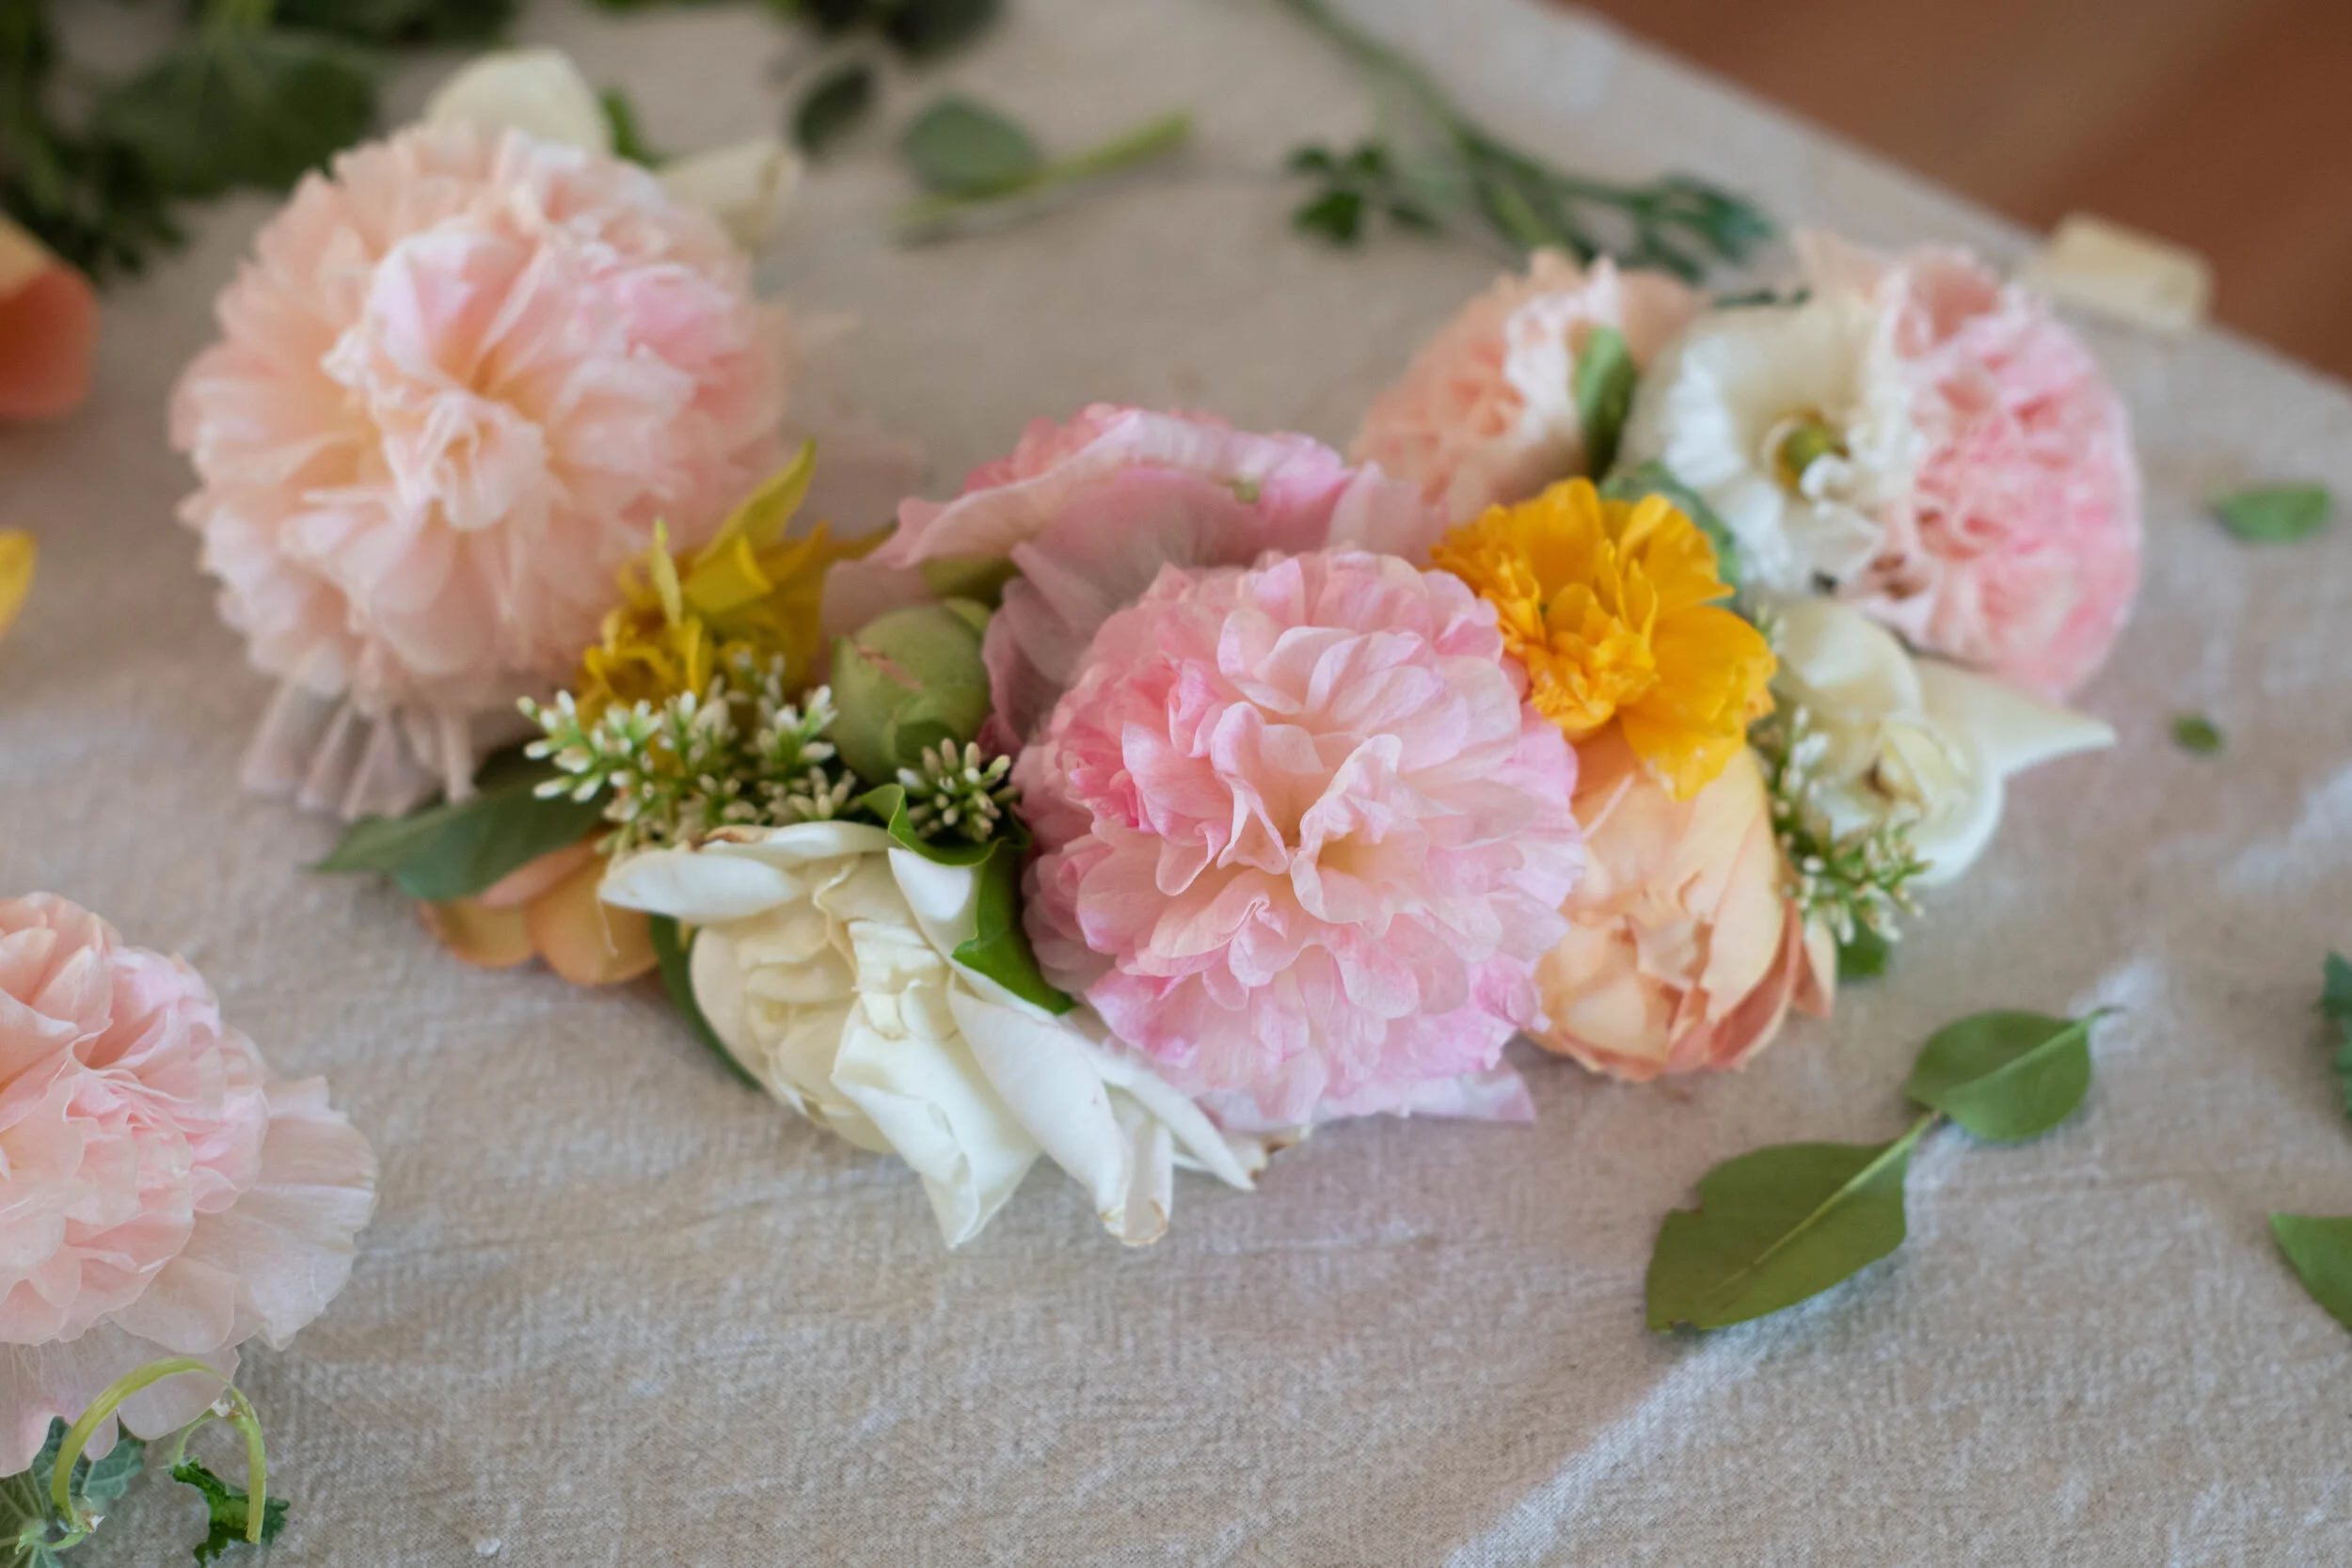
In this example I choose to use Lady of Shallot roses, Double Chater Salmon Hollyhocks, Yellow Colombine, White Tea Roses, pansies, common white dianthus and some cuttings from some bushes in my yard. As you design your crown, think about color and texture. I chose a color scheme of blooms in a range of apricots and pinks. Using colors that are next to each other on the color wheel or that are different textures of various shades of the same color is a good place to start if you’re not confident in choosing colors that go together.
Directions:
Step 1:To begin, take your wire and use it to measure the circumference of the head of the person you are making your crown for.
Step 2: Give yourself an extra 6-8 inches and wrap the wire back around itself as seen in the image below.

Step 3: You will then choose a flower or small bunch of flowers and greenery and hold it firmly against the wire.

Step 4: Take a short piece of tape and wrap it snugly around the stems of the little bunch or blossom.
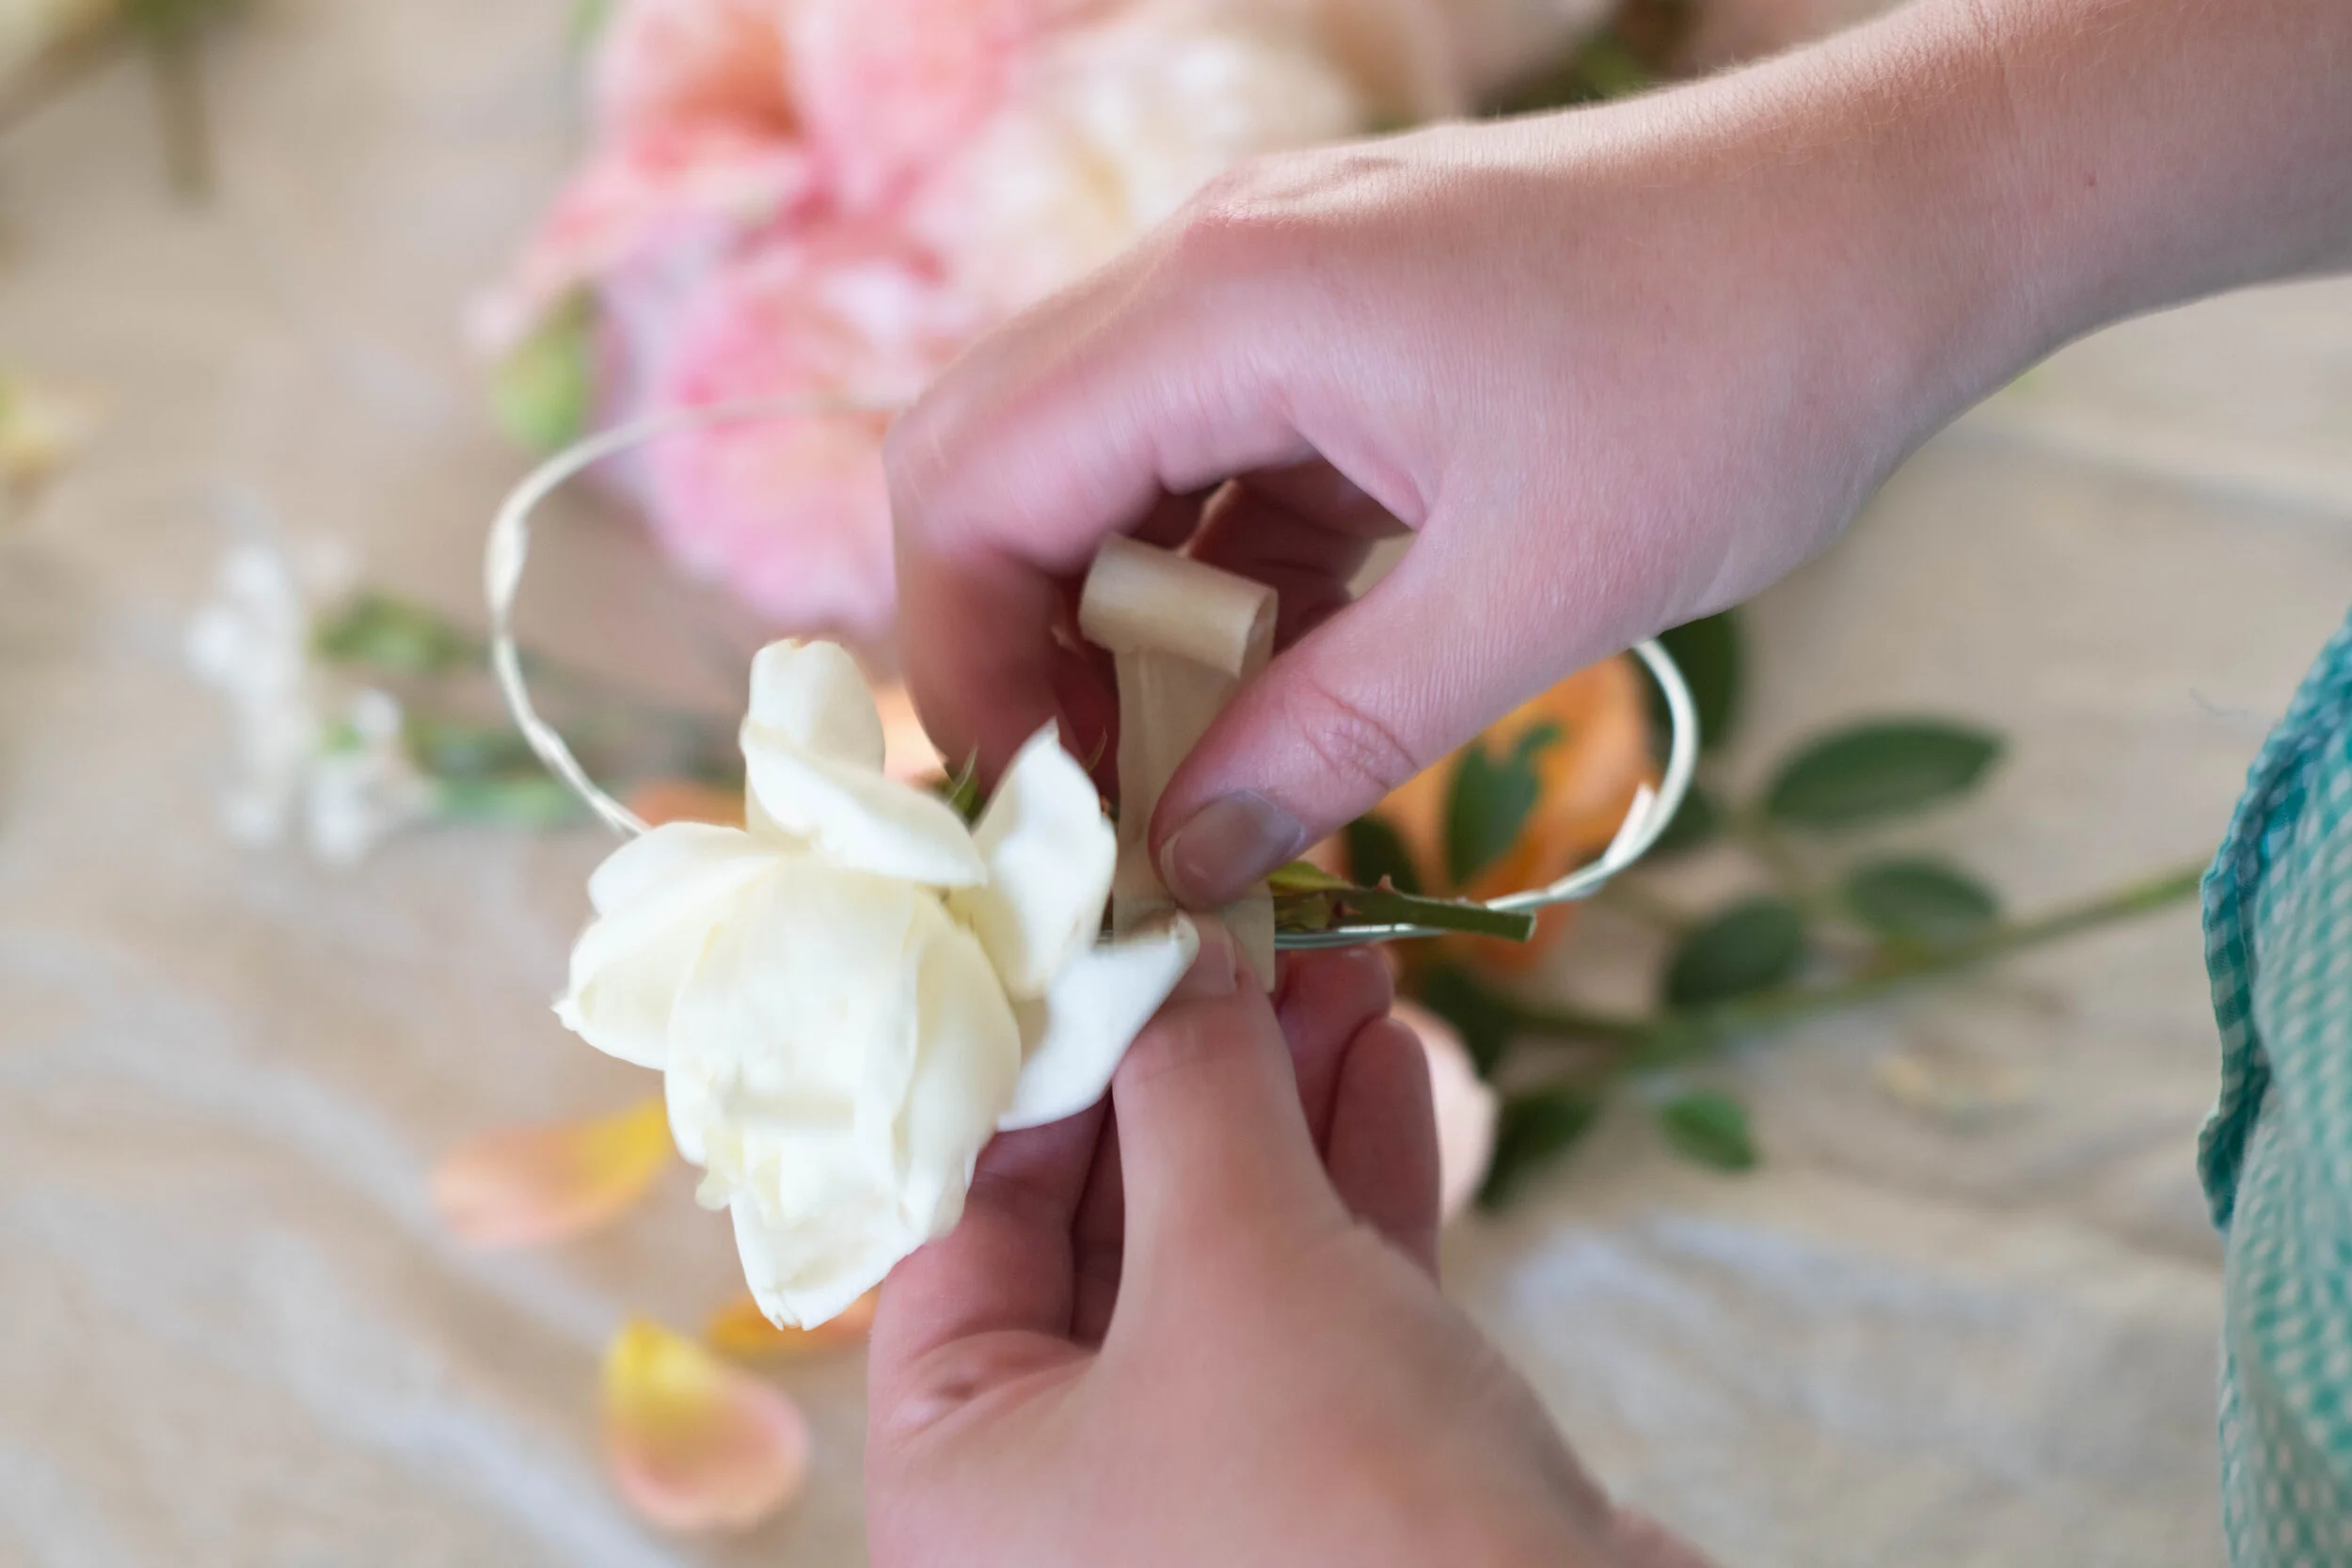
Step 5: Moving in the same direction, layer the next bunch just slightly farther down the wire, overlapping the bloom that has already been secured and repeat step 4 with the tape.

Step 6: Continue attaching your blooms, working around the wire until all of the wire is completely covered.


I’d love to see your crowns so please post using the hashtag #haldengarden so we can all see your beautiful creations.
Leave any questions below in the comments!
- Sara Haller -


Recipe: Emily’s Summer Salad

Fresh salad is good for the body and for the tastebuds. I love going out to harvest a little bunch of lettuce and bringing it in for a salad. We offer a mix of lettuces that you can start in early spring or late summer for spring and fall salads. You can find those here. Lettuce can be grown indoors as well since it tolerates partial shade. This recipe is light and has a wonderful citrusy taste. It’s perfect for parties and gatherings.
Prep Time: 15 minutes
Servings: Makes one large salad as seen in the photos.
INGREDIENTS
FOR THE SALAD
4-6 cups Lettuce mix
2 apples
4 large carrots or 10 baby carrots
4-6 sweet peppers
1 cucumber
4-6 oz goat cheese
1 package of craisins
*You can adjust any of the above measurements to match your personal preference.
FOR THE DRESSING
Juice of 1 lemon
Equal amount of canola oil as lemon juice
2 cloves garlic
Salt
Pepper
*Mix and let sit a couple hours in advance
INSTRUCTIONS
Start with the dressing. Mix it up thoroughly and allow it time to sit in the fridge if you have that option.
Chop lettuce. I like to use a variation of lettuces to add color and variety.
Chop all your vegetables into small pieces. I like to slice the cucumber and I make sure the peppers and carrots are diced into small bits.
Sprinkle all the toppings over the lettuce. Do not add the dressings until just before you are ready to serve the salad. Once the dressing has been put on, the salad will not keep.
As soon as you are ready to serve, coat all the ingredients with the dressing.


If you’re interested in growing any of the other ingredients in this salad they can be found here: cucumber, red pepper , carrot. Cucumbers and peppers should be started in early spring and carrots are a cold crop that can be started in early spring or direct sown in mid/late summer so that they mature in the fall (later if you’re in zone 8+ or earlier if you’re in zone 4 or lower).


Thank you to Emily Davis for letting me post her recipe. This is one that she came up with and would bring to family parties and baby showers. I loved it so much that I asked her for the recipe and it’s become one of my favorites for summer evenings alongside fish or quiche.
How To Use Edible Flowers With Molly J. Wilk
I had the pleasure of talking with Molly J. Wilk, a pastry chef and Le Cordon Bleu graduate from Austin Texas. Molly lives in Versailles where she teaches pastry making in her enchanting French apartment.
I’ve followed Molly on Instagram for about a year now, and I sincerely love seeing what new confection she will bake up next. I started to notice the thing that really sets her incredible creations apart is her use of flowers on her pastries.


She’ll make lemon tart with a dusting of lavender, cakes dotted in bright flowers, or macaroons glittering with crushed petals. I finally reached out to her, and she was nice enough to call from France to share with me some of her secrets to using edibles.


When working with edible plants on food, you need to make sure that they are culinary grade. This means they were grown in such a way that they can be safely eaten. Flowers, unlike food, are often cultivated with less regard towards chemicals and cleanliness because they were not grown with the intent to be eaten. Flowers from your local grocer are probably not clean enough to put on food, so use caution.
Growing edibles yourself is ideal because you can control the way in which they’re grown and make sure that they are clean and safe to be used around food. Molly has a little grow box on her balcony where she gets a lot of her herbs and blooms.

Another place she sources from is a little market in Versailles called Potger Du Roe which was created in the 17th century to supply fresh produce for the King’s Palace. It is available to be toured, which Molly would highly recommend if you’re ever in Versailles. There, she buys a barquet, which is little bundle of edible flowers that are grown with the intent to use on food. A barquet will include marigolds, calendula, lavender, or a few other herbs.
Herbs are one of Molly’s favorite edibles to use such as Oregano, Rosemary, and Pineapple sage. Herbs are highly scented which adds another dimension of beauty and flavor to pastries.


One rule of thumb Molly has is to only use plants on her food that can actually be eaten. On occasion she might top a cake with a non-edible flower for decoration, but not without taking preventative measures to protect it such as wrapping the stems with florist tape, using aluminum foil, or painting on a clear glaze you can make that preserves your delicious dessert.
The easier thing to do is simply decorate with edibles. And there is a large array to choose from: Marigolds, elderflower, dandelions, lilacs, chive blossoms, calendula, acacia. Some of the real beauties are roses, peonies, daisies and pansies.

I asked Molly this question: Are the flowers meant to be eaten? She says that it depends, and in some cases the flowers are very much meant to be a part of the pastry flavor and texture. Dried flowers tend to be a good way to add a different dimension without overpowering the flavor of the confection.


If Molly chooses to dry her flowers, she washes them and sets them on a paper towel to be left on the counter for a few days until they are dry. You can also hang larger bundles of herbs and flowers with twine until they are dry enough to store in a jar or paper sack.
Drying flowers can be a really good way to preserve memories: a bouquet from a wedding, a favorite party, or some herbs snipped from home. Every time you go to use them the memory of their origin will be there for you.

If you’re interested in learning more about how to make French pastries and using edibles, Molly offers online pastry classes. She also does surprise Bake Alongs and posts recipes on her Instagram @mollyjwilk and her website. Huge thank you to Molly for sharing with us her knowledge and know how!


If you want to grow your own edibles for drying and baking, we have plenty of beautiful herbs which can be found here or various varieties of flowers which you can find in these links: calendula, pansies, stock, and snapdragons.
Also, be sure you know which flowers are edible and which are not because some are poisonous such as foxglove and sweet peas.


5 Vegetables to Grow in Your First Garden
Are you new to the world of gardening? Don’t worry--you’re most certainly not alone! Every master gardener was a beginner at one point. The best thing you can do is just start! Here, we’ll tell you about five veggies that are great for someone just starting out.
1. Zucchini Squash
Talk about a producer! One plant will give you enough zucchini to feed a family. Zucchini does well in a variety of soils and a single plant will produce multiple squashes. It’s awesome chopped up into soups and sauces, or sautéed in butter. You can use it as a side dish or even make it into bread! That’s why growing it in your garden can be so useful. This is a great one for beginning gardeners.

So what do you need to know before you start? Zucchini like rich, well-drained soil the most (as do most plants) but they can still do okay in all different kinds of soil. They like heat and do best sown well after frost is passed. Growing two plants fairly close together so that they’ll pollinate each other will really help them thrive. I would try Black Beauty as a great variety to begin with. It is famously reliable and will do well almost anywhere.
2. Tomatoes
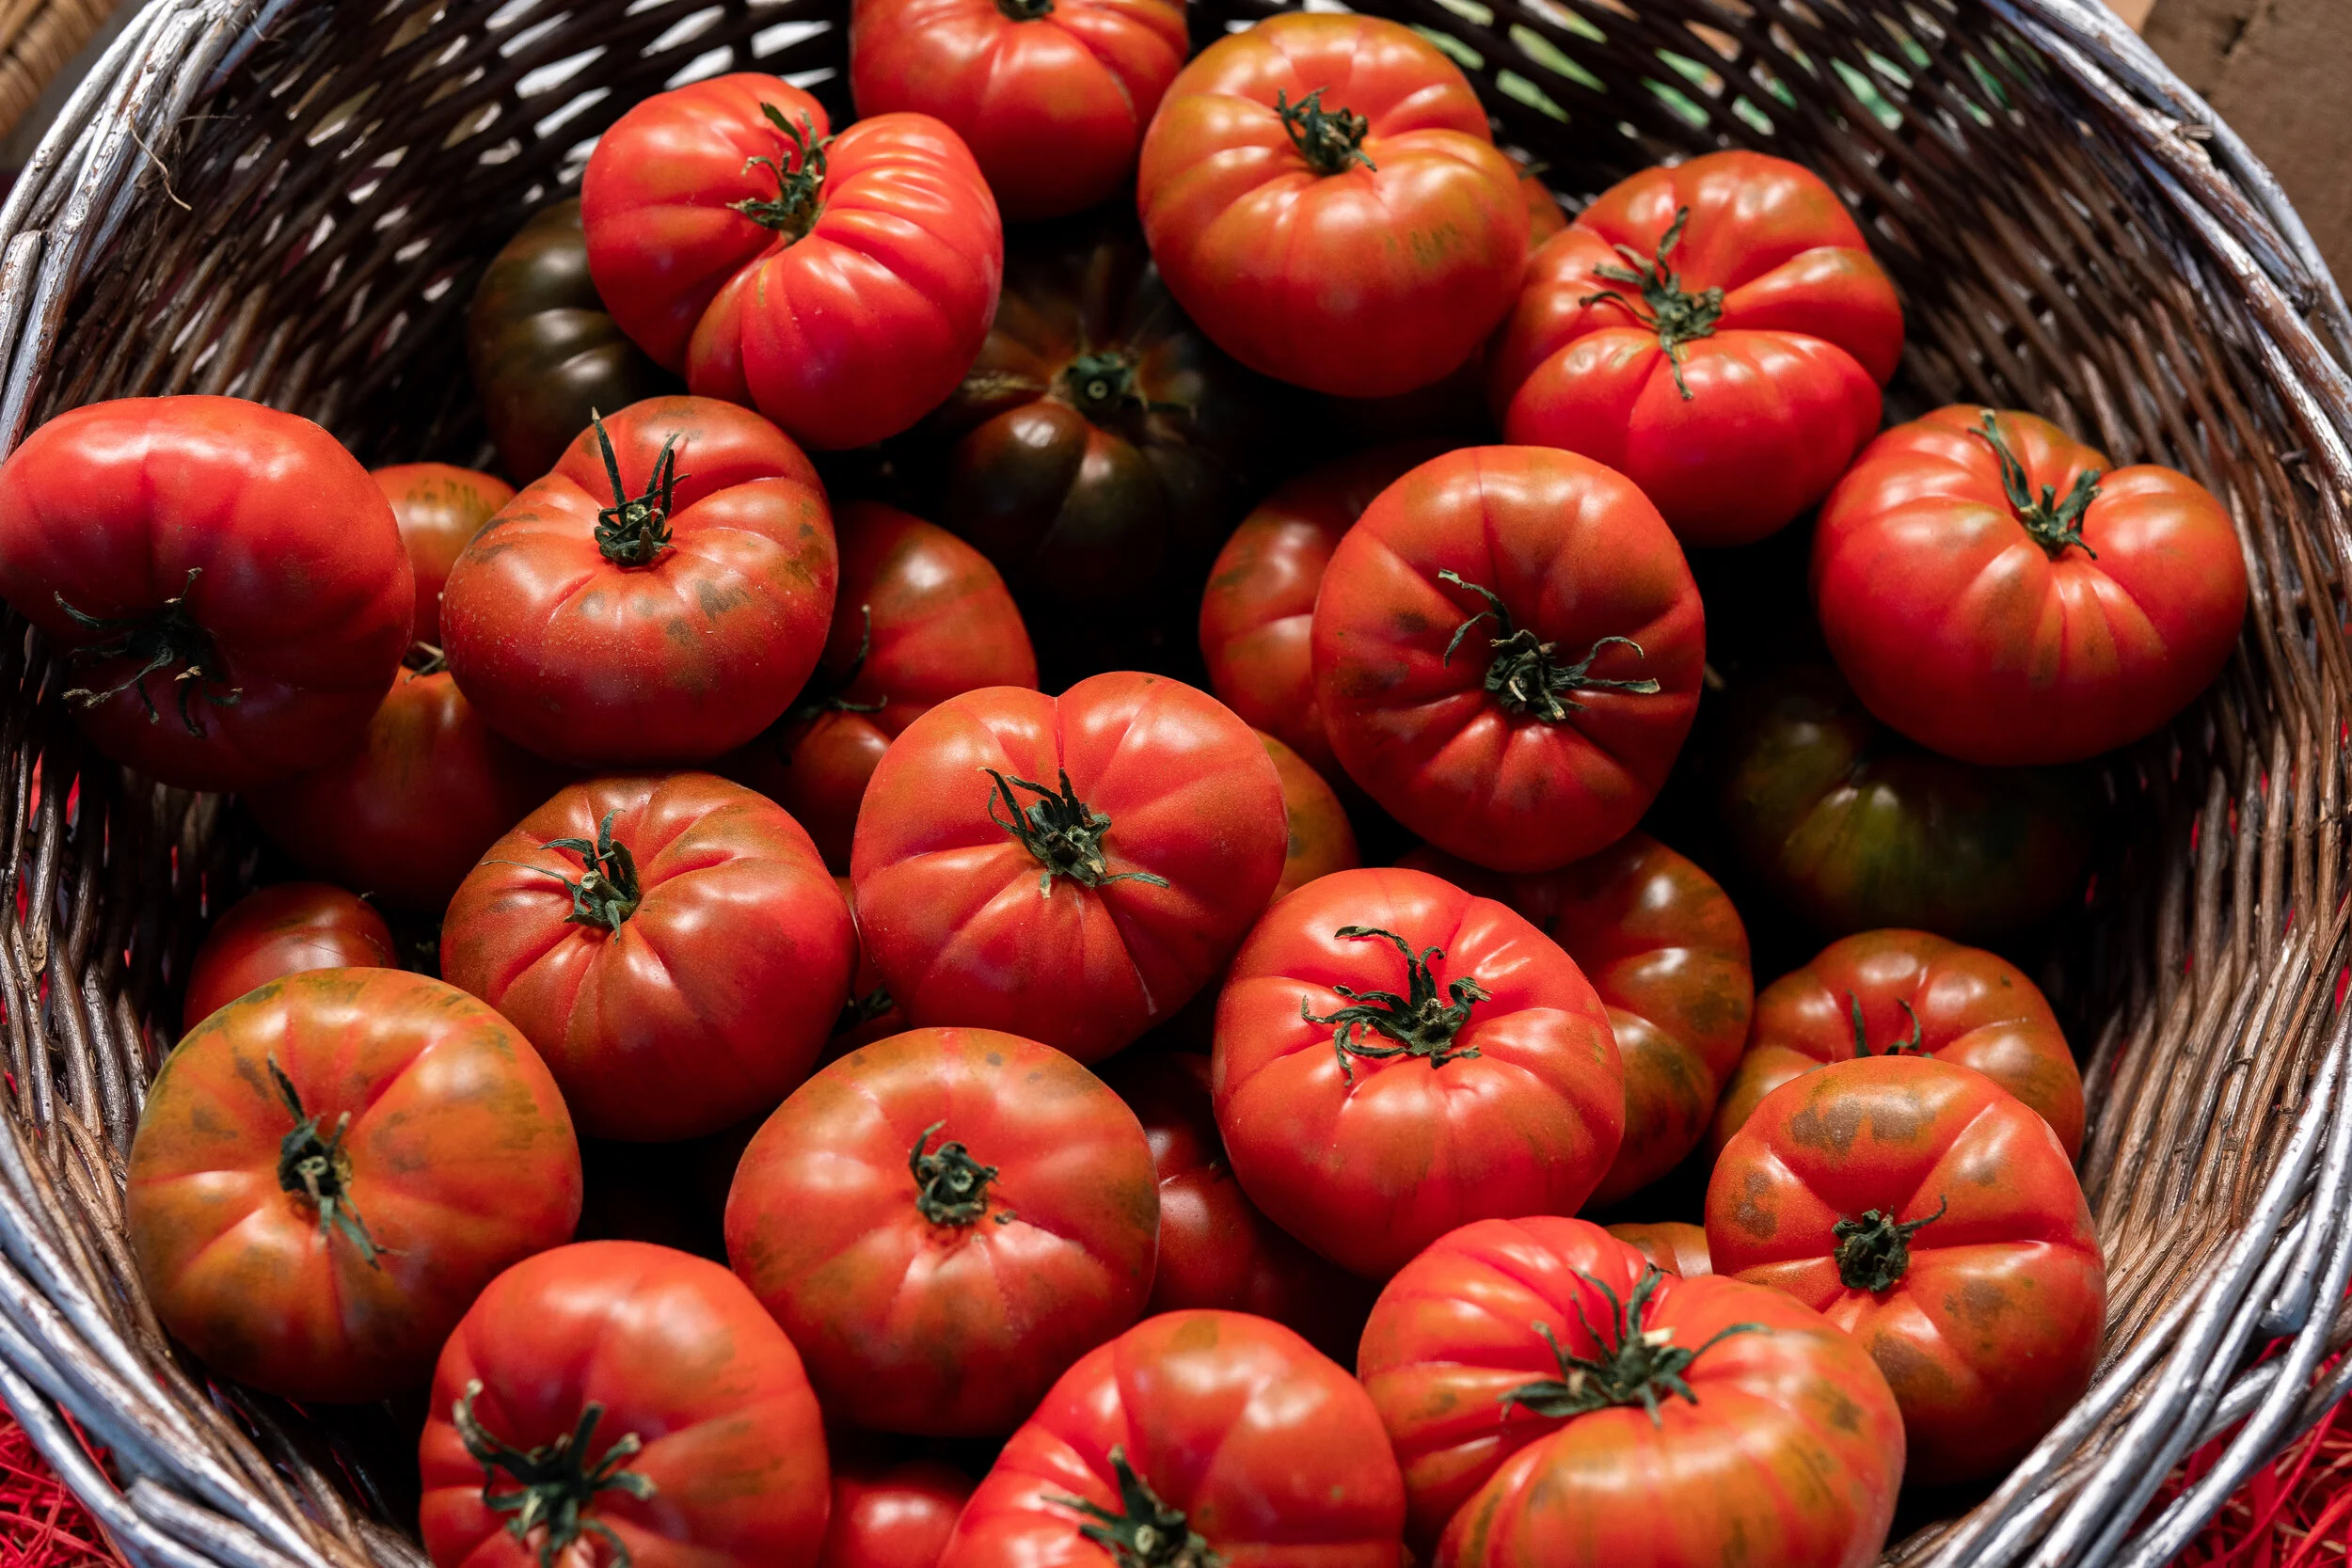
If you’ve never had home-grown tomatoes, you’re missing out. There is nothing to compare to a home grown tomato. Store bought doesn’t come close. Tomatoes from your garden go perfectly in pasta and other dishes, or just by themselves fresh off the vine. With lots of varieties to choose from, you’ll have plenty of options for your garden this year.

Tomatoes are most often transplanted from containers to the garden itself. They have a long growing season, and are one of the most productive plants you can grow in your beginner garden! There are all kinds of methods to getting bigger and better production but even the most novice gardener will get some nice tomatoes as long as they give their plants enough sun and keep things watered. Seeds are easy to start in an egg carton or some cups at the windowsill until frost has passed. Romas have less juice and so are great for making salads and bruschetta, Black Cherokee is famous for it’s amazing flavor, and Marglobe is a good all around classic. Those might be a few good ones to try. Cherry tomatoes are also lovely in salads or just to pop in your mouth.

3. Bush Beans
Every little garden should have some bush beans in it. They take up very little space, are easy to get up, and will give you loads of AMAZING beans for a long time throughout the summer months. If you don’t like string beans then you’re probably thinking of the little wilted green/gray slop that comes out of a can from the grocery store that are tolerable in casseroles. Fresh garden beans are a whole different ball game. Boiled over the stove until they’re soft and sprinkled with salt and butter, you will feel like you’ve died and gone to heaven. I like to grow a combination of green and yellow. Blue Lake Bush and Golden Wax are both awesome, and you should have lots of success with them.

4. Lettuce
Lettuce is really fun to grow because it has such a short span of maturity. In 55 days you’ll have beautiful fresh lettuce on your table. It is an extremely diverse family of vegetables with everything from little micro greens to big heads of iceberg lettuce. Lettuce is best grown in the spring and fall chill. If grown in the heat of the summer it will usually be bitter and go to seed. These plants prefer sun but can do well with a little shade. If planting an outdoor garden isn’t an option for you right now, you can even grow lettuce indoors at a sunny window! Some great classics to start with are Buttercrunch, Vates Kale, and Green Spinach.

5. Peppers
Peppers can really grow well in a variety of places, even without full sun depending on the variety. When I was a missionary for the Church of Jesus Christ of Latter-day Saints I was assigned to work in Kentucky to learn Spanish so that I could work among the Spanish speaking congregation. Hispanics often LOVE hot peppers and they are commonly used in almost everything they cook. I used to love going up to the doors of the most forgotten little apartments or trailers and noticing a little pepper plant next to the door or at the side of a house.

Jalapeño plants will give you dozens of these little green gems that you can mix into salsas, sauté for burgers or make into poppers. A lot of varieties have beautiful shiny green foliage that mix in beautifully to bouquets and arrangements. It’s best to start seed indoors and then transplant out. Don’t be intimidated about seed starting. You can just get any kind of container lying around the house and push the seeds into the soil. In a couple of weeks you’ll see happy little sprouts peeking out their heads and soon enough will have your own delicious peppers. A few good varieties to start with are Hot Tam Jalapeño and California Wonder.
Which vegetable do you want to start with? Let us know in the comments below! We would really appreciate you using our hashtag in your Instagram posts #growhalden. We love to see what you are doing in your garden.
Recipe: Rhubarb Pie

I don’t know if there’s anything more delicious on this earth than warm fresh pie with a scoop of ice cream. This recipe is one that has been handed down from mother to daughter for many many years. The crust is light and flaky and perfect. I hope it will become a favorite in your home as well.
Prep Time: 30 minutes
Cook Time: 1 hour 15 minutes
Total Time: 1 hr 45 minutes
Servings: Makes one pie
INGREDIENTS
FOR THE CRUST
Combine with a pastry cutter:
2 cups Crisco
4 cups flour
⅔ T. salt
Add to mixture:
⅔ c. water approx
At the end:
2 T milk
3 T sugar
FOR THE FILLING
4-5 cups chopped rhubarb
1 ⅓ cup sugar
6 T flour
4 T butter
Bake for 1 hour and 15 minutes at 350
INSTRUCTIONS
*Making a pie is going to be a little different where you live so this recipe might need to be tweaked here and there to be perfect for where you live.
Using a pastry cutter (or a fork if you don’t have one) combine flour, salt and Crisco. Work the mixture together until it starts to conglomerate into balls like little peas.
Then you’ll add the water. This part is critical and will vary a lot based on the humidity in the air. If you live in a very humid place you will use less water than in this recipe. If it is a very dry day then you might use slightly more. Better to err on the side of using less water to begin with and then you can add more if needed. Refer to the photos below to get an idea of the consistency you’re looking for. It should feel a bit like play dough. If the dough is crumbly and falls apart easily then it needs a bit more water.
Once you’ve achieved the right consistency, split your dough into two parts and roll them into two balls. (See photos below) On a lightly floured surface roll the first ball into a circle about ¼ inch thick and 2 or 3 inches larger than your pie tin. Then take the crust and fold it onto itself to create a semi-circle shape (See photos below). Then carefully lift that onto a pie tin. If you are unable to do this because the crust is falling apart then you don’t have enough water in your crust or you have rolled it too thin. Once the semi-circle of crust is on the pie tin, carefully unfold it so that the whole thing hangs over the edge of your tin.
This is a good time to preheat your oven to 350 F. Using a sharp knife, chop the rhubarb into one inch slices. Combine the sugar and flour and coat the rhubarb in the mixture. Pour the filling into the pie tin. Using a butter knife place pats of butter scattered over the rhubarb. This works best with butter that is room temperature.
Re-flour your surface and follow the instructions from Step 3 with the 2nd ball of dough making sure that the dough is wide enough to hang over the edge of the pie tin so that the lower crust and the upper crust have contact with each other.
To seal the pie you will take the index finger and thumb of your dominant hand and place it at the edge of the pie tin. Then using your opposing hand, use your thumb to pinch the crust, creating a pattern effect that also seals the filling in the pie and makes your pie beautiful. Proceed around the perimeter of the pie, pulling with your thumb and pushing with your two fingers (See photos below).
Using a sharp knife, create little slits in a circle formation around the pie for ventilation. Using your fingers, dab milk over the top crust and scatter a little handful of sugar over the top.
Your pie is ready to go in the oven. Place a large piece of foil below the pie because it will likely leak slightly. Bake at 350 degrees for approximately one hour and 15 minutes. The time will vary slightly based on altitude and how hot your oven bakes so rather than going on time be sure to keep a close eye on it. After about 45 minutes place a piece of foil over the pie (simply on top like you might do with a piece of paper, not scrunched around it. You won’t want to take the pie out of the oven to do this). Keep an eye on your crust and when it looks lightly brown but not dark brown in any place and looks like it has little pink bubbles in some places it is ready!
Place your pie in a safe place with a clean cloth over it until it is warm. Serve with a scoop of ice cream and you will be in heaven!
My Mom has been making pies all her life and is a master. I photographed her making one for you so you can use it as a reference. I would sincerely love to see YOUR pie so please post a photo of it on social media if you have it or leave a comment here! I hope you love this pie as much as I do! -Sara Haller


Also my Mom is an angel on earth and just looking through these pictures makes me feel all the nostalgia of sitting and talking to Mom while I watch her make her pies. Thanks Mom for sharing your ways with all of us and also for always being there to laugh and listen.
Sara ;)
Dig For Victory In 2020!
“These are days never to be forgotten…”
Here we are in the midst of a global pandemic and it’s hard to know what the future will bring. It helps me to remember that we are not the first generation to face difficulty and that it is often times like these that bring out the best in people and cause us to grow, as individuals and as a whole. At Halden we believe in the power of gardening. There is something about it that brings so much joy and satisfaction and SO in a world that could use a little more joy right now, we decided to create a campaign to help people grow victory gardens again in 2020!
The year 1939 marked the beginning of the Second World War. The coming years brought unprecedented trial for the American people. A severe food crisis erupted across the globe as farmers were recruited into military service and farms were transformed into battlefields. Mimicking what had been started in WW1, Americans across the country were encouraged to contribute to the war effort by planting, fertilizing, and harvesting their own fruits and vegetables so that more food could be shipped overseas.

Citizens rose up to the challenge to “sow the seeds of victory” by utilizing any idle land that could be found including school and company grounds, parks, backyards or available vacant lots. The war garden movement spread like wildfire, by word of mouth, through civic associations, women’s clubs, chambers of commerce and neighbor to neighbor as the American people banned together, enlisting themselves as “soldiers of the soil.”

“In 1942, roughly 15 million families planted victory gardens; by 1944, an estimated 20 million victory gardens produced roughly 8 million tons of food—which was the equivalent of more than 40 percent of all the fresh fruits and vegetables consumed in the United States…The Victory Garden campaign served as a successful means of boosting morale, expressing patriotism, safeguarding against food shortages on the home front, and easing the burden on the commercial farmers working arduously to feed troops and civilians overseas.” (America’s Patriotic Victory Gardens by Laura Schumm).

Why Victory Gardens Matter Today
In our day, 2020 brings on a foe much different than anything we have ever seen. And yet the same fear of the future, looms heavy in the human heart all over the world, just as it did in that day. It can be easy to wallow in the dark and desperate internet bogs as we huddle in our homes wondering when it will end. But rather than standing down, hunkered deep in the game of blaming and shaming and wondering and waiting, we can choose to stand up and go out into the sunshine and create something.
Just like the generation before, we believe that we can boost morale, that we can express patriotism, that we can safeguard against food shortages on the home front and ease burdens overseas as we once again plant victory gardens!

So wherever you are we invite you to enlist as a “soldier of the soil” and plant a victory garden this year! You may be sitting in a New York high rise or out on the plains of Wyoming reading this and shrugging your shoulders wondering what a victory garden would look like for you. Whatever your situation we assure you that you can create a victory garden.

You Can Do Your Part!
If you’re in a studio apartment in Chicago then you can make a little garden of herbs and flowers at your window sill. Perhaps you have an empty backyard fence or a little balcony that faces the sun. Whatever your situation we urge you to take this chance to grow something- whether it’s just flowers or vegetables- and to let it be a symbol of a cause that you believe in. You don’t need to be an expert gardener or even to have ever gardened before. No one was born knowing how to do something so the best way to learn is just to start. We promise you that whatever your victory garden looks like it will bring a little light into your life.

Halden Garden was officially launched a week after social distancing was announced in the United States. We seriously considered just waiting because who starts a business right now!? But we decided to forge ahead because we really do believe that right now more than ever the world needs gardening. There’s something about it that just fills you up and brightens your life and we want people to have that.

Share Your Stories. #haldendigforvictory
So we’re asking you to spread the word! And to join in the cause. We’ve created the hashtag #haldendigforvictory. We hope you’ll follow it and start using it to share this campaign to everyone you know! We want to see your victory gardens and hear about what they’re doing for you and your families. Thank you for your support. We would appreciate it so much if you share this with as many people as you can and spread the cause!
“Do not let us speak of darker days; let us speak rather of sterner days. These are not dark days: these are great days-- the greatest days our country has ever lived; and we must all thank God that we have been allowed, each of us according to our stations, to play a part in making these days memorable in the history of our race.” - Winston Churchill
Planting a Cottage Garden
You might think planting flowers from seed is just not realistic. I thought the same thing BUT my little cottage garden this year has taught me otherwise.
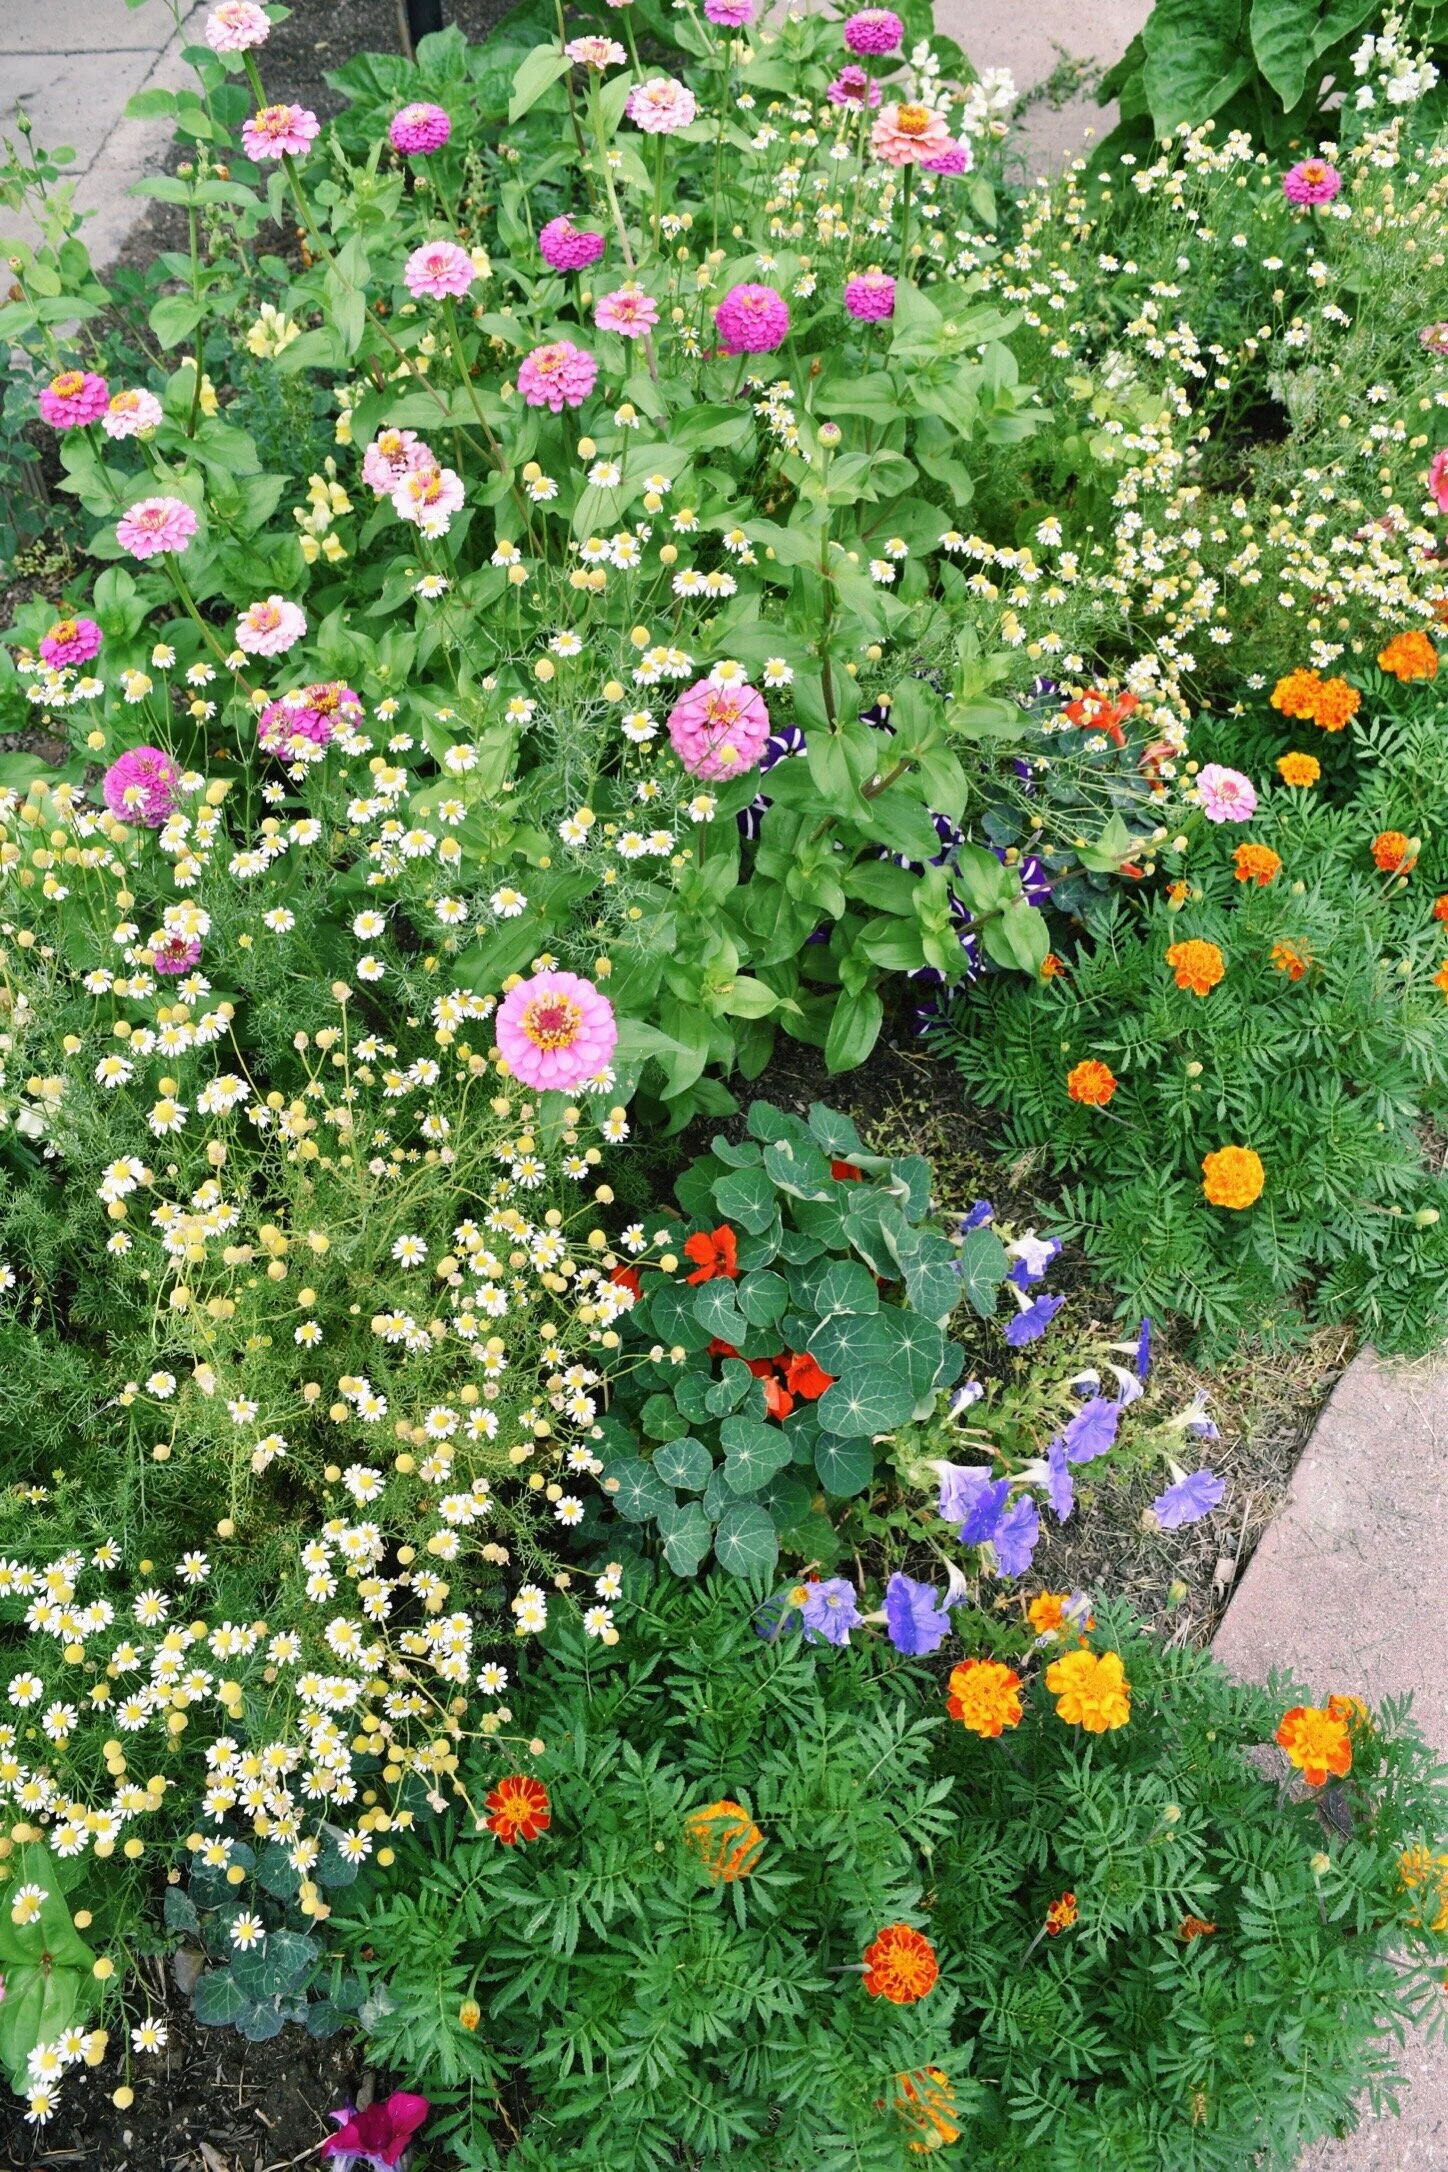
Sara Haller here, co-founder of Halden Garden. I wanted to show you how to plant your own cottage garden, like this one I did last year. You might think planting flowers from seed is just not realistic. I thought the same thing BUT this little cottage garden taught me otherwise.
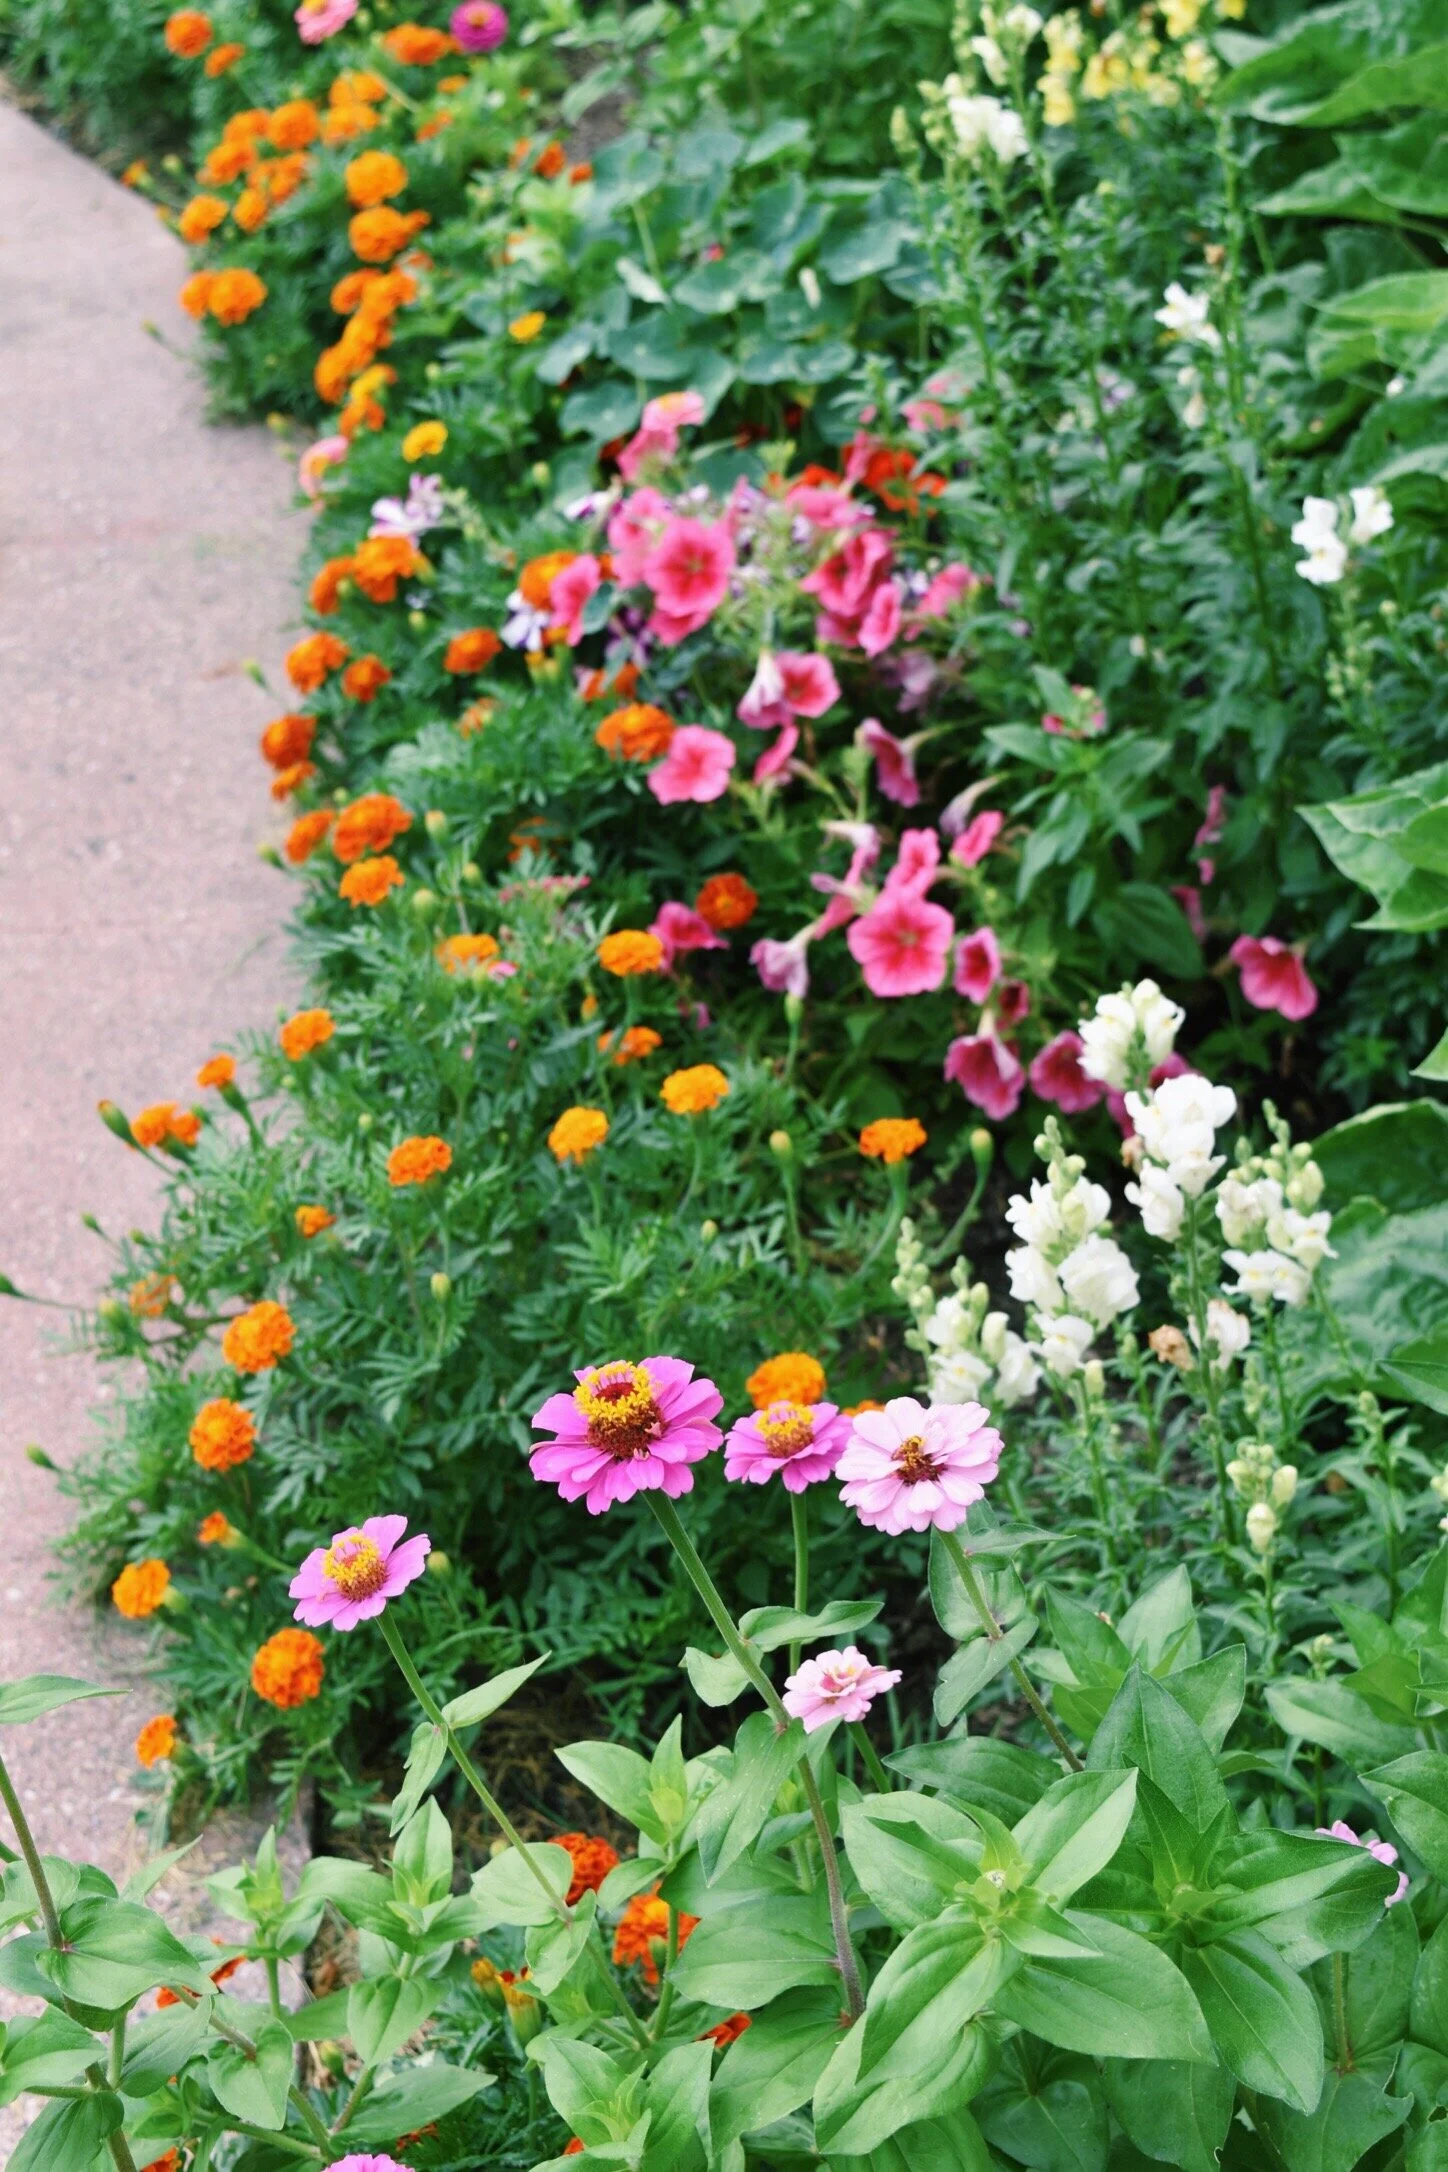


A cottage garden is more unplanned than a traditional garden. That’s why direct sowing one from seed is ideal.
After the last frost date, I just scattered seed based on height, placing taller flowers in the back and shorter varieties in the front.


The key to planting flower seed is to water right and have patience. If seeds dry out even once they will not germinate.
Newly planted seeds need water every day for a short amount of time. As their roots become deeper they need longer watering less frequently. You kinda have to build up based on their size. That will be about twice a day at the start and then once a day, every other day, and finally once a week.
And before you know it you’ll have big beautiful flowers in your garden for very little cost.
Other tidbits to know: Snails LOVE marigolds especially so you’ve really got to watch them when they’re seedlings. Put out snail bait when you plant and then every one to two weeks as needed.


If you have a new garden plot that has a lot of sun and hasn’t ever had flowers in it you should plant petunias. Mine kind of got crowded out but the pink ones in the picture above are petunias. In new ground they THRIVE and grow big and beautiful the whole growing season. These petunias I started from seed indoors in March so they’d be ready to put out just after last frost.
Another fun thing about a cottage garden is in addition to adding beauty to your landscape these beauties all do well as cut flowers so you can bring them inside for flower arrangements. The more you cut, the more flowers will continue to bloom.


If you’re sad you missed the spring planting, it’s not too late. All of these flowers mature in 75 days or less so even in June or July you could start and have blooms in September and October depending on your zone. Check your last frost date and count back from there.
Here are the links to the “recipe”/seeds I used in my Cottage Garden if that helps: Calendula, Marigolds, German Chamomile, Sunflowers, Snapdragons
I hope this helps! Put any questions you have in the comments!