
FOCAL FLOWERS
These carefully chosen varieties are often the star of the show in arrangements and flower gardens. Every garden should include some of these queens of the garden!
Dahlias
Grown from a tuber that is planted in spring after the last frost of the season, these easy to grow beauties are one that you will definitely want to include on your grow list.
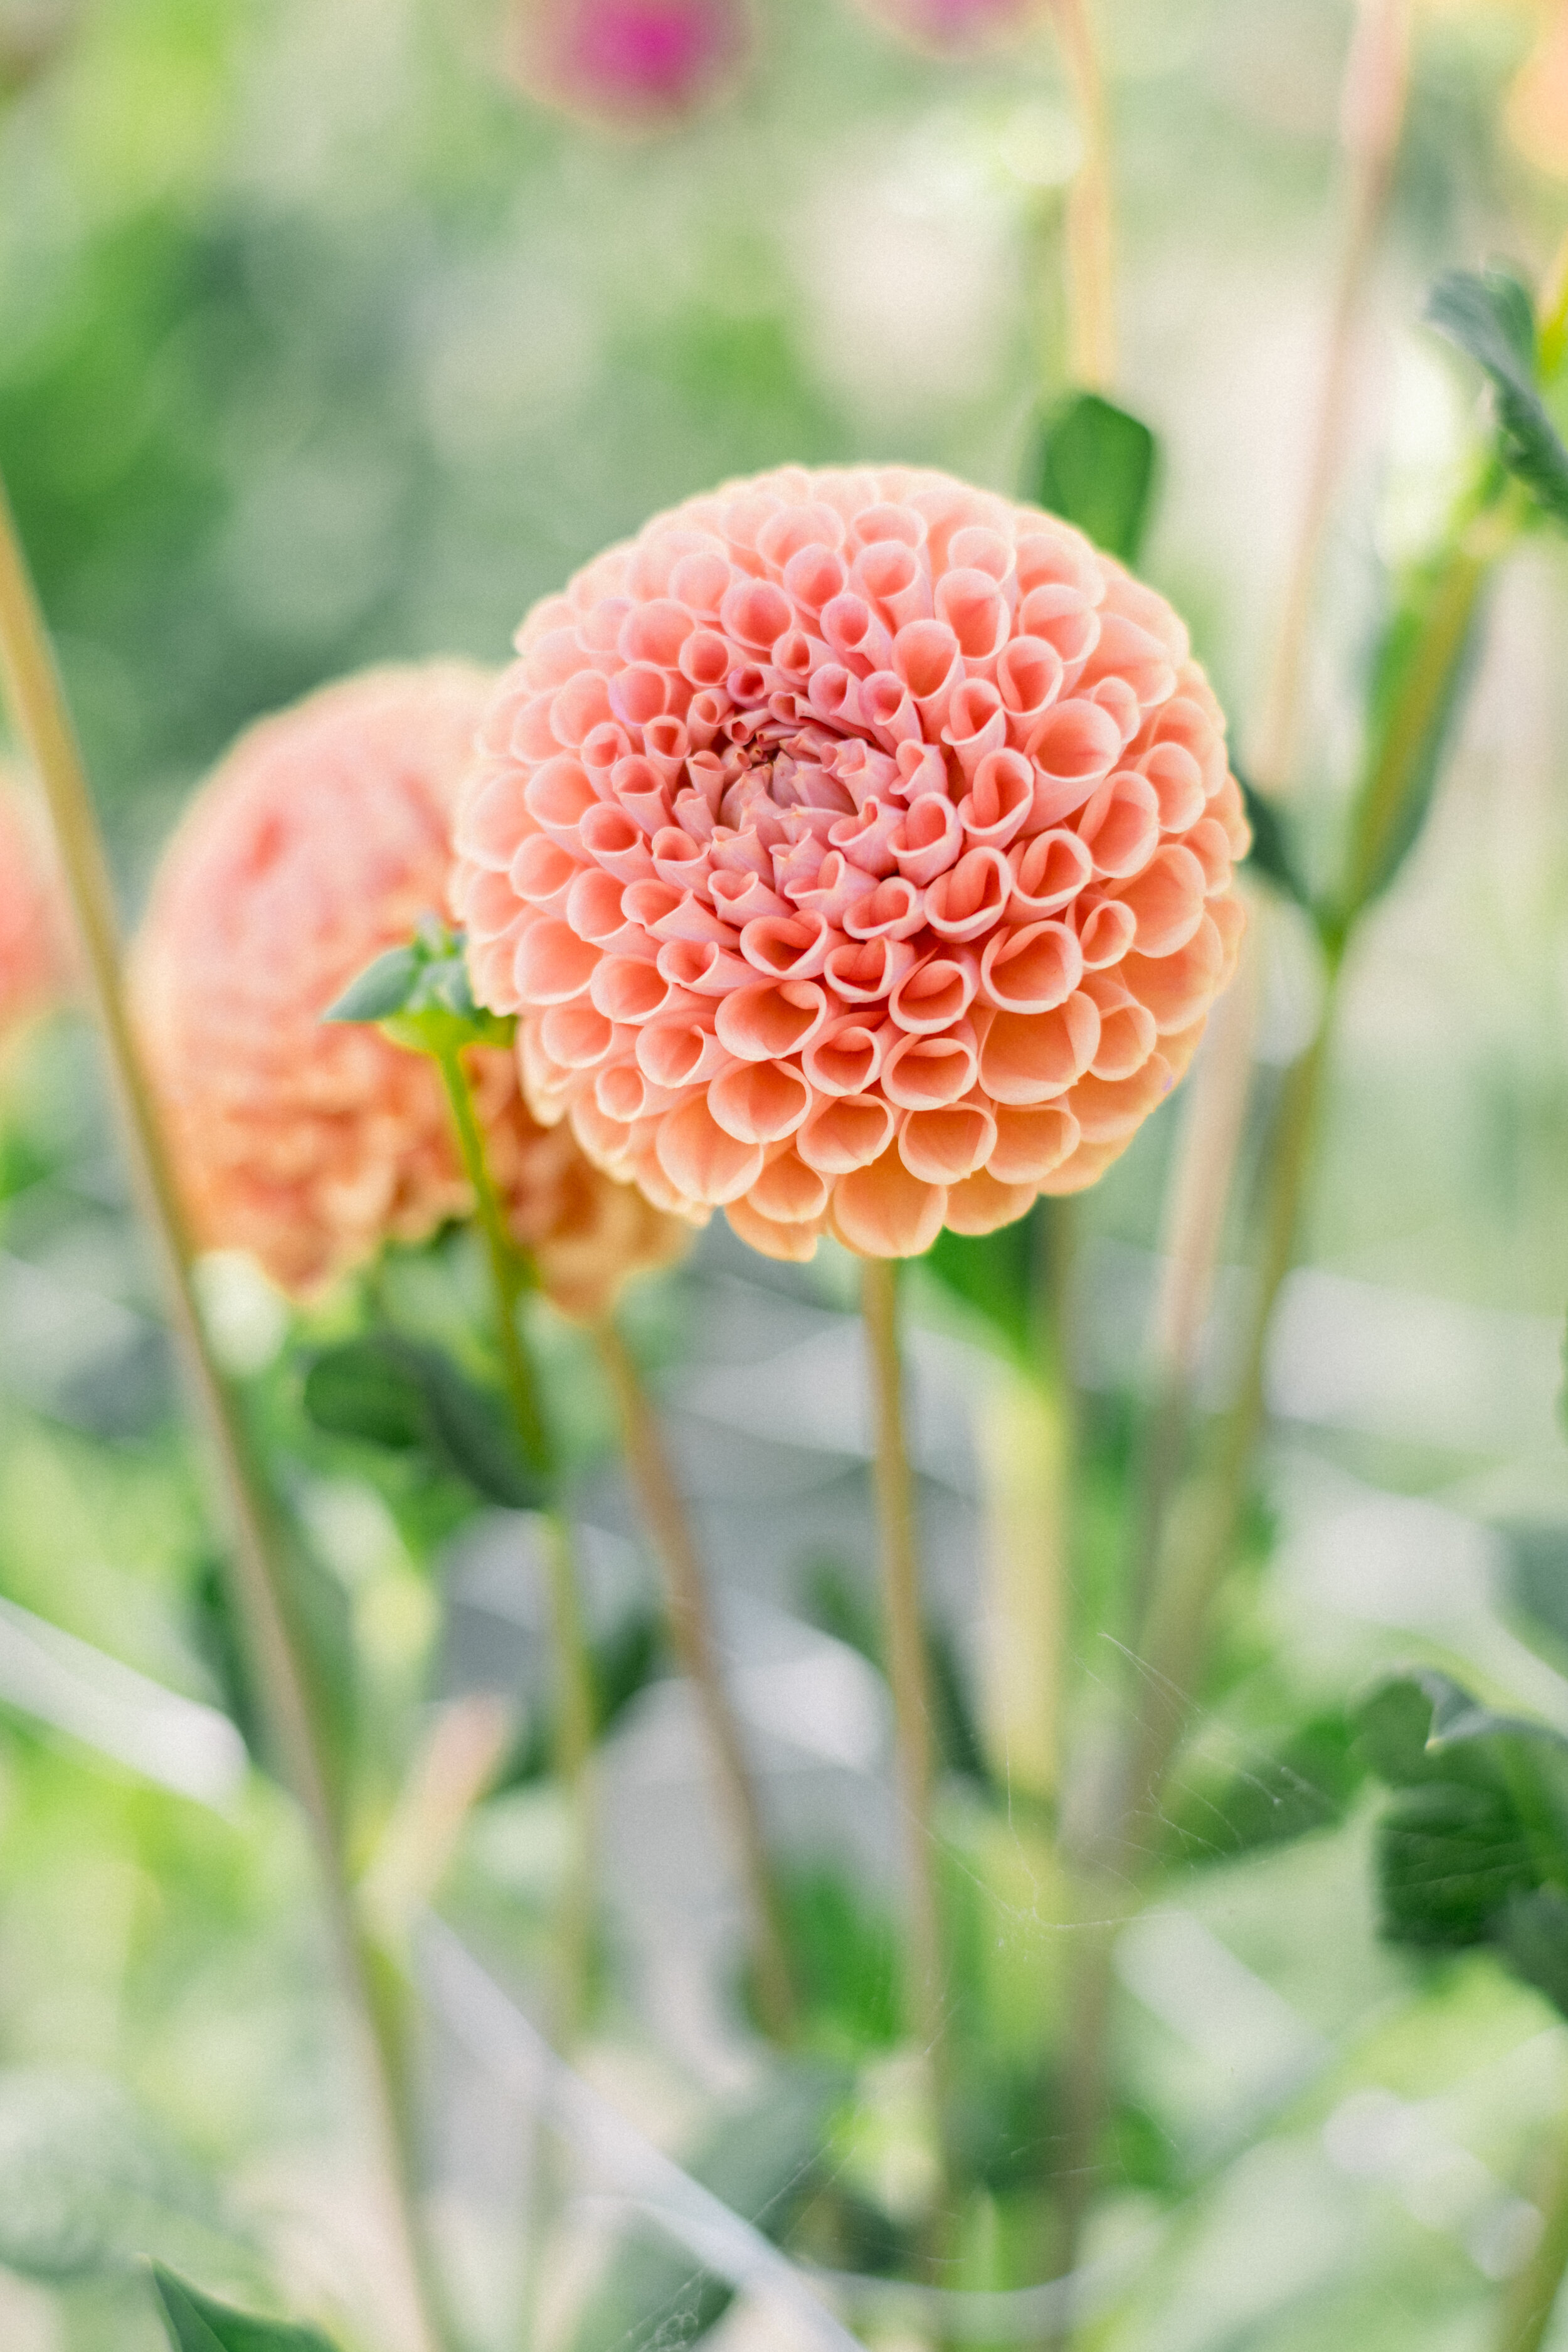
Bronze colored petals with touches of orange and pink are curved forming a perfect ball shape. The small size and long stems of these flowers make them suitable for garden plantings and in cut flower arrangements.
Flower Type: Ball
Plant Height: 3-4’
Flower Diameter: 4”
Light Requirements: full sun, part sun
Soil Preference: well-draining soil
USDA Zones: 2-7 (annual), 8-11 (perennial)
Days to Maturity: 80-100 days
How to Grow
Planting Depth: 1-2” (sprouting inside), 4-6” depth (outside)
Plant Spacing: 12-18”
When to plant: Sprout tuber indoors 4-6 weeks before the last frost date, transplant after the danger of frost has passed. Plant tubers directly outdoors after the danger of frost has passed.
Growing Tips: Tubers rot easily so avoid giving them too much water until the plant has begun to sprout (2-3 weeks after planting). Pinch top of stem when plants are 10-12” to promote branching. Add compost or fertilizer to soil before planting, or fertilize every 3-4 weeks with a well-balanced fertilizer after growth is visible. Trellis or staking is recommended to keep plants upright.
Cut Flower: Flowers can be harvested when petals are 3/4 open. Sear stems in 160-170F water or use a hydrating product to achieve 5-7 day vase-life.
Storing and Dividing Tubers: After frost has turned the top growth brown, cut the stem back a few inches above the soil. Then carefully dig carefully around the roots and rinse off excess dirt from and remove any tubers that may be rotting or damaged. Allow tubers to dry for several weeks allowing the roots to develop a slight wrinkled appearance before placing them in storage following the same storage procedures as above. Tubers can be divided in spring by cutting the tuber root segments apart with a sharp knife, making sure each has at least one visible eye (bud). Tubers can then be planted.
photo by @melindasgardenlove and @dahliasbyvanessa
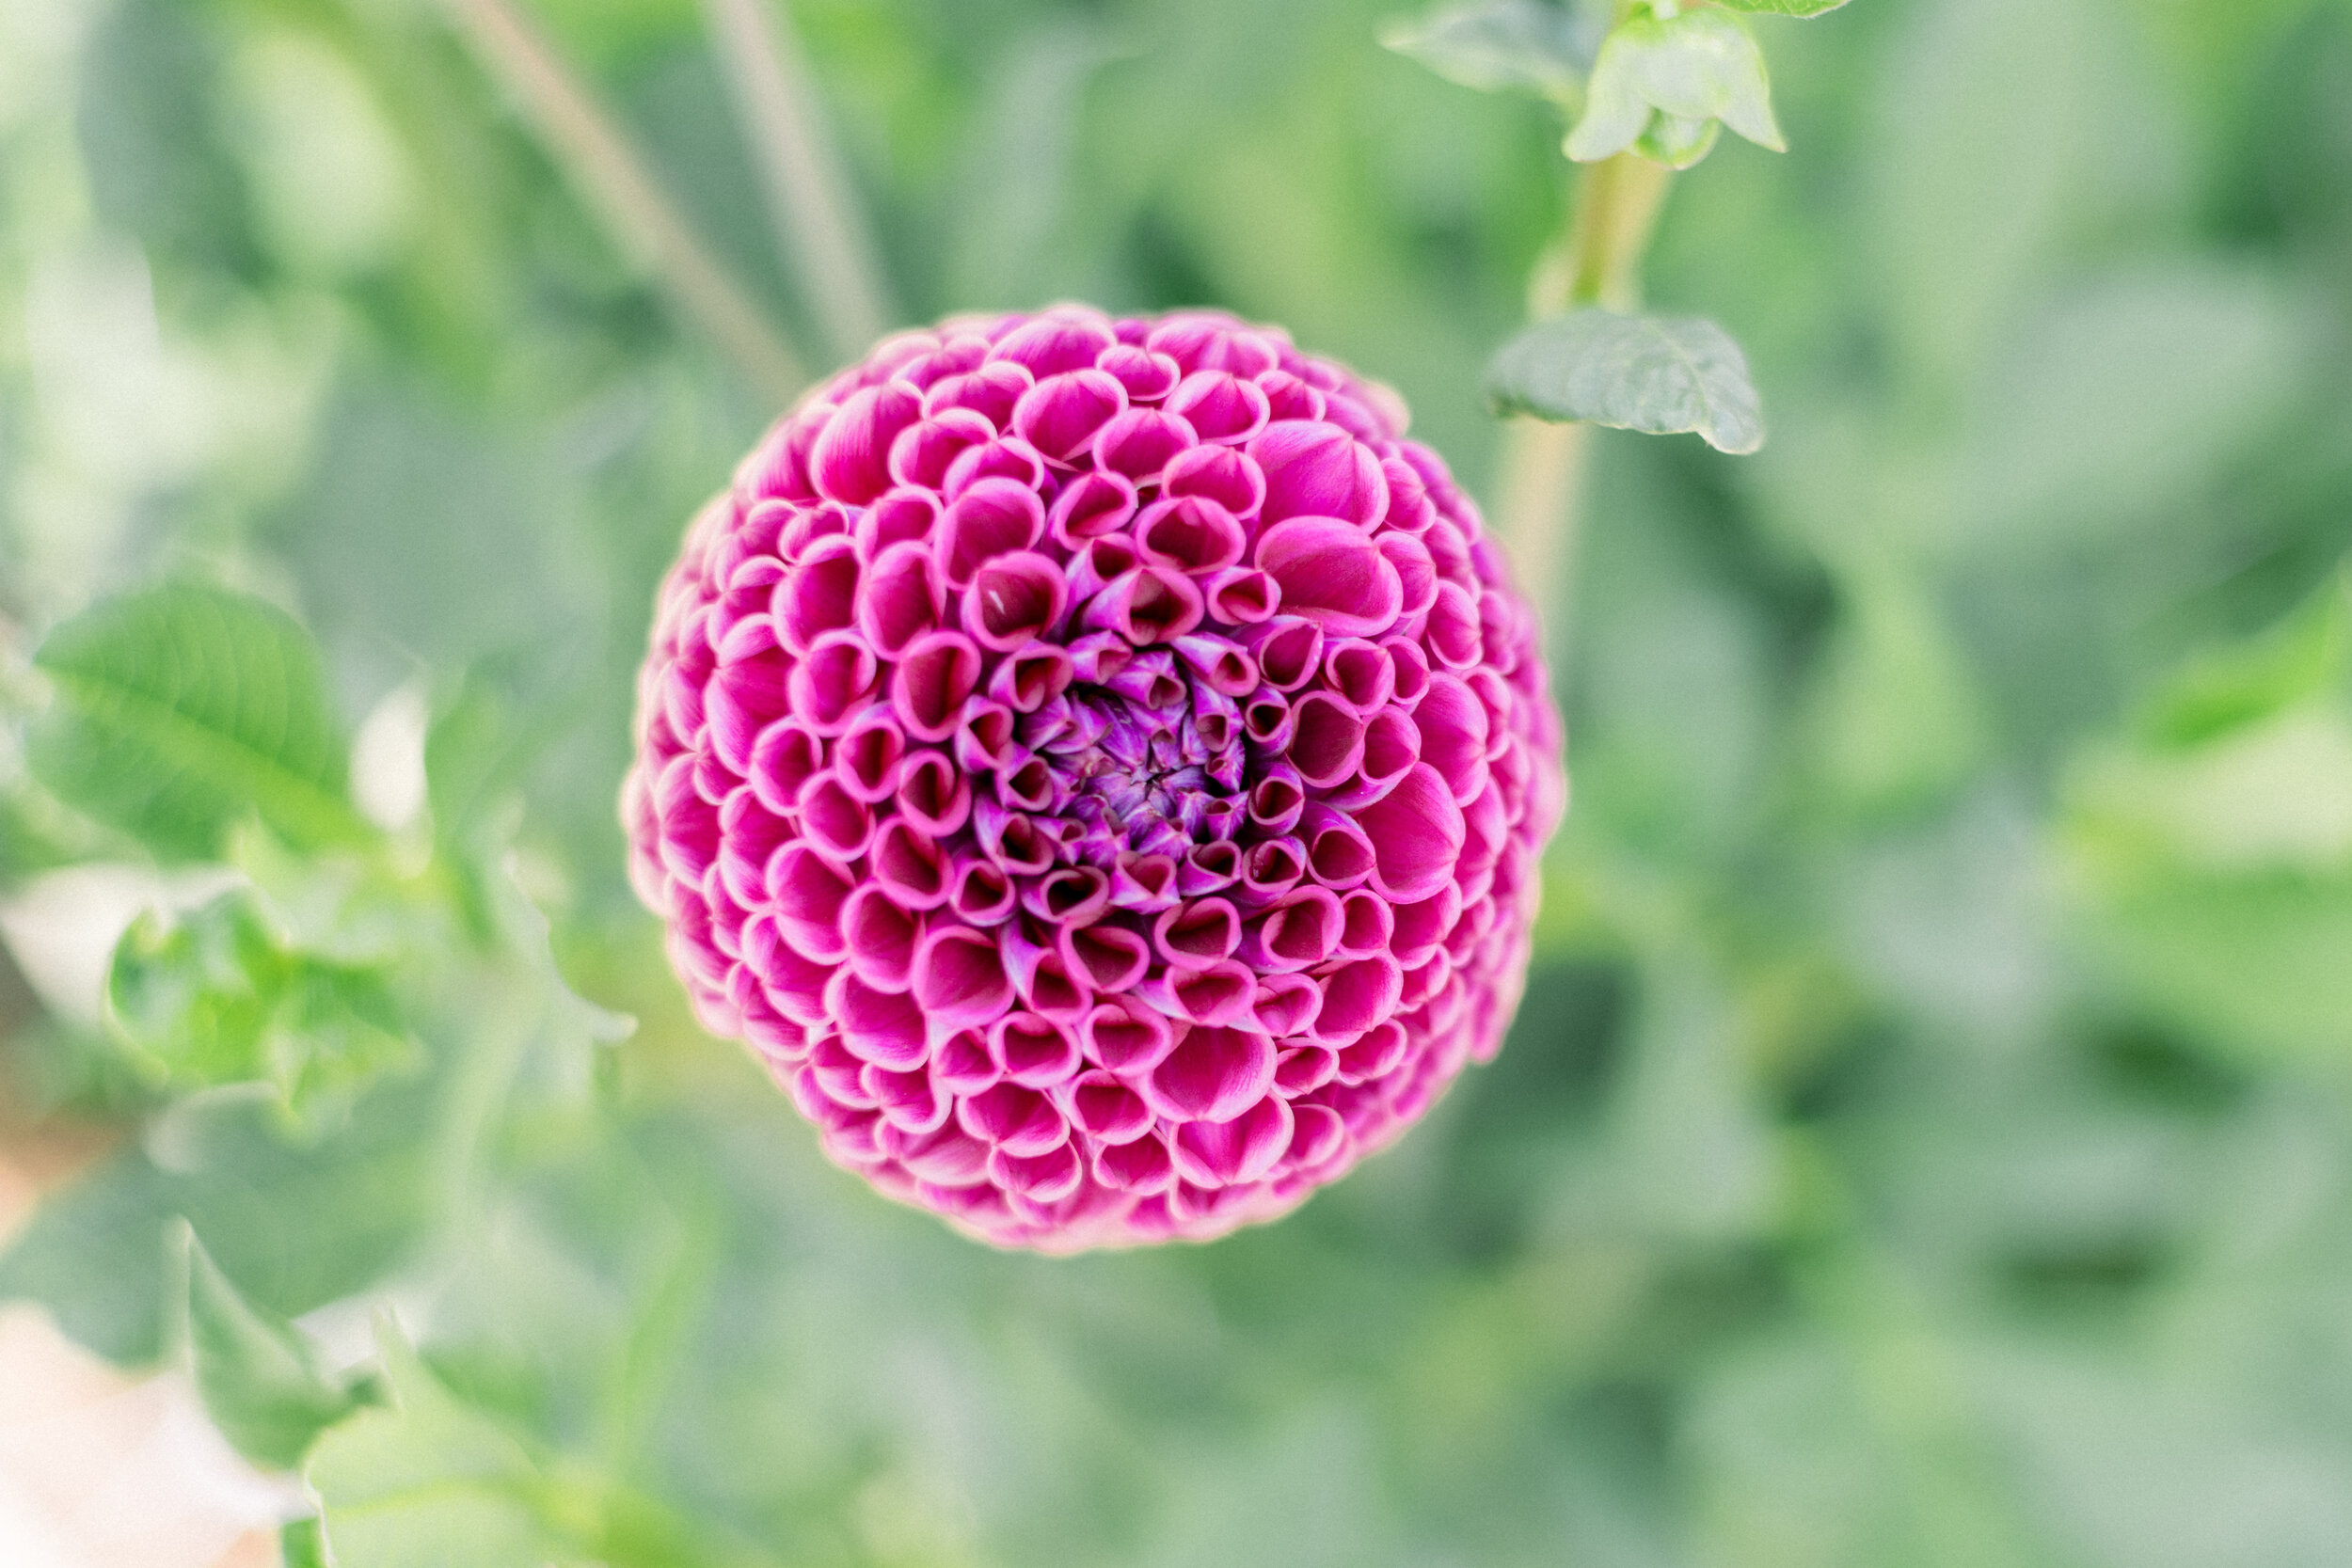
Petals curl and align perfectly to create a deep maroon flower pom. Deep colored petals contrast against the bright green leaves on tall stems adding height and color to your garden. Long stems are ideal in floral arrangements.
Flower Type: Ball
Plant Height: 3-4’
Flower Diameter: 4-6”
Light Requirements: full sun, part sun
Soil Preference: well-draining soil
USDA Zones: 2-7 (annual), 8-11 (perennial)
Days to Maturity: 80-100 days
How to Grow
Planting Depth: 1-2” (sprouting inside), 4-6” depth (outside)
Plant Spacing: 12-18”
When to plant: Sprout tuber indoors 4-6 weeks before the last frost date, transplant after the danger of frost has passed. Plant tubers directly outdoors after the danger of frost has passed.
Growing Tips: Tubers rot easily so avoid giving them too much water until the plant has begun to sprout (2-3 weeks after planting). Pinch top of stem when plants are 10-12” to promote branching. Add compost or fertilizer to soil before planting, or fertilize every 3-4 weeks with a well-balanced fertilizer after growth is visible. Trellis or staking is recommended to keep plants upright.
Cut Flower: Flowers can be harvested when petals are 3/4 open. Sear stems in 160-170F water or use a hydrating product to achieve 5-7 day vase-life.
Storing and Dividing Tubers: After frost has turned the top growth brown, cut the stem back a few inches above the soil. Then carefully dig carefully around the roots and rinse off excess dirt from and remove any tubers that may be rotting or damaged. Allow tubers to dry for several weeks allowing the roots to develop a slight wrinkled appearance before placing them in storage following the same storage procedures as above. Tubers can be divided in spring by cutting the tuber root segments apart with a sharp knife, making sure each has at least one visible eye (bud). Tubers can then be planted.
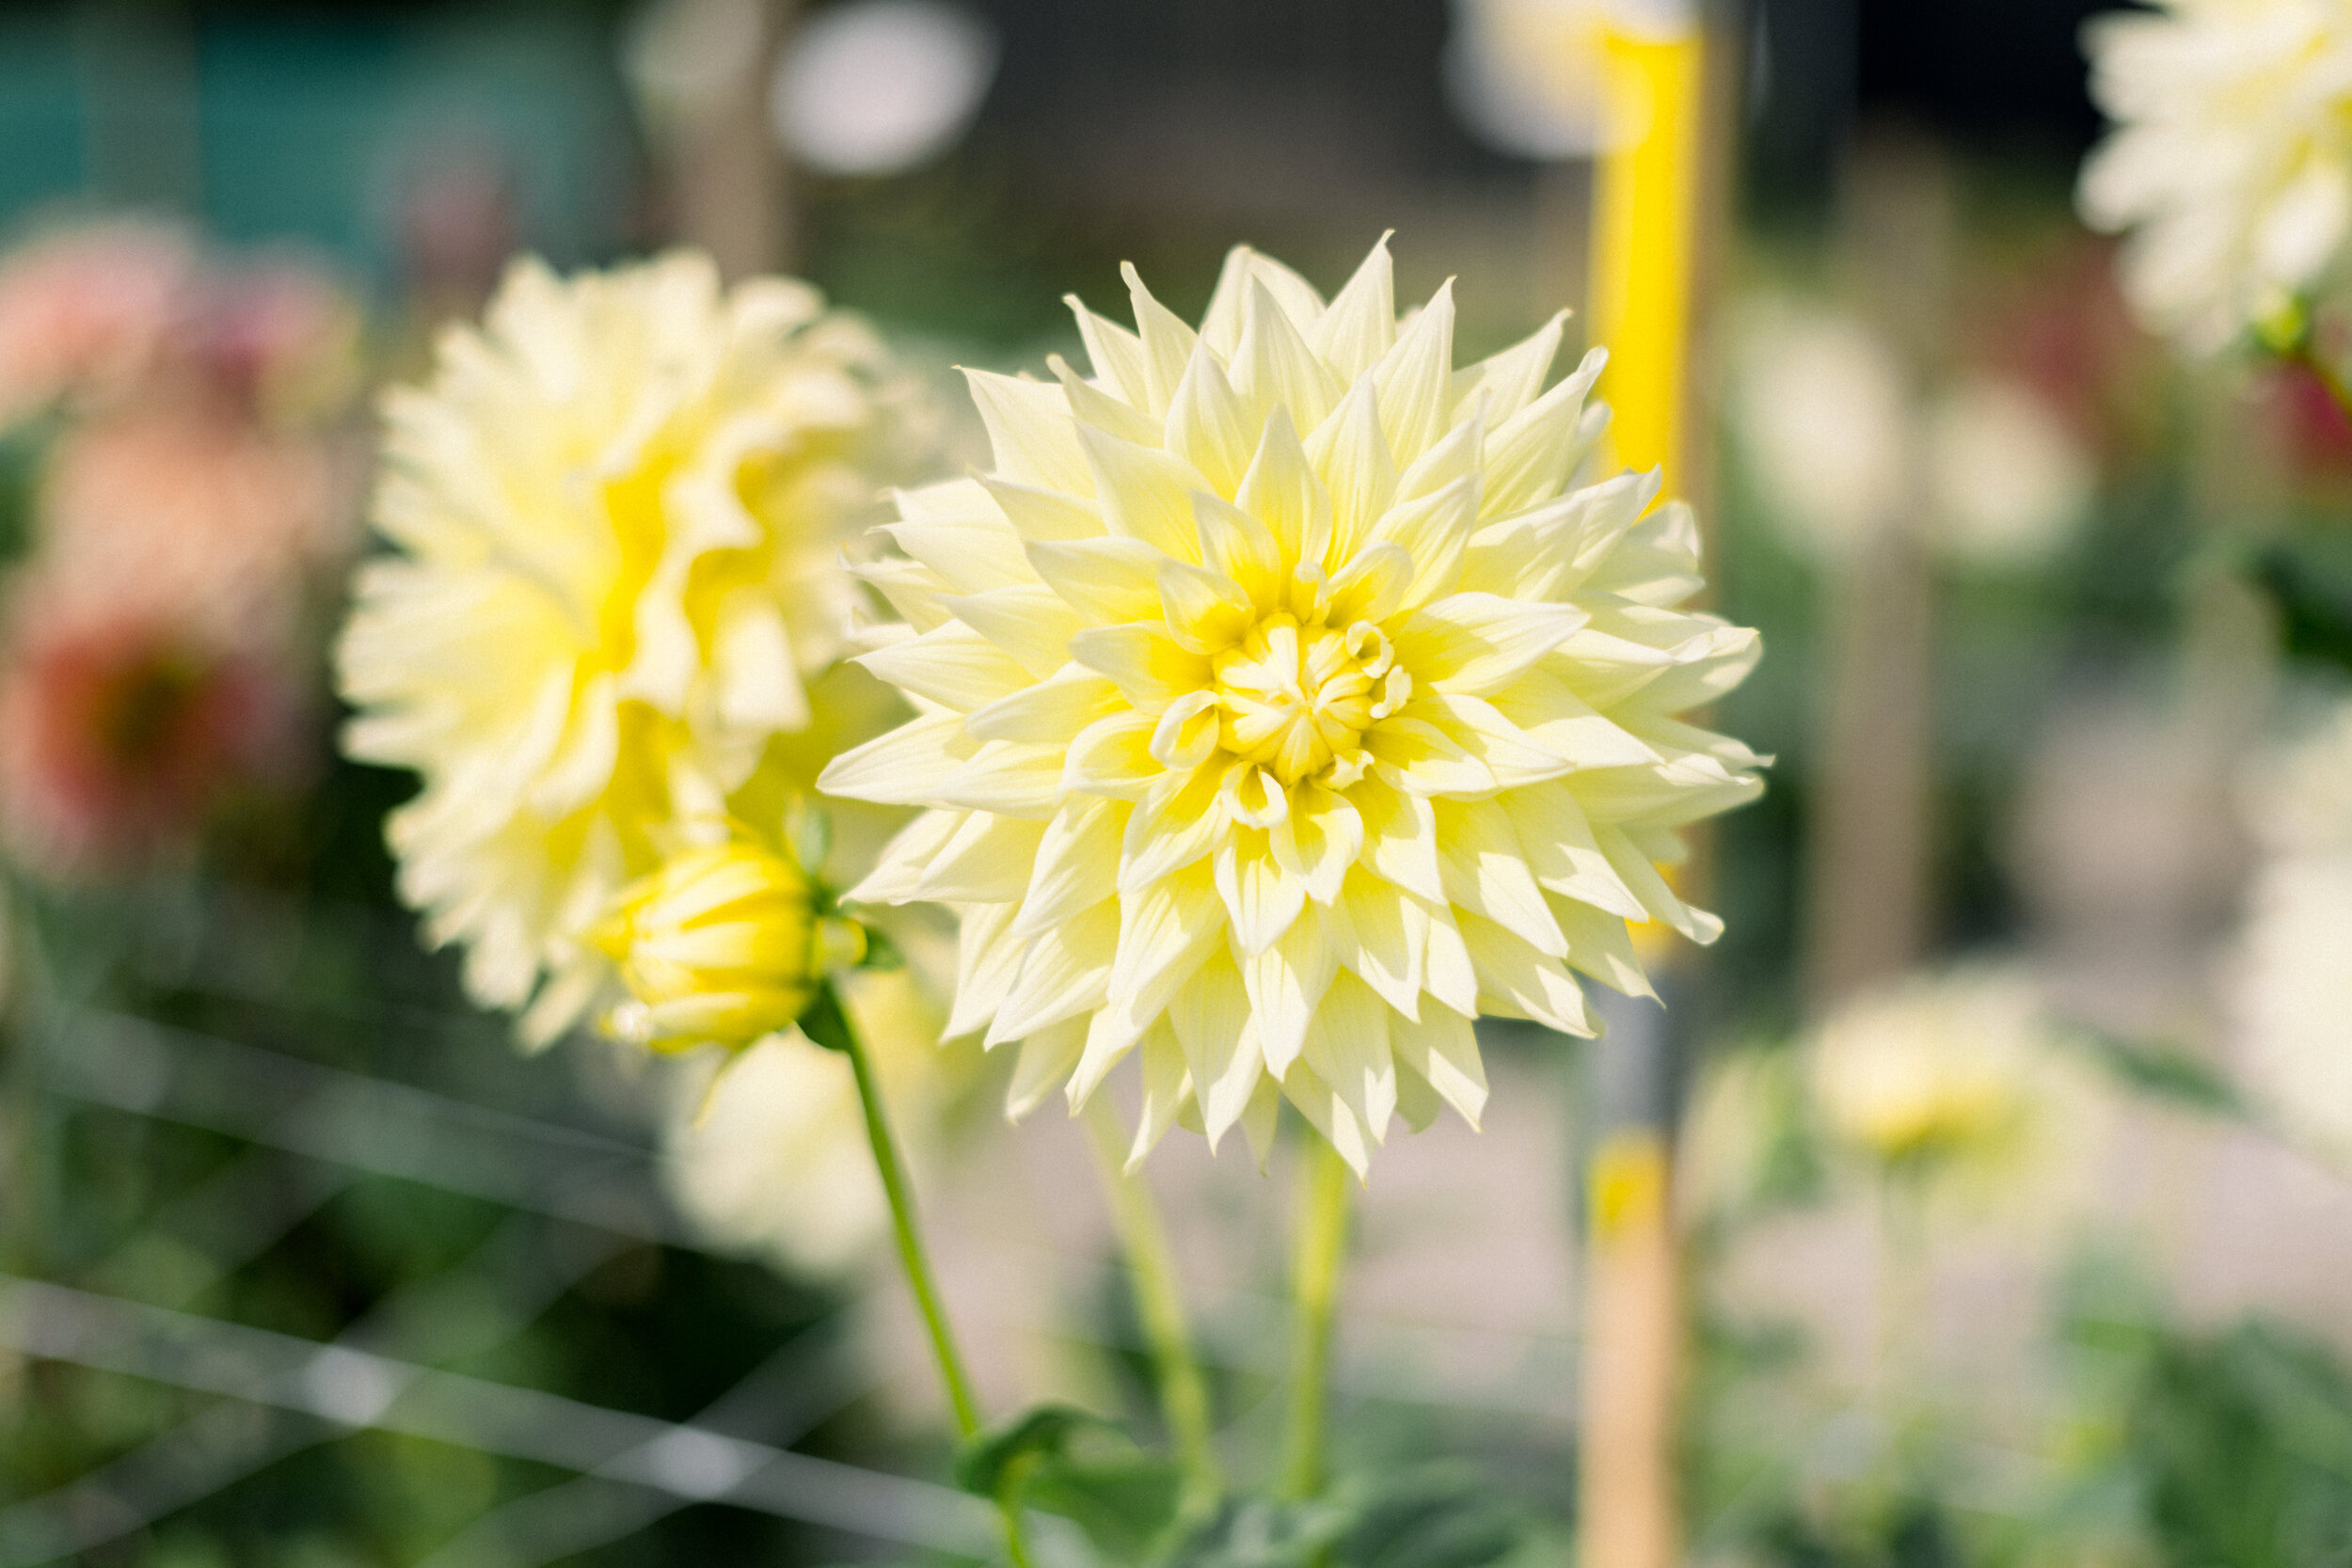
Just like the beauty of the full moon on a clear night, ‘La Luna’ dinner plate dahlias will capture your attention and leave you waxing and waning for more, with a pale yellow center bustling with smaller petals that give way to a larger cusp of white tipped petals that give this dahlia its classic starburst shape.
Flower Type: Dinner Plate
Plant Height: 4-5’
Flower Diameter: 6-8”
Light Requirements: full sun, part sun
Soil Preference: well-draining soil
USDA Zones: 2-7 (annual), 8-11 (perennial)
Days to Maturity: 80-100 days
How to Grow
Planting Depth: 1-2” (sprouting inside), 4-6” depth (outside)
Plant Spacing: 12-18”
When to plant: Sprout tuber indoors 4-6 weeks before the last frost date, transplant after the danger of frost has passed. Plant tubers directly outdoors after the danger of frost has passed.
Growing Tips: Tubers rot easily so avoid giving them too much water until the plant has begun to sprout (2-3 weeks after planting). Pinch top of stem when plants are 10-12” to promote branching. Add compost or fertilizer to soil before planting, or fertilize every 3-4 weeks with a well-balanced fertilizer after growth is visible. Trellis or staking is recommended to keep plants upright.
Cut Flower: Flowers can be harvested when petals are 3/4 open. Sear stems in 160-170F water or use a hydrating product to achieve 5-7 day vase-life.
Storing and Dividing Tubers: After frost has turned the top growth brown, cut the stem back a few inches above the soil. Then carefully dig carefully around the roots and rinse off excess dirt from and remove any tubers that may be rotting or damaged. Allow tubers to dry for several weeks allowing the roots to develop a slight wrinkled appearance before placing them in storage following the same storage procedures as above. Tubers can be divided in spring by cutting the tuber root segments apart with a sharp knife, making sure each has at least one visible eye (bud). Tubers can then be planted.
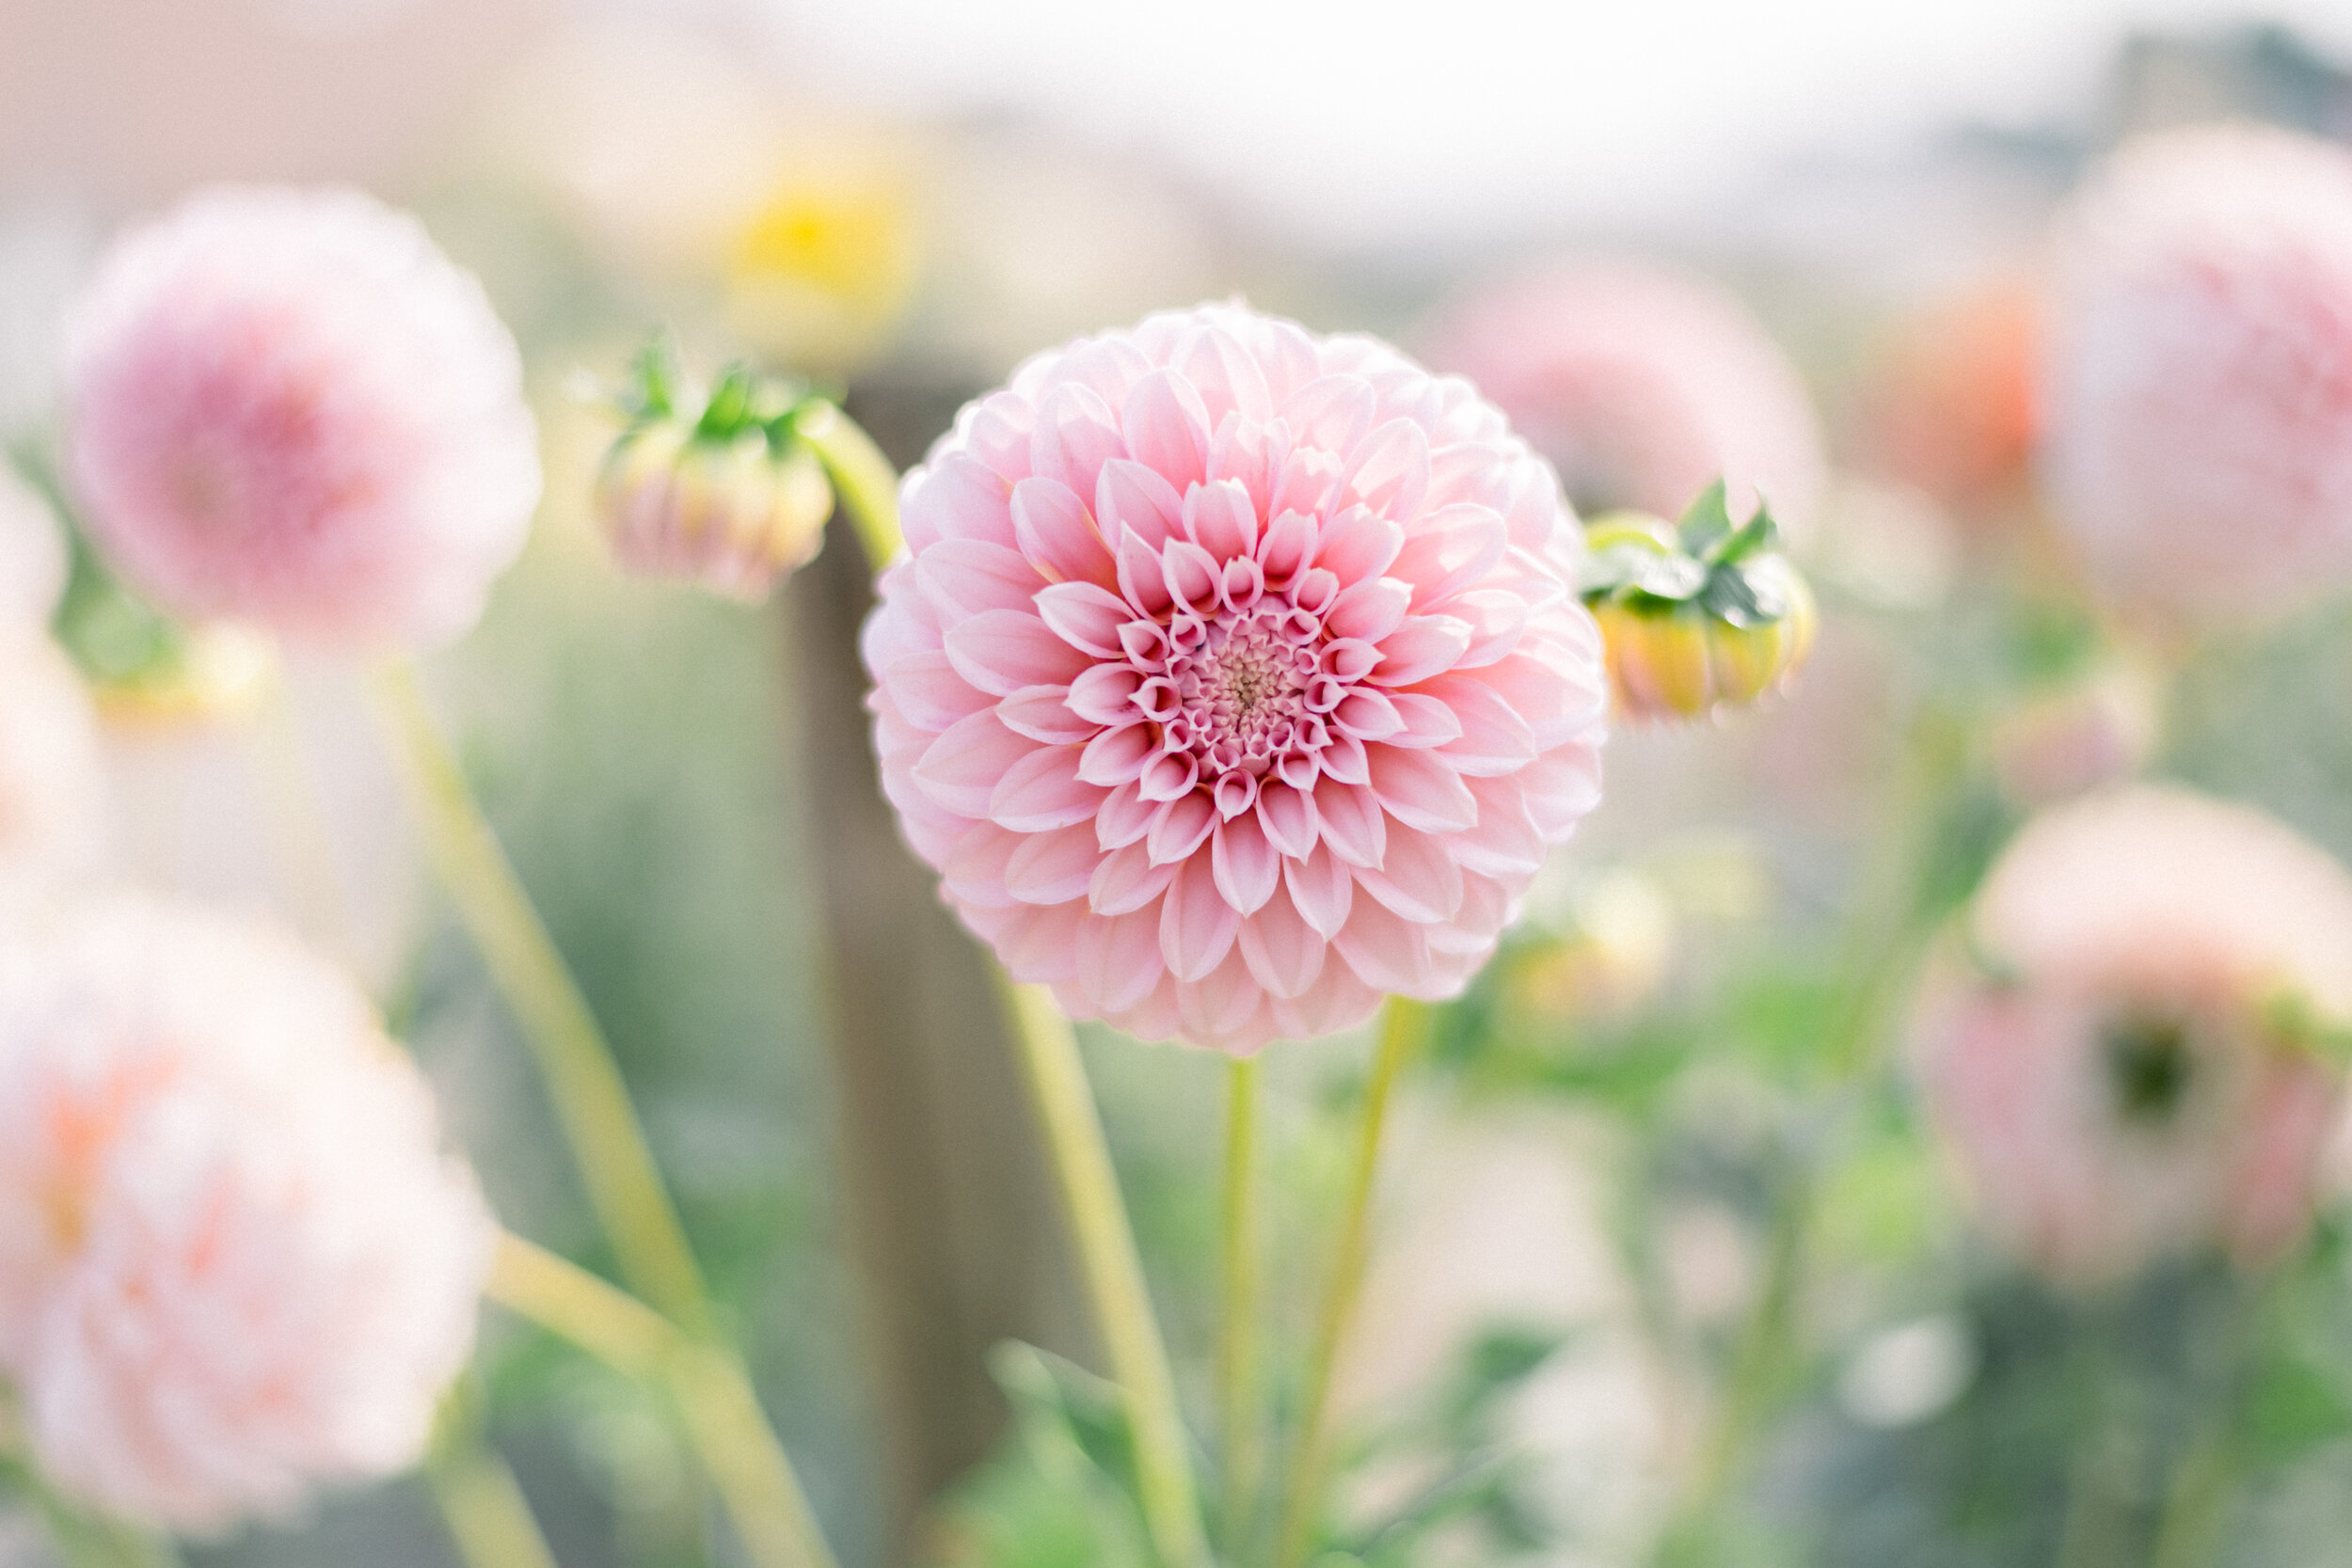
This flower has a peach hue towards the center of the petals that fades to cream towards the tips which will surely make you crave peaches and cream. The fading color and curled petals gives this flower so much depth and adds texture and interest to your gardens and floral arrangements.
Flower Type: Decorative medium-flowered
Plant Height: 4-5’
Flower Diameter: 4-5”
Light Requirements: full sun, part sun
Soil Preference: well-draining soil
USDA Zones: 2-7 (annual), 8-11 (perennial)
Days to Maturity: 80-100 days
How to Grow
Planting Depth: 1-2” (sprouting inside), 4-6” depth (outside)
Plant Spacing: 12-18”
When to plant: Sprout tuber indoors 4-6 weeks before the last frost date, transplant after the danger of frost has passed. Plant tubers directly outdoors after the danger of frost has passed.
Growing Tips: Tubers rot easily so avoid giving them too much water until the plant has begun to sprout (2-3 weeks after planting). Pinch top of stem when plants are 10-12” to promote branching. Add compost or fertilizer to soil before planting, or fertilize every 3-4 weeks with a well-balanced fertilizer after growth is visible. Trellis or staking is recommended to keep plants upright.
Cut Flower: Flowers can be harvested when petals are 3/4 open. Sear stems in 160-170F water or use a hydrating product to achieve 5-7 day vase-life.
Storing and Dividing Tubers: After frost has turned the top growth brown, cut the stem back a few inches above the soil. Then carefully dig carefully around the roots and rinse off excess dirt from and remove any tubers that may be rotting or damaged. Allow tubers to dry for several weeks allowing the roots to develop a slight wrinkled appearance before placing them in storage following the same storage procedures as above. Tubers can be divided in spring by cutting the tuber root segments apart with a sharp knife, making sure each has at least one visible eye (bud). Tubers can then be planted.
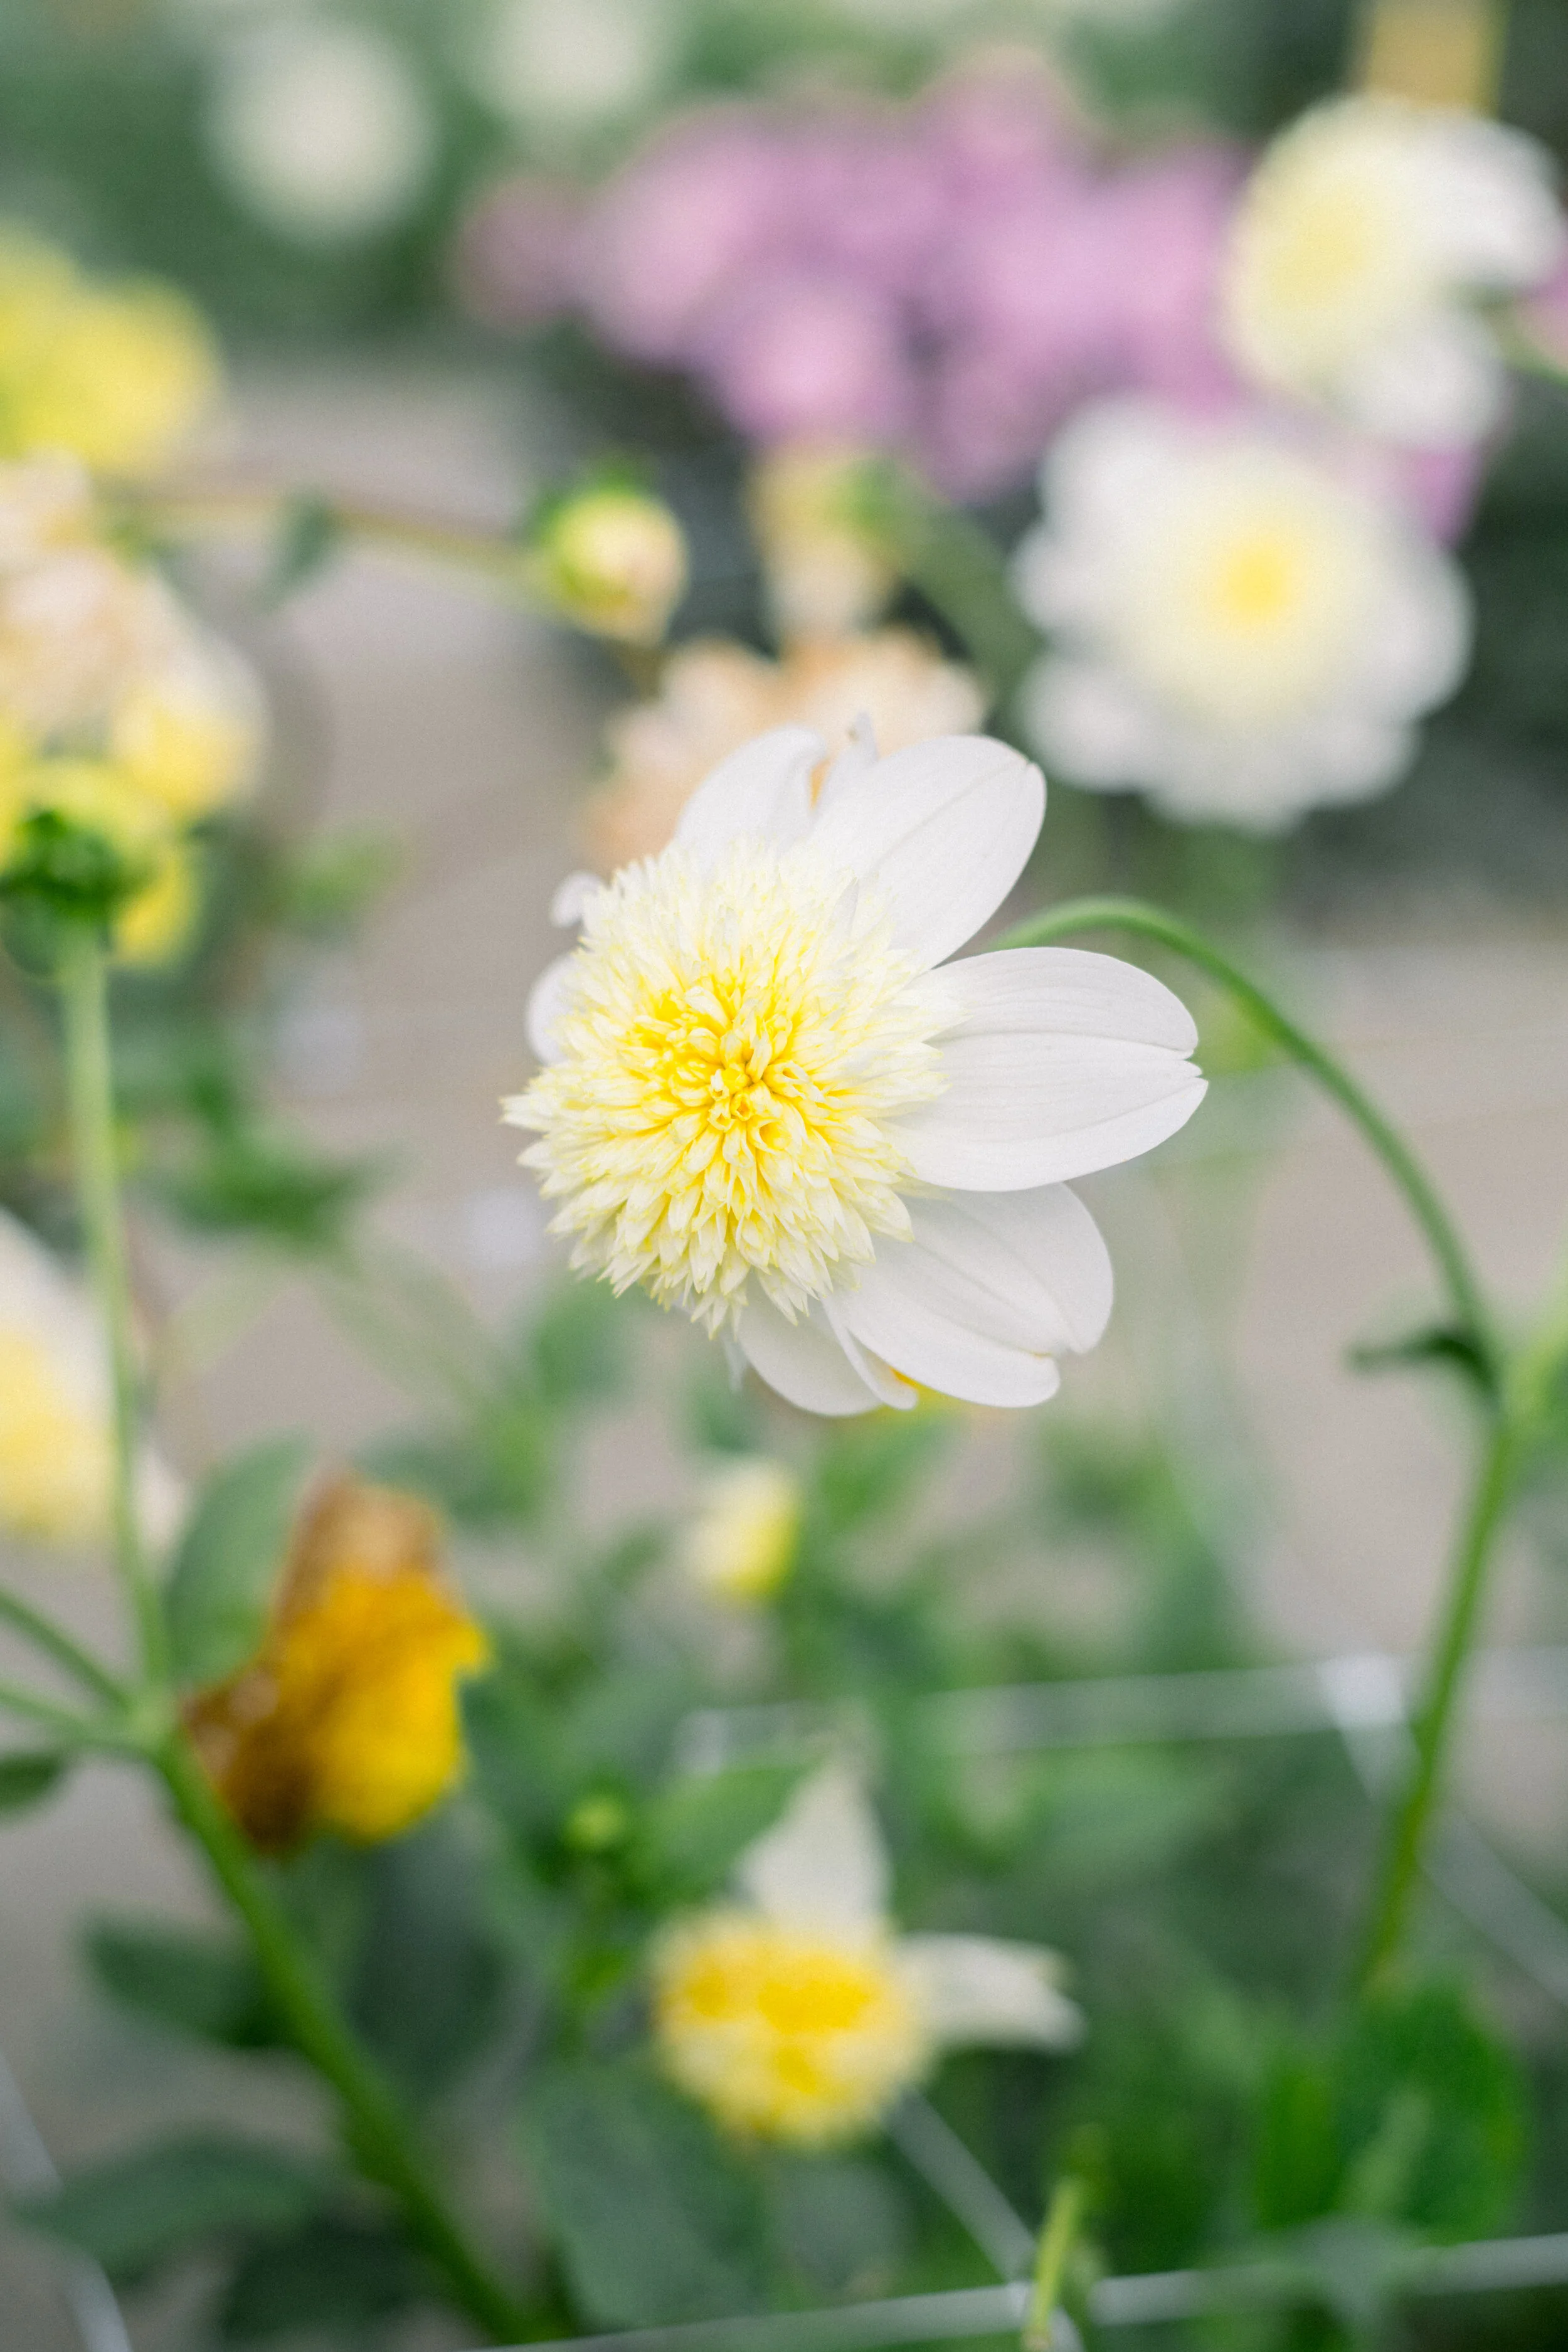
This flower has a peach hue towards the center of the petals that fades to cream towards the tips which will surely make you crave peaches and cream. The fading color and curled petals gives this flower so much depth and adds texture and interest to your gardens and floral arrangements.
Flower Type: Decorative medium-flowered
Plant Height: 4-5’
Flower Diameter: 4-5”
Light Requirements: full sun, part sun
Soil Preference: well-draining soil
USDA Zones: 2-7 (annual), 8-11 (perennial)
Days to Maturity: 80-100 days
How to Grow
Planting Depth: 1-2” (sprouting inside), 4-6” depth (outside)
Plant Spacing: 12-18”
When to plant: Sprout tuber indoors 4-6 weeks before the last frost date, transplant after the danger of frost has passed. Plant tubers directly outdoors after the danger of frost has passed.
Growing Tips: Tubers rot easily so avoid giving them too much water until the plant has begun to sprout (2-3 weeks after planting). Pinch top of stem when plants are 10-12” to promote branching. Add compost or fertilizer to soil before planting, or fertilize every 3-4 weeks with a well-balanced fertilizer after growth is visible. Trellis or staking is recommended to keep plants upright.
Cut Flower: Flowers can be harvested when petals are 3/4 open. Sear stems in 160-170F water or use a hydrating product to achieve 5-7 day vase-life.
Storing and Dividing Tubers: After frost has turned the top growth brown, cut the stem back a few inches above the soil. Then carefully dig carefully around the roots and rinse off excess dirt from and remove any tubers that may be rotting or damaged. Allow tubers to dry for several weeks allowing the roots to develop a slight wrinkled appearance before placing them in storage following the same storage procedures as above. Tubers can be divided in spring by cutting the tuber root segments apart with a sharp knife, making sure each has at least one visible eye (bud). Tubers can then be planted.
Photo by @theflowerfarm.co and @niky_pedley
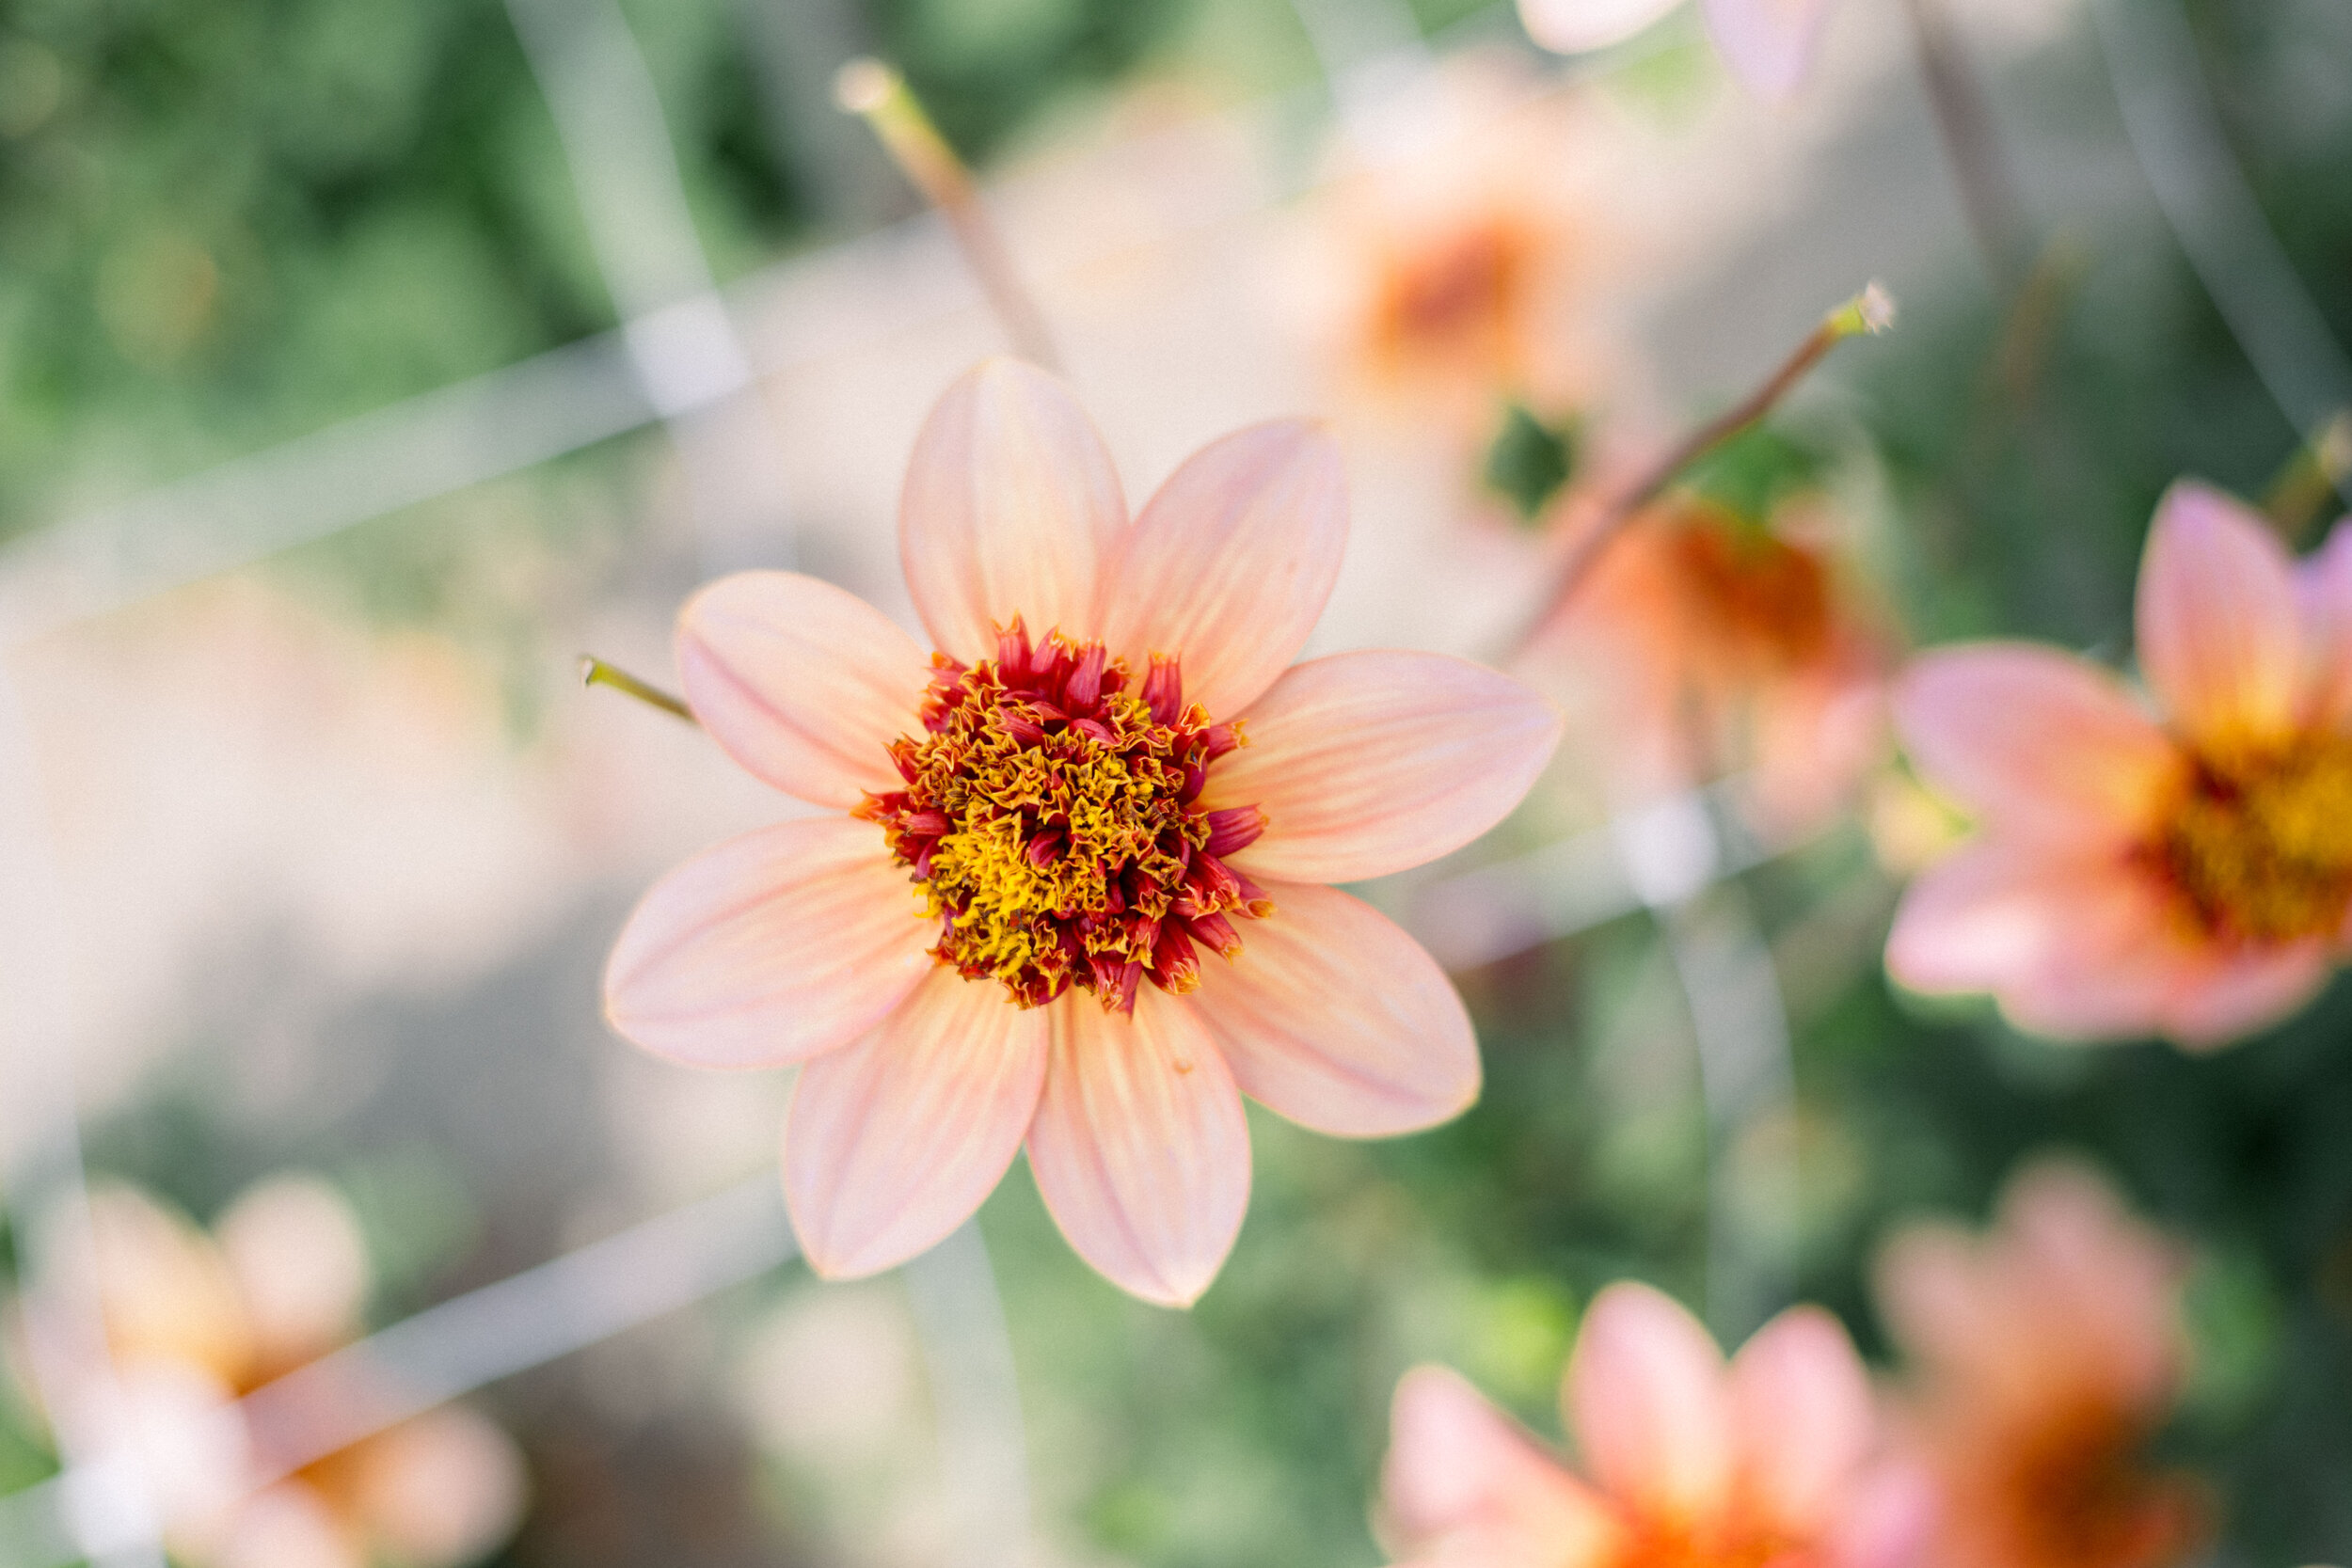
These dahlias will ‘totally’ catch your eye with the illusion of an almost fuzzy center with a cluster of red tipped in golden yellow surrounded by pink petals. Flowers attract a variety of pollinators when in full bloom. Plants are compact for dahlias so they are ideal in border garden plantings, but are also an excellent addition to your cutting garden.
Flower Type: Anemone
Plant Height: 2-3’
Flower Diameter: 2-6”
Light Requirements: full sun, part sun
Soil Preference: well-draining soil
USDA Zones: 2-7 (annual), 8-11 (perennial)
Days to Maturity: 80-100 days
How to Grow
Planting Depth: 1-2” (sprouting inside), 4-6” depth (outside)
Plant Spacing: 12-18”
When to plant: Sprout tuber indoors 4-6 weeks before the last frost date, transplant after the danger of frost has passed. Plant tubers directly outdoors after the danger of frost has passed.
Growing Tips: Tubers rot easily so avoid giving them too much water until the plant has begun to sprout (2-3 weeks after planting). Pinch top of stem when plants are 10-12” to promote branching. Add compost or fertilizer to soil before planting, or fertilize every 3-4 weeks with a well-balanced fertilizer after growth is visible. Trellis or staking is recommended to keep plants upright.
Cut Flower: Flowers can be harvested when petals are 3/4 open. Sear stems in 160-170F water or use a hydrating product to achieve 5-7 day vase-life.
Storing and Dividing Tubers: After frost has turned the top growth brown, cut the stem back a few inches above the soil. Then carefully dig carefully around the roots and rinse off excess dirt from and remove any tubers that may be rotting or damaged. Allow tubers to dry for several weeks allowing the roots to develop a slight wrinkled appearance before placing them in storage following the same storage procedures as above. Tubers can be divided in spring by cutting the tuber root segments apart with a sharp knife, making sure each has at least one visible eye (bud). Tubers can then be planted.
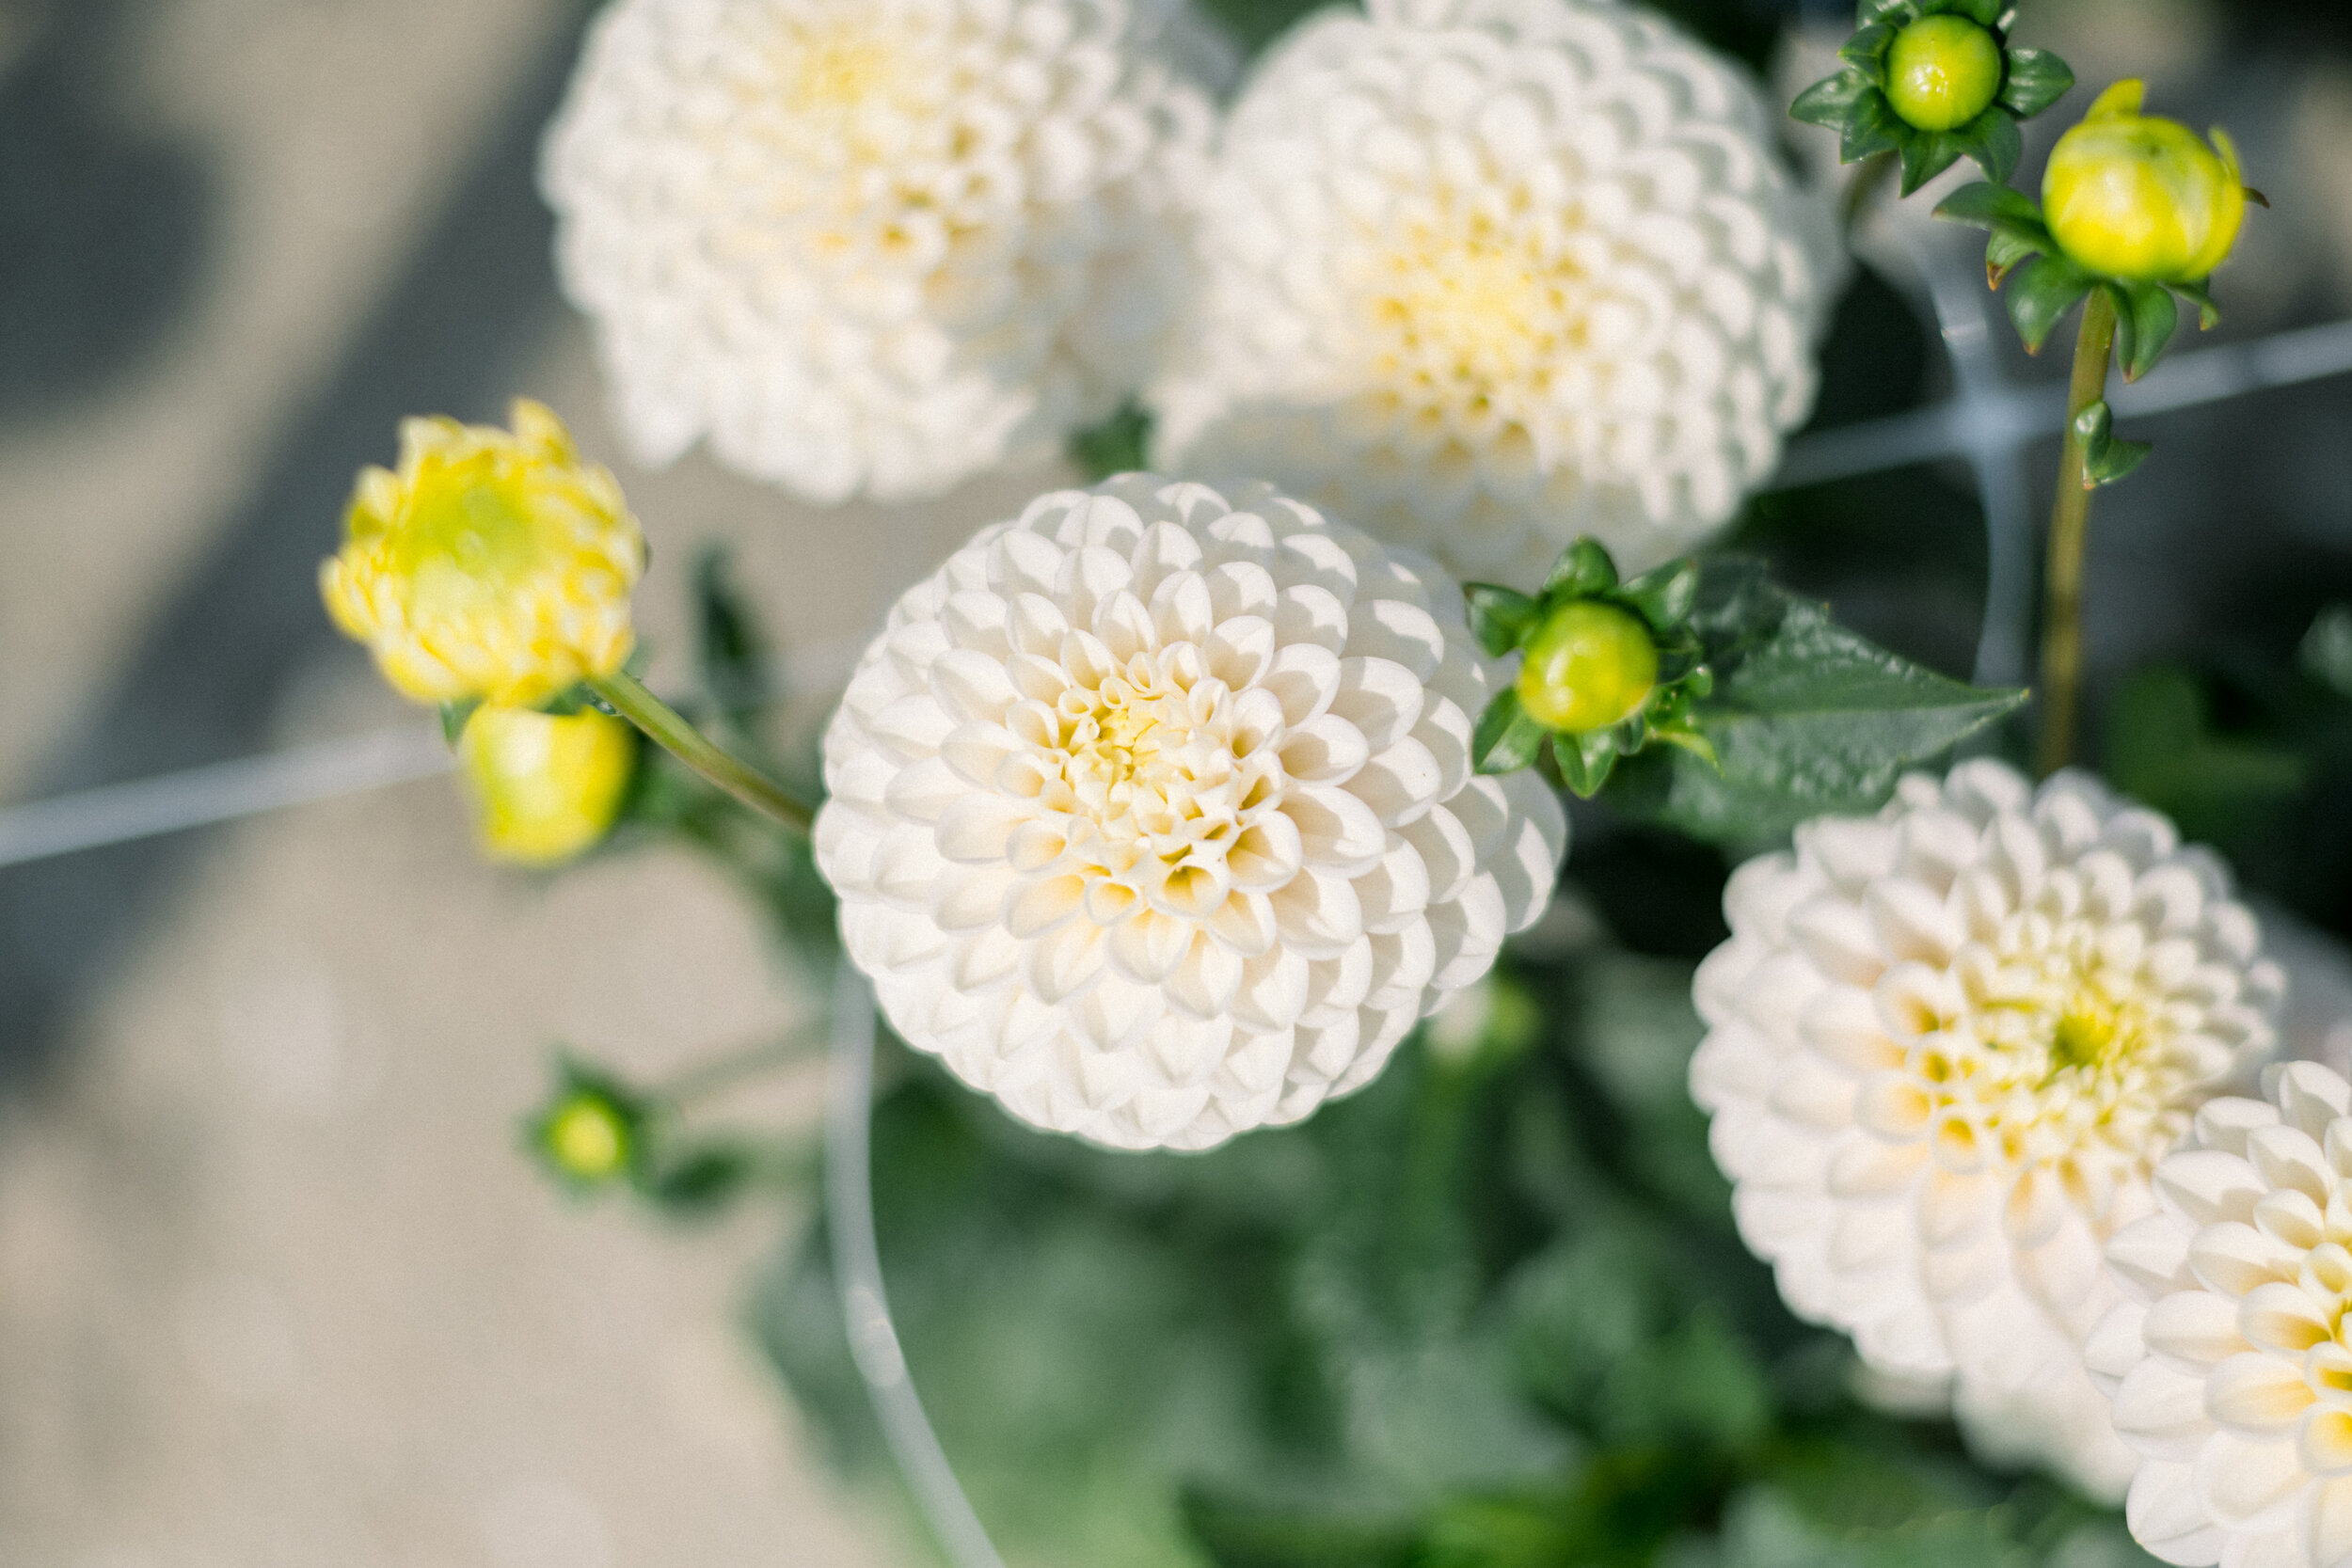
These intricate flowers will give the illusion of giant balls of cotton growing in your gardens. It’s height and bright white blooms are divine in the garden while it’s long stems are excellent for use as a cut flower.
Flower Type: Ball
Plant Height: 3-4’
Flower Diameter: 3-4”
Light Requirements: full sun, part sun
Soil Preference: well-draining soil
USDA Zones: 2-7 (annual), 8-11 (perennial)
Days to Maturity: 80-100 days
How to Grow
Planting Depth: 1-2” (sprouting inside), 4-6” depth (outside)
Plant Spacing: 12-18”
When to plant: Sprout tuber indoors 4-6 weeks before the last frost date, transplant after the danger of frost has passed. Plant tubers directly outdoors after the danger of frost has passed.
Growing Tips: Tubers rot easily so avoid giving them too much water until the plant has begun to sprout (2-3 weeks after planting). Pinch top of stem when plants are 10-12” to promote branching. Add compost or fertilizer to soil before planting, or fertilize every 3-4 weeks with a well-balanced fertilizer after growth is visible. Trellis or staking is recommended to keep plants upright.
Cut Flower: Flowers can be harvested when petals are 3/4 open. Sear stems in 160-170F water or use a hydrating product to achieve 5-7 day vase-life.
Storing and Dividing Tubers: After frost has turned the top growth brown, cut the stem back a few inches above the soil. Then carefully dig carefully around the roots and rinse off excess dirt from and remove any tubers that may be rotting or damaged. Allow tubers to dry for several weeks allowing the roots to develop a slight wrinkled appearance before placing them in storage following the same storage procedures as above. Tubers can be divided in spring by cutting the tuber root segments apart with a sharp knife, making sure each has at least one visible eye (bud). Tubers can then be planted.

SHOP ALL DAHLIAS
Shop all 65 of our varieties. They come in every color and personality!
Heirloom Chrysanthemums
These incredible flowers will bloom in the fall when much of the rest of the garden has faded and return every year. These varieties are not your average pincushion mums that you get at the hardware store. Some will grow to be over 6 feet tall with 5 inch blooms in every color and shape. Grown from cuttings that are shipped in early spring, these are a must for any garden!

We no longer sell mums on our website. Please download the Halden app and create a profile to shop hardy mums and other bulbs, seeds, etc.
iPhone: https://apps.apple.com/us/app/halden/id6474762581
Google Play: https://play.google.com/store/apps/details?id=com.haldengarden&pcampaignid=web_share
Bloom Date: Sept. 20
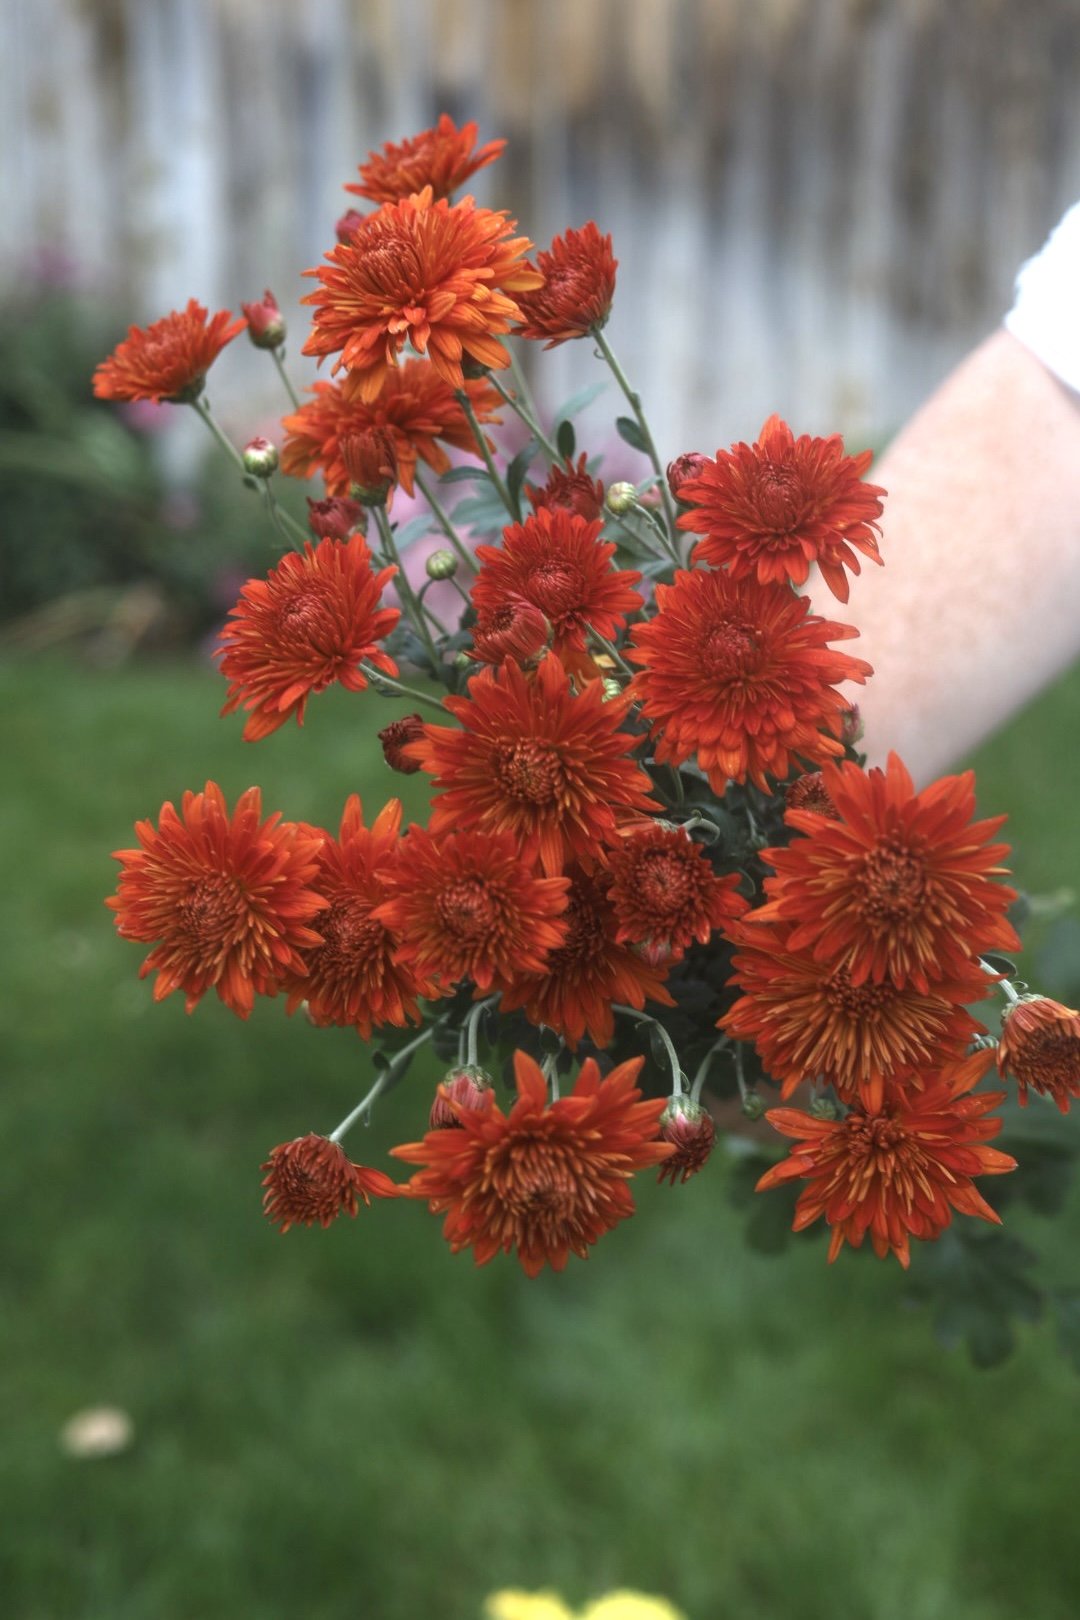
A brilliant orange-red decorative cushion. Strong plant that digs well.
Good for fall pots.
Cold hardy. Perennial.
We no longer sell mums on our website. Please download the Halden app and create a profile to shop hardy mums and other bulbs, seeds, etc.
iPhone: https://apps.apple.com/us/app/halden/id6474762581
Google Play: https://play.google.com/store/apps/details?id=com.haldengarden&pcampaignid=web_share
Bloom Date: Sept. 15
Fully double 4” decorative glowing burnt orange flowers on a willowy-stiff stem.
Can grow up to 20” tall and 30” wide.
Performs well as a cut flower.
Pairs beautifully with ‘Minnruby’ , ‘Tangelo’, and ‘Autumn Beauty’

We no longer sell mums on our website. Please download the Halden app and create a profile to shop hardy mums and other bulbs, seeds, etc.
iPhone: https://apps.apple.com/us/app/halden/id6474762581
Google Play: https://play.google.com/store/apps/details?id=com.haldengarden&pcampaignid=web_share
Bloom Date: Sept. 10
Pure white 1” button on a 12” tall rounded plant. Excellent pot plant and long lasting.

We no longer sell mums on our website. Please download the Halden app and create a profile to shop hardy mums and other bulbs, seeds, etc.
iPhone: https://apps.apple.com/us/app/halden/id6474762581
Google Play: https://play.google.com/store/apps/details?id=com.haldengarden&pcampaignid=web_share
Bloom Date-Sept. 20 Exquisite 5” rich lavender flowers on a very dark green 24” plant.

We no longer sell mums on our website. Please download the Halden app and create a profile to shop hardy mums and other bulbs, seeds, etc.
iPhone: https://apps.apple.com/us/app/halden/id6474762581
Google Play: https://play.google.com/store/apps/details?id=com.haldengarden&pcampaignid=web_share
Bloom Date: Sept. 15

We no longer sell mums on our website. Please download the Halden app and create a profile to shop hardy mums and other bulbs, seeds, etc.
iPhone: https://apps.apple.com/us/app/halden/id6474762581
Google Play: https://play.google.com/store/apps/details?id=com.haldengarden&pcampaignid=web_share
Bloom Date: Sept. 15
A stunning 4” white decora- tive flower on a sturdy round mounded plant. Can reach 16” tall.

We no longer sell mums on our website. Please download the Halden app and create a profile to shop hardy mums and other bulbs, seeds, etc.
iPhone: https://apps.apple.com/us/app/halden/id6474762581
Google Play: https://play.google.com/store/apps/details?id=com.haldengarden&pcampaignid=web_share
Five-inch blooms that are ideal for cutting.
Bloom Date: Sept. 22
Height: 30 Inches

Bloom Date: Sept. 15
An excellent true pink 2” blossom on a full 15” cushion plant.
Bloom Date Sept. 20
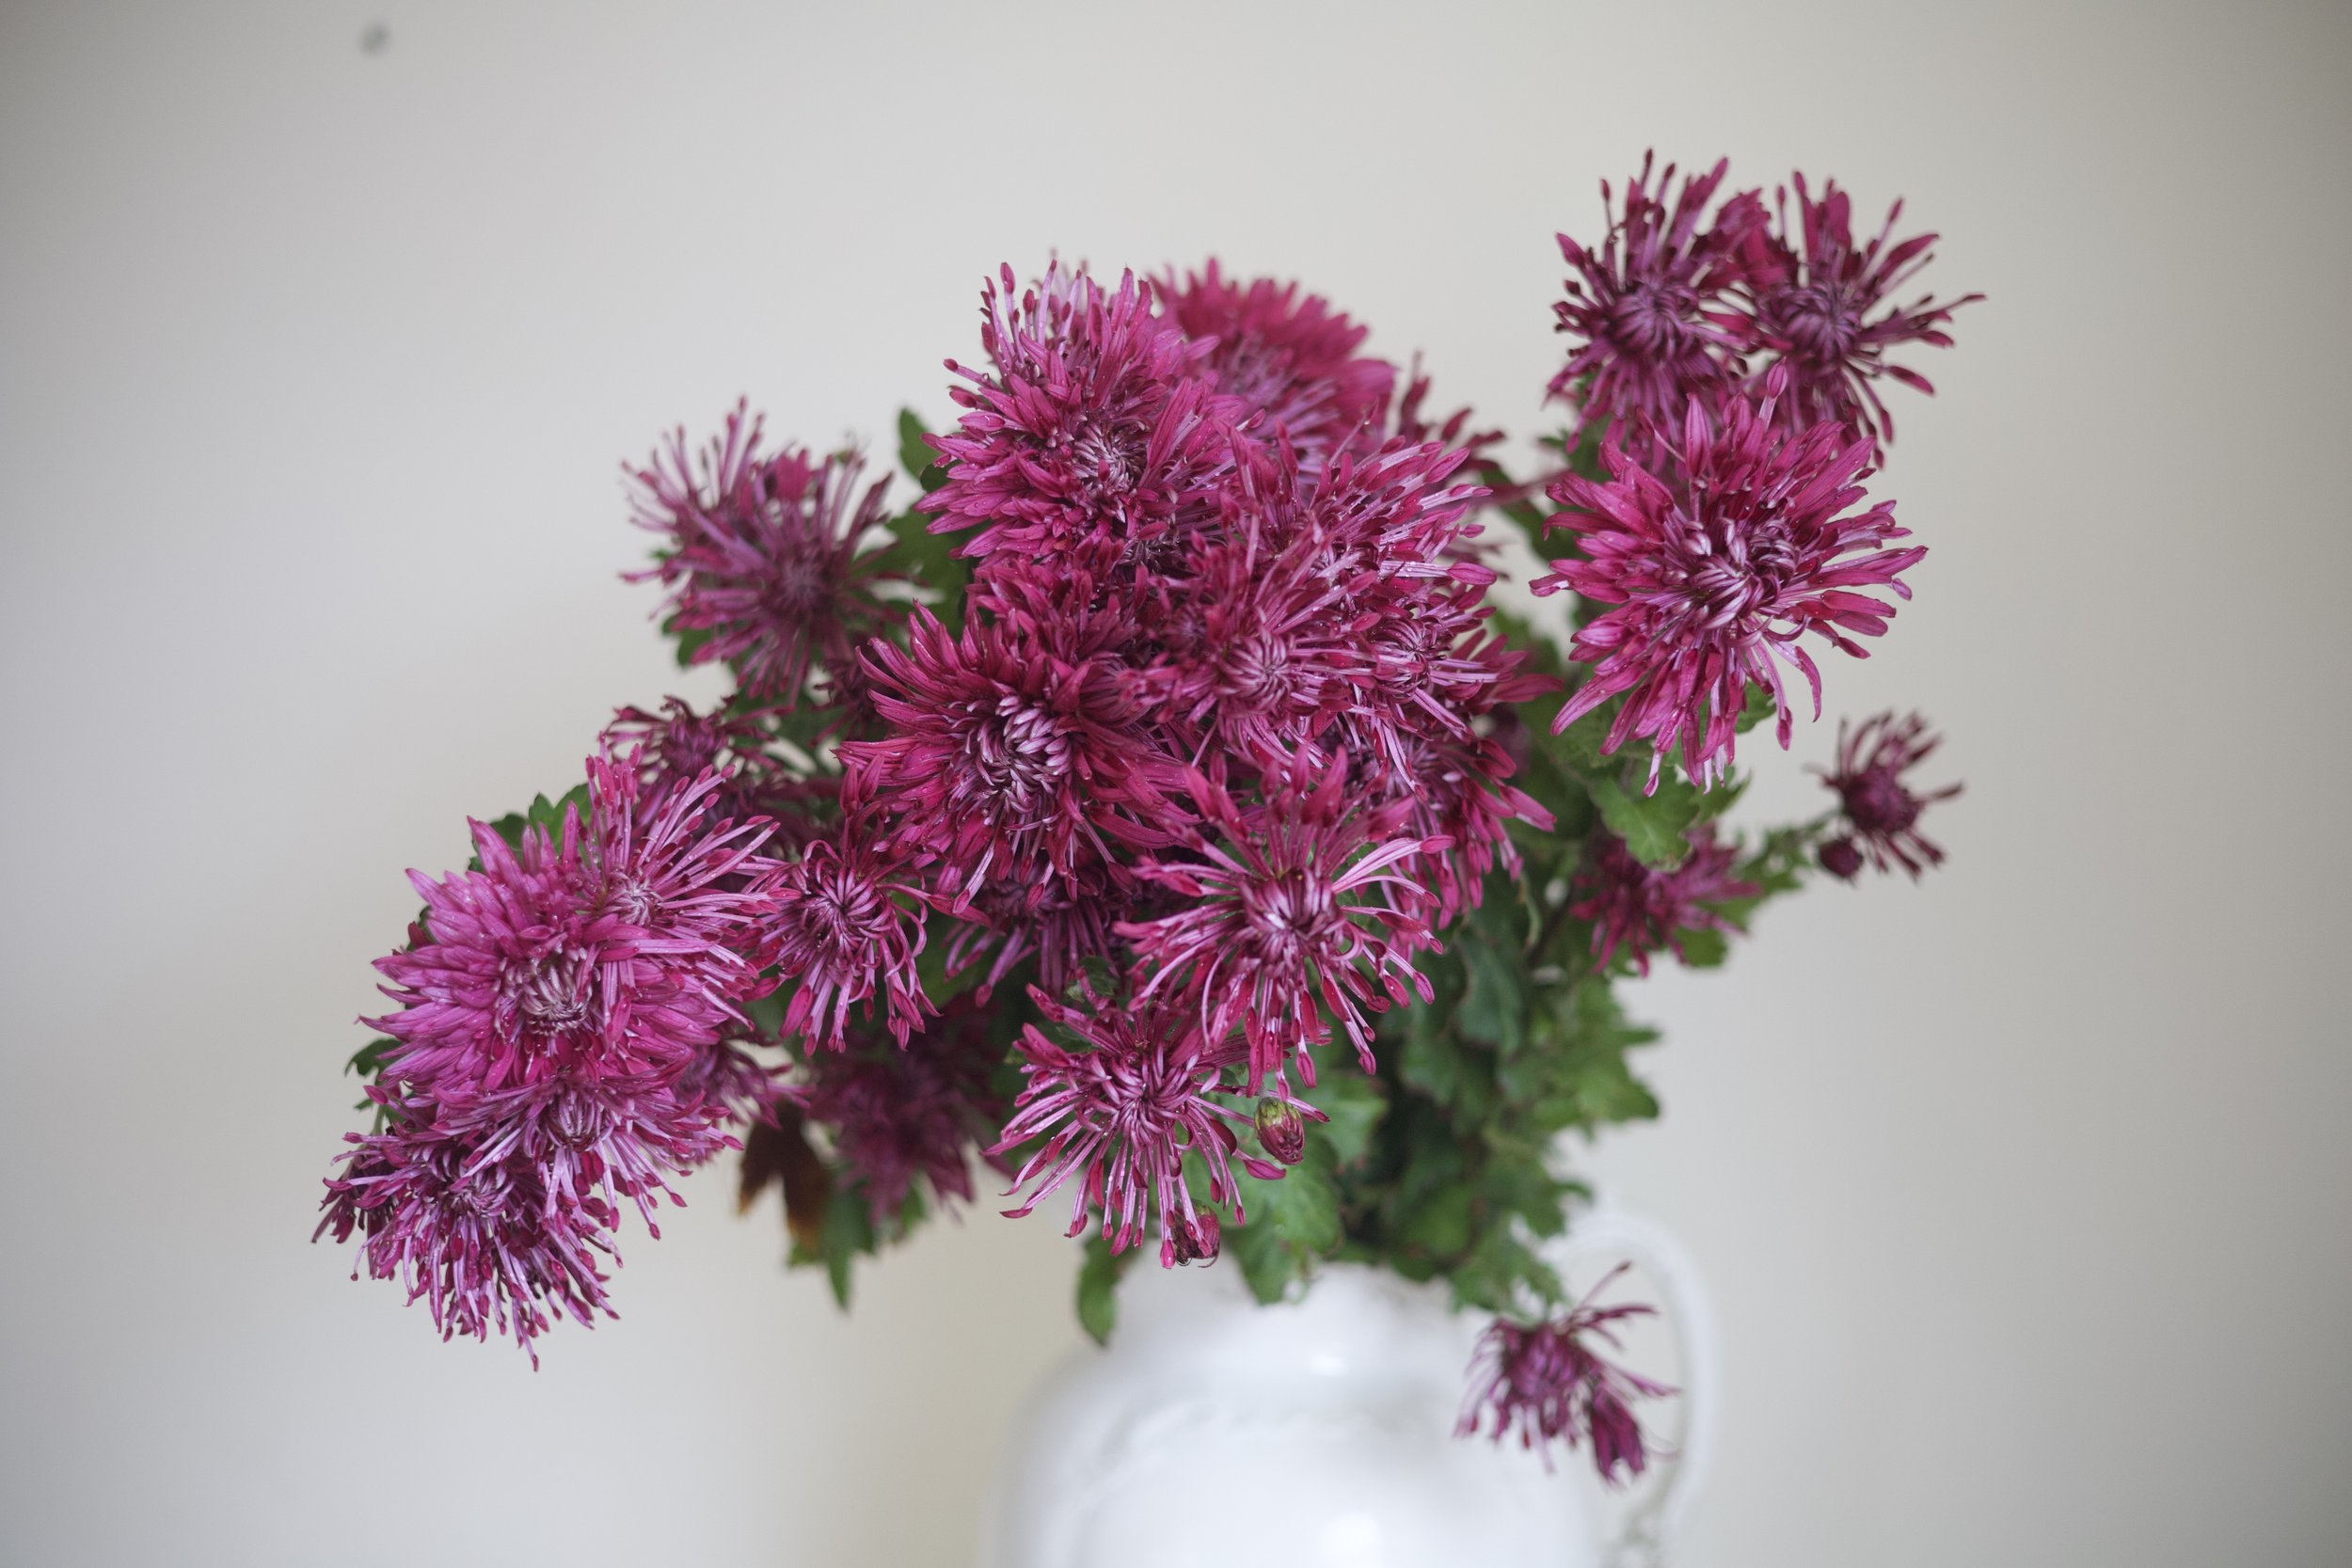
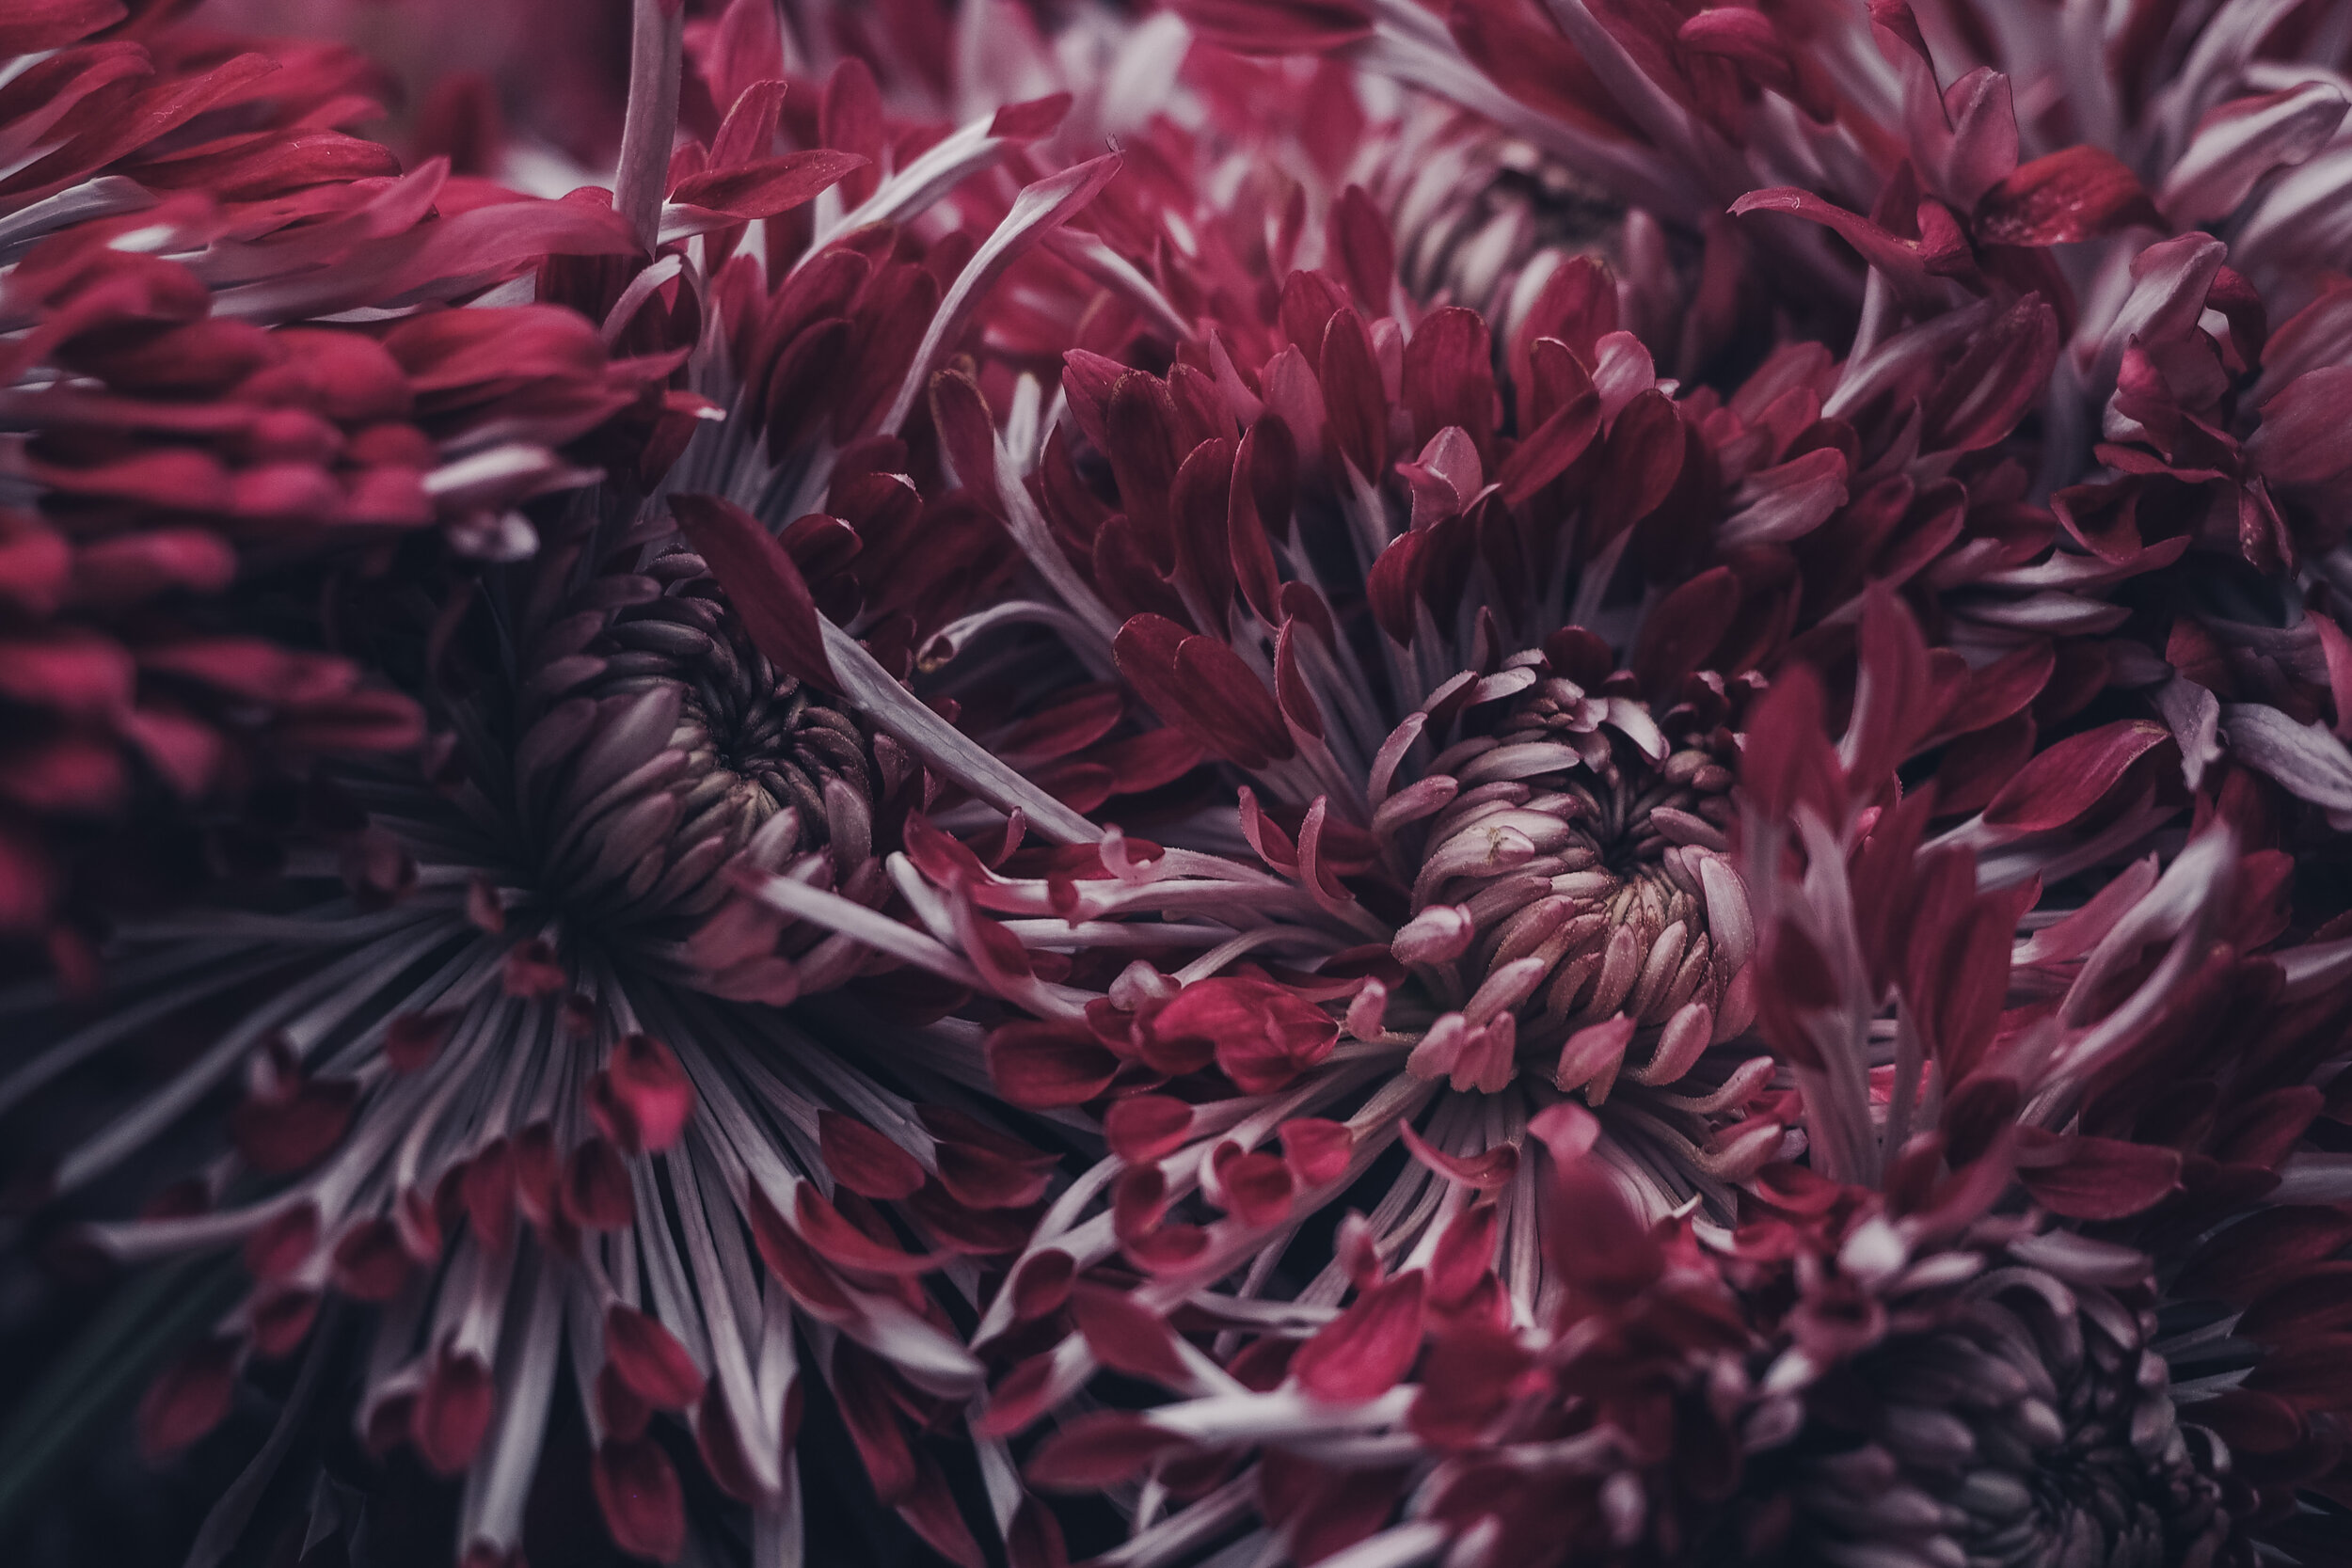
Spiky purple petals with a silvery reverse. Plants have sturdy stems 26 inches.
Wonderful as a cut flower. Blooms alongside ‘Cheerleader’ and pairs well with ‘Minnruby’ and ‘Cameo’ in the landscape

Bloom Date: Sept. 25
A big incurved deep gold/ orange football mum which can be disbudded for 5-6” blooms.
Perennial

Incredible mammoth mum in the landscape especially if grown in a tight group of 3 or 4 cuttings.

Bloom Date: Sept. 25
Can be disbudded for 5-6” flowers.
Pairs well with ‘Carrousel’ and ‘Cameo’
ROSES
There’s a reason they’re the most sought after flower throughout time. Incredibly fragrant and prolific, roses come in every color and style. Our roses are grown from a spring planted, 2-3 year old bare root which will establish happily in your garden and bloom the first year. For about the amount you would pay for two dozen roses you can have these incredible varieties blooming in your yard year after year.
This rose comes as a bare root.
Bare root roses will ship in spring 2021 at the proper planting time.
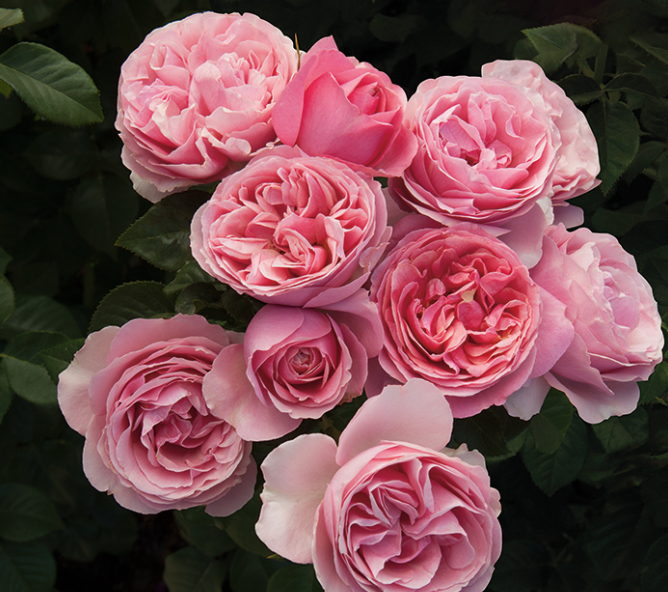
This beauty is all dressed up and ready to go..into your rose collection. Her full gown of glossy, dark green foliage is highlighted with old-fashioned, fully double blooms in a sparkling shade of watermelon pink. The non-fading blooms are held to perfection on long stems ideal for cutting, but equally as glamorous when left on the bush. A mild perfume completes her ensemble and enhanced resistance against common rose diseases ensure this fancy lady is here to stay.
Product Details
Zone: 5 To 9
Page Number: 9
Planting Season: Spring
Fertilizer Type: 5-5-7
Flowering Season: Summer
Light Requirements:
Fragrant: Y
Size Shipped: 2 Year, #1 Grade
Bareroot: Y
Grafted: Y
Deciduous: Y
Shipping Details
State Restrictions: AK;HI;ID
Physical Details
Height: 60 To 66
Flowering: Yes
Petal Count: 45
Foliage Color: Dark Green
Flower Color Pink
Spacing: 60
Bareroot: Y
Grafted: Y
Deciduous: Y
Prune Time: Late Fall And Early Spring
Resistance Details
Disease Resistant: Y
Scientific Details
Genus: Rosa
Species: Hybrida
Subspecies: WEKgrasucejuc
Common Name: All Dressed Up Grandiflora Rose
This rose comes as a bare root.
Bare root roses will ship in spring 2021 at the proper planting time.
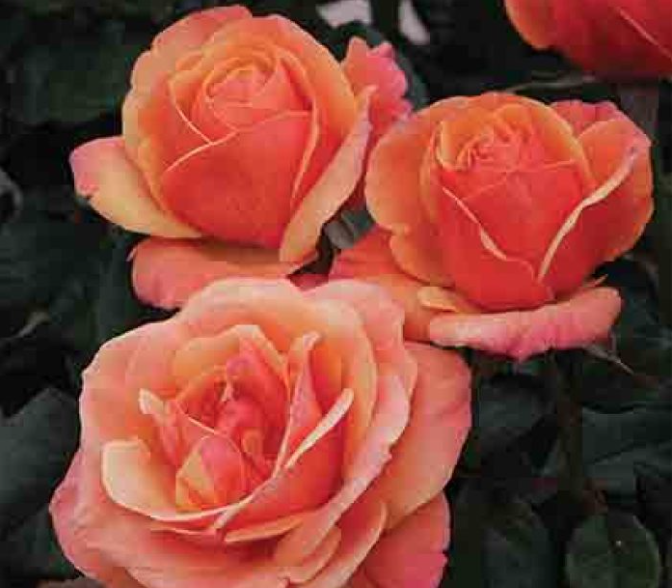
Anna's Promise praises the true heart and steadfast love that transcends the trials and tribulations endured by Downton Abbey's character Anna Bates. The unique color combination of golden petals with a pink blush and glowing bronze reverse is a fitting representation of Anna's character. Elegant blossoms surrounded by glossy, green foliage, exude a spicy, fruit fragrance. This graceful plant includes strong blossom stems for bouquets in the parlor. Well clothed with deep glossy green foliage.
The unique color, golden tan with a pink blush and copper reverse, comes from dad About Face, but the blooms are larger with improved form over the original. Bouquets of these beauties are perfect for the table with delicious scents reminiscent of grapefruit and fresh cut apples. The upright bushes have deep, glossy green foliage with good disease resistance and bloom prolifically throughout the season.
Product Details
Zone: 6 To 9
Page Number: 9
Planting Season: Spring
Fertilizer Type: 5-5-7
Flowering Season: Summer
Light Requirements:
Fragrant: Y
Size Shipped: 2 Year, #1 Grade
Bareroot: Y
Grafted: Y
Deciduous: Y
Shipping Details
State Restrictions: AK;HI;ID
Physical Details
Height: 60 To 72
Flowering: Yes
Petal Count: 35
Foliage Color: Green
Flower Color Golden
Spacing: 36
Bareroot: Y
Grafted: Y
Deciduous: Y
Prune Time: Late Fall And Early Spring
Hybrid / Open Pollinated: Hybrid
Resistance Details
Disease Resistant: Y
Scientific Details
Genus: Rosa
Species: Hybrida
Subspecies: WEKdoofat
Common Name: Anna's Promise Grandiflora Rose
This rose comes as a bare root.
Bare root roses will ship in spring 2021 at the proper planting time.
Photo by @melvin_cottage
This rose comes as a bare root.
Bare root roses will ship in spring 2021 at the proper planting time.
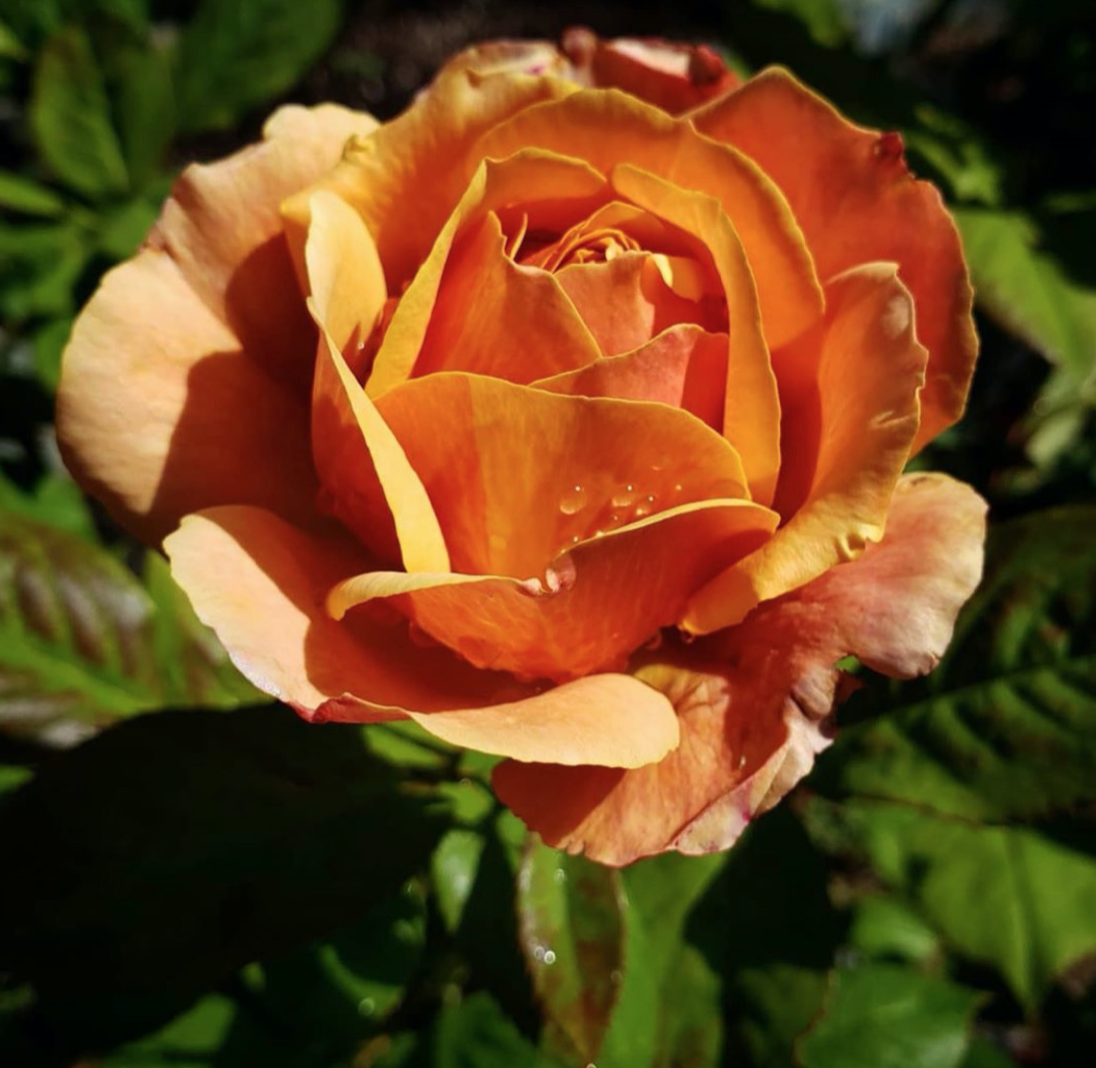
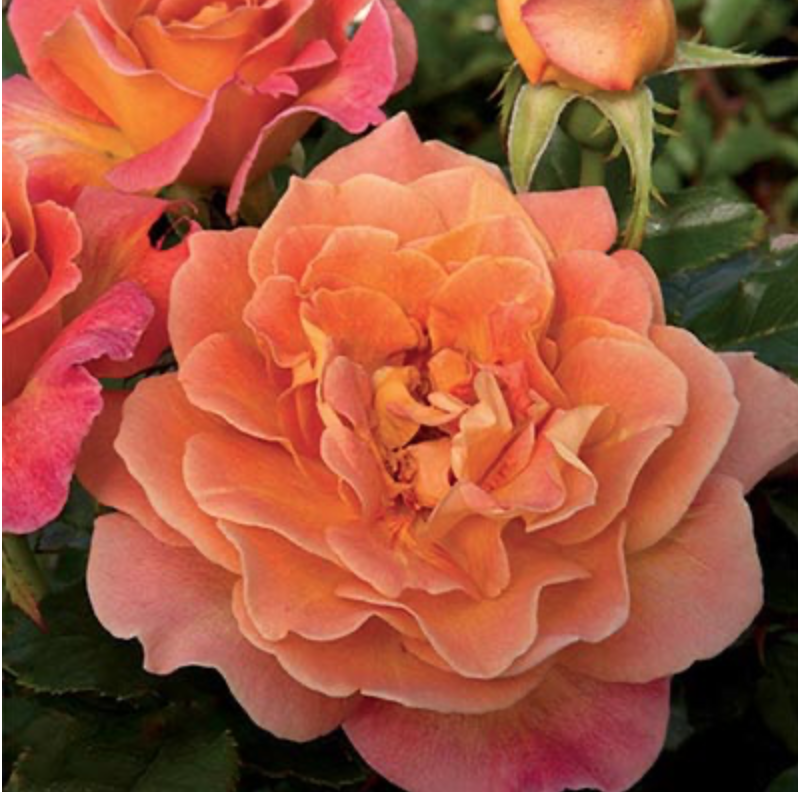
Rosie the Riveter pays tribute to the women who worked in factories and shipyards during World War II. The old-fashioned unusual flowers of orange-gold suffused with pink are surely reminiscent of that era. The exquisite pointy and shapely buds are proudly held on top of very glossy dark foliage as a feminine symbol of charm and strength. The moderate fruity & spice fragrance is the perfect complement to these cultural icons. Like the tireless Rosies, the even rounded plants of Rosie the Riveter are the workhorse of the garden, producing an arsenal of flowers. Maximum flower power? Yes, we can do it!
General Information
Class Floribunda
Cultivar cv. WEKzazou
Patent PPAF
Plant Habit Medium
Growth Habit Rounded & bushy
Stem Length Medium
Foliage Color Very glossy dark green
Disease Resistance Good
Flower Color Orangey-gold suffused with pink with gold reverse
Bud Form Pointed & ovoid
Flower Size Medium, around 3-3½ inch diameter
Flower Form Old-fashioned & double
Petal Count 30 to 45
Parentage Hotel California x Distant Drums
Hybridizer Christian Bédard
Intro Year 2018
Introduced By Weeks Roses
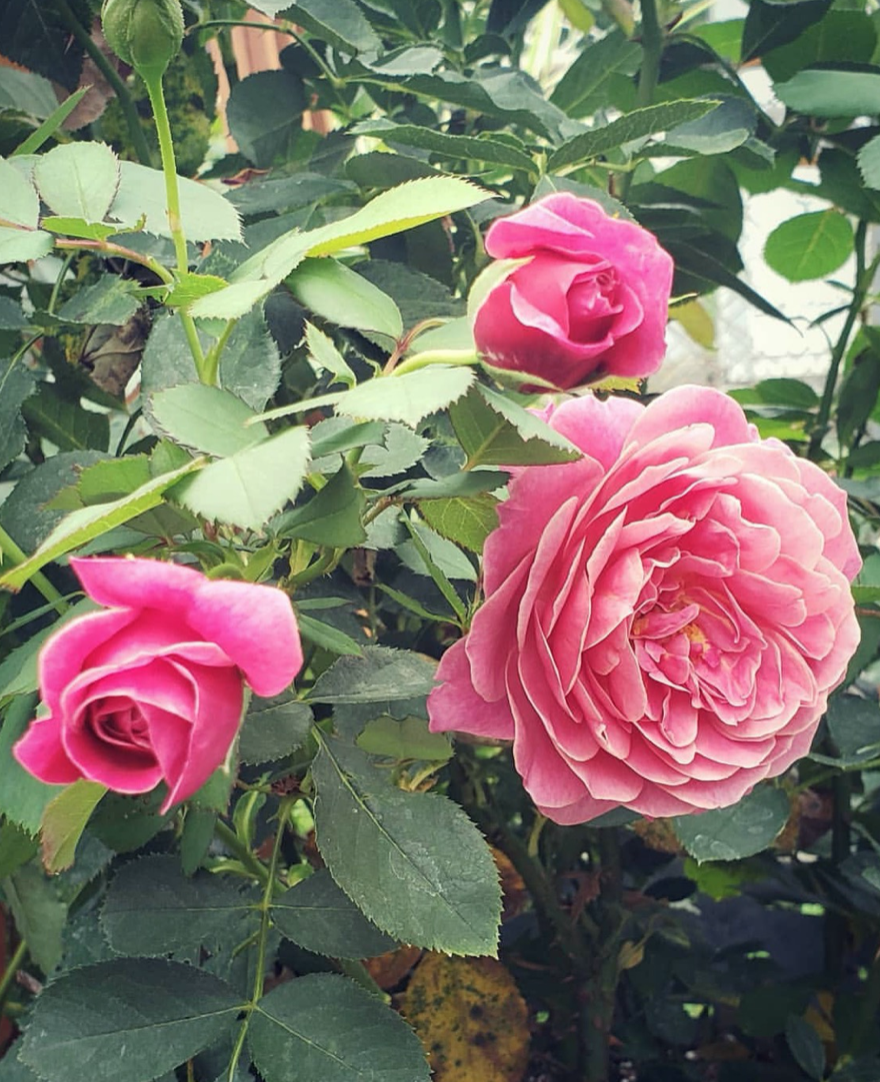
photo by @grass.to.garden
This rose comes as a bare root.
Bare root roses will ship in spring 2021 at the proper planting time.
This rose comes as a bare root.
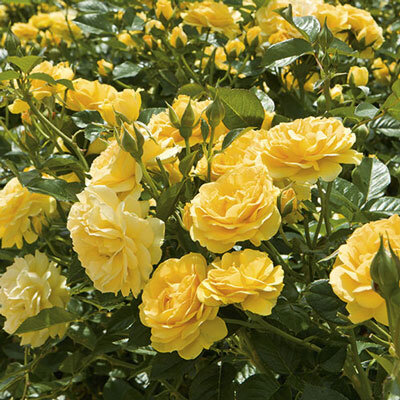
Just before our wonderful American icon left us, she selected this exceptional rose to bear her name. Julia loved the even butter gold color & the licorice candy fragrance. Yet it wasn't just the old-fashioned blooms that inspired the recipe. The perfectly rounded habit, super glossy leaves & great disease resistance finish off the dish. An awesome AARS award winner—a right & proper honor for a dear friend. Consistent, hardy & floriferous in all climates. Very disease resistant. Available budded & own-root.
photo by @carmenbarbaneagra
This rose comes as a bare root.
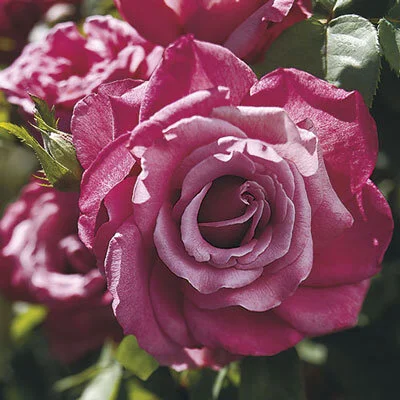
Magenta buds spiral open to varying tones of lilac & lavender. A wonderful cutting rose, Heirloom's sturdy stems bear flowers both singly and in clusters, clothed with glossy dark green leaves. Yet, it's that fragrance that has kept her in high regard. It's an allusive scent of apple, wine & ripe raspberries. Best flower size & most intense color in cool conditions.
This rose comes as a bare root.
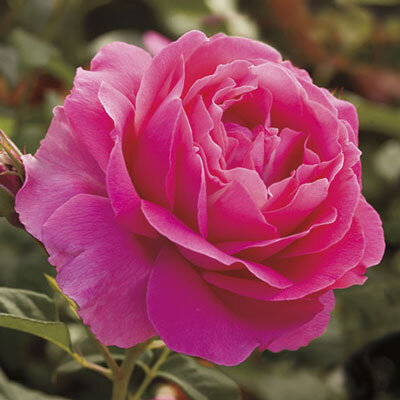
Here's a clean mean flowering machine whose big bountiful beauties reek with old rose romance, style & fragrance. Each lovely blossom invites you to bury your nose…to swoon from the perfume of the 'old time' roses of your dreams. A big vigorous 'shrubby' bush whose nodding clusters, abundant deep-green leaves & low-thorned cutting stems provide a perfect touch to a landscape or bouquet. A modern antique for all climates. A modern antique for all climates.
This rose comes as a bare root.
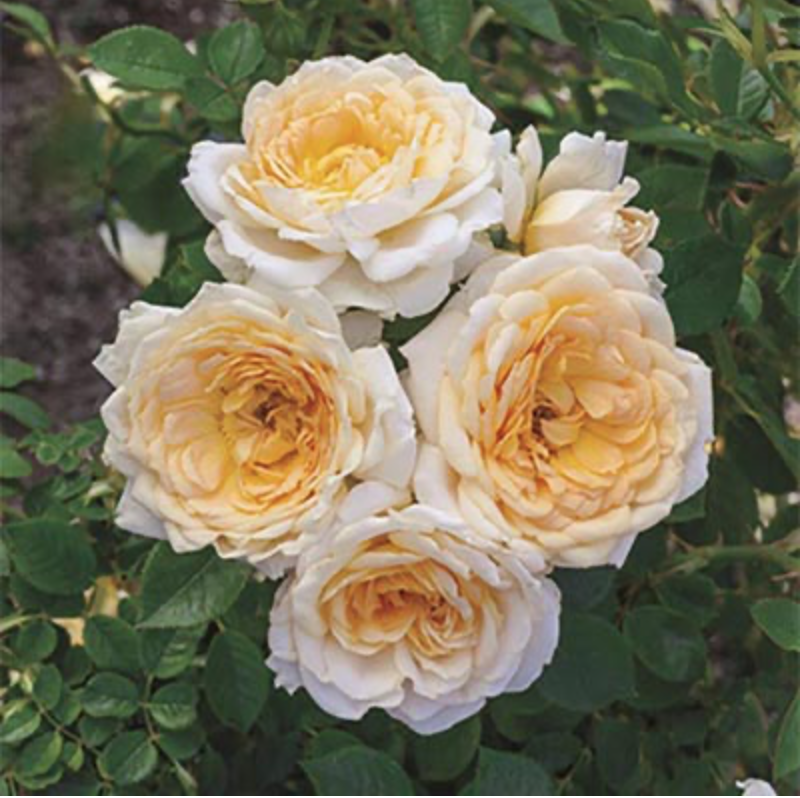
Edith's Darling, the new addition to the popular series of roses inspired by Downton Abbey characters, is a fitting tribute to Lady Edith and her beloved daughter Marigold. The joy Edith finds in her daughter is what you will feel when you're growing this true old-fashioned soft apricot-gold gem of a flower. Although diminutive in size, with a short, compact & bushy habit, rest assured that Edith's Darling is perfect to fill a border or confined spot in the landscape with a great flowering show of full-sized blooms with long lasting coloration. This darling of a rose exudes a strong fresh cut apple and fruity perfume that evokes Edith's unconditional motherly love. Now use your clippers to bring some blooms into the house to create a warm and fragrant ambiance around the dining table!
photo by @greentandemflowerfarm and @elizabethsaypol
This rose comes as a bare root.
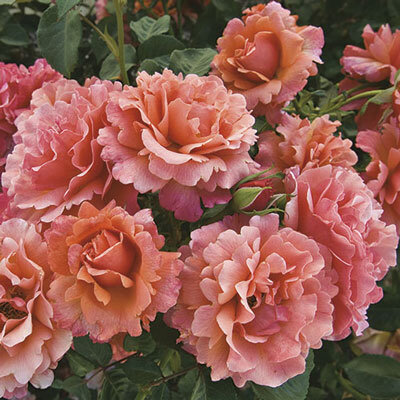
Deeeee…lectable colors of mango orange, peach pink & ripe apricot bounce off the mirrored glossy green leaves, providing a flamboyant fruit salad for the landscape. Her free-flowing swirling shades of sunset show up in fragrant large colorful clusters atop a rounded bushy plant. So disease resistant, vigorous, flowerful & fabulous, you just can't say 'no' to this seductress of the garden. The one & only AARS award winner granted for 2010. Perfect in every climate.
photo by @anastassia_shaitura
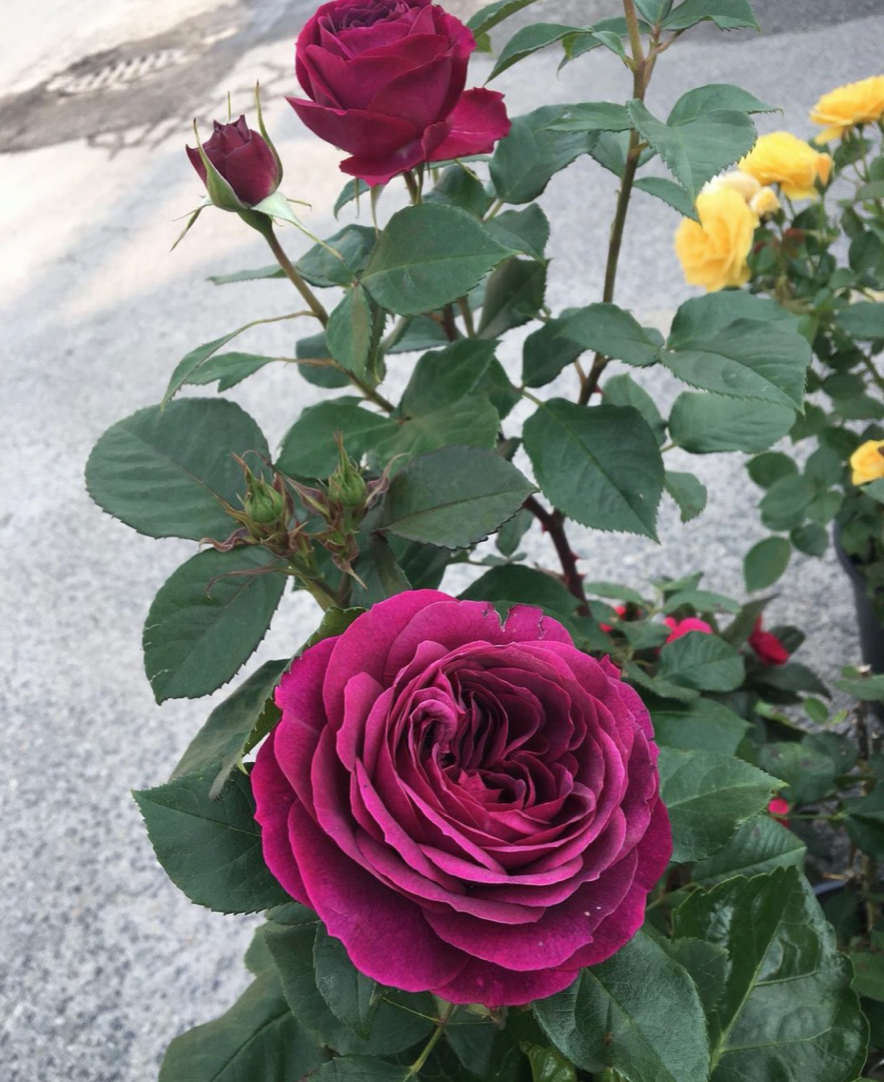
photo by @therealmemiki and @beekoon.t and evergreen.eden.garden
This rose comes as a bare root.
This rose comes as a bare root.
Bare root roses will ship in spring 2021 at the proper planting time.
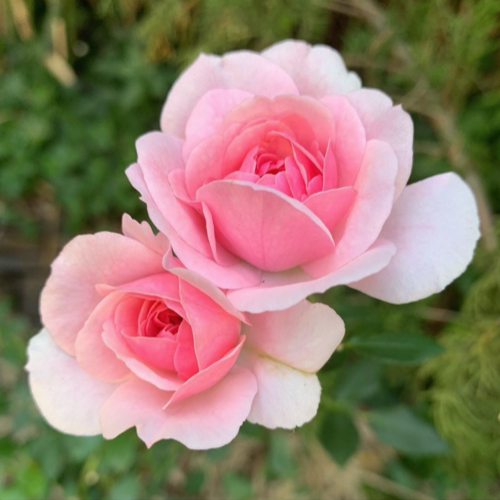
A low-care rose for the landscape—it's the first shrub to win the AARS award. It has several good qualities: vigorous, easy to grow, bushy and full of very disease-resistant foliage, hardy in harsh climates. Provides clusters of ruffled pink blooms with a sweet scent of fresh-cut apples. Proven performer. Hardy, clean & showy.
photo by @hillhouse_garden
Peonies
Peonies are grown from a root that is best planted in the fall or spring. Once your shrub is established, it will send up the most heavenly blooms, mid to late spring year after year. There’s a reason these incredibly fragrant flowers are known as “The Queen of Spring.”
10
Bulbs per Order
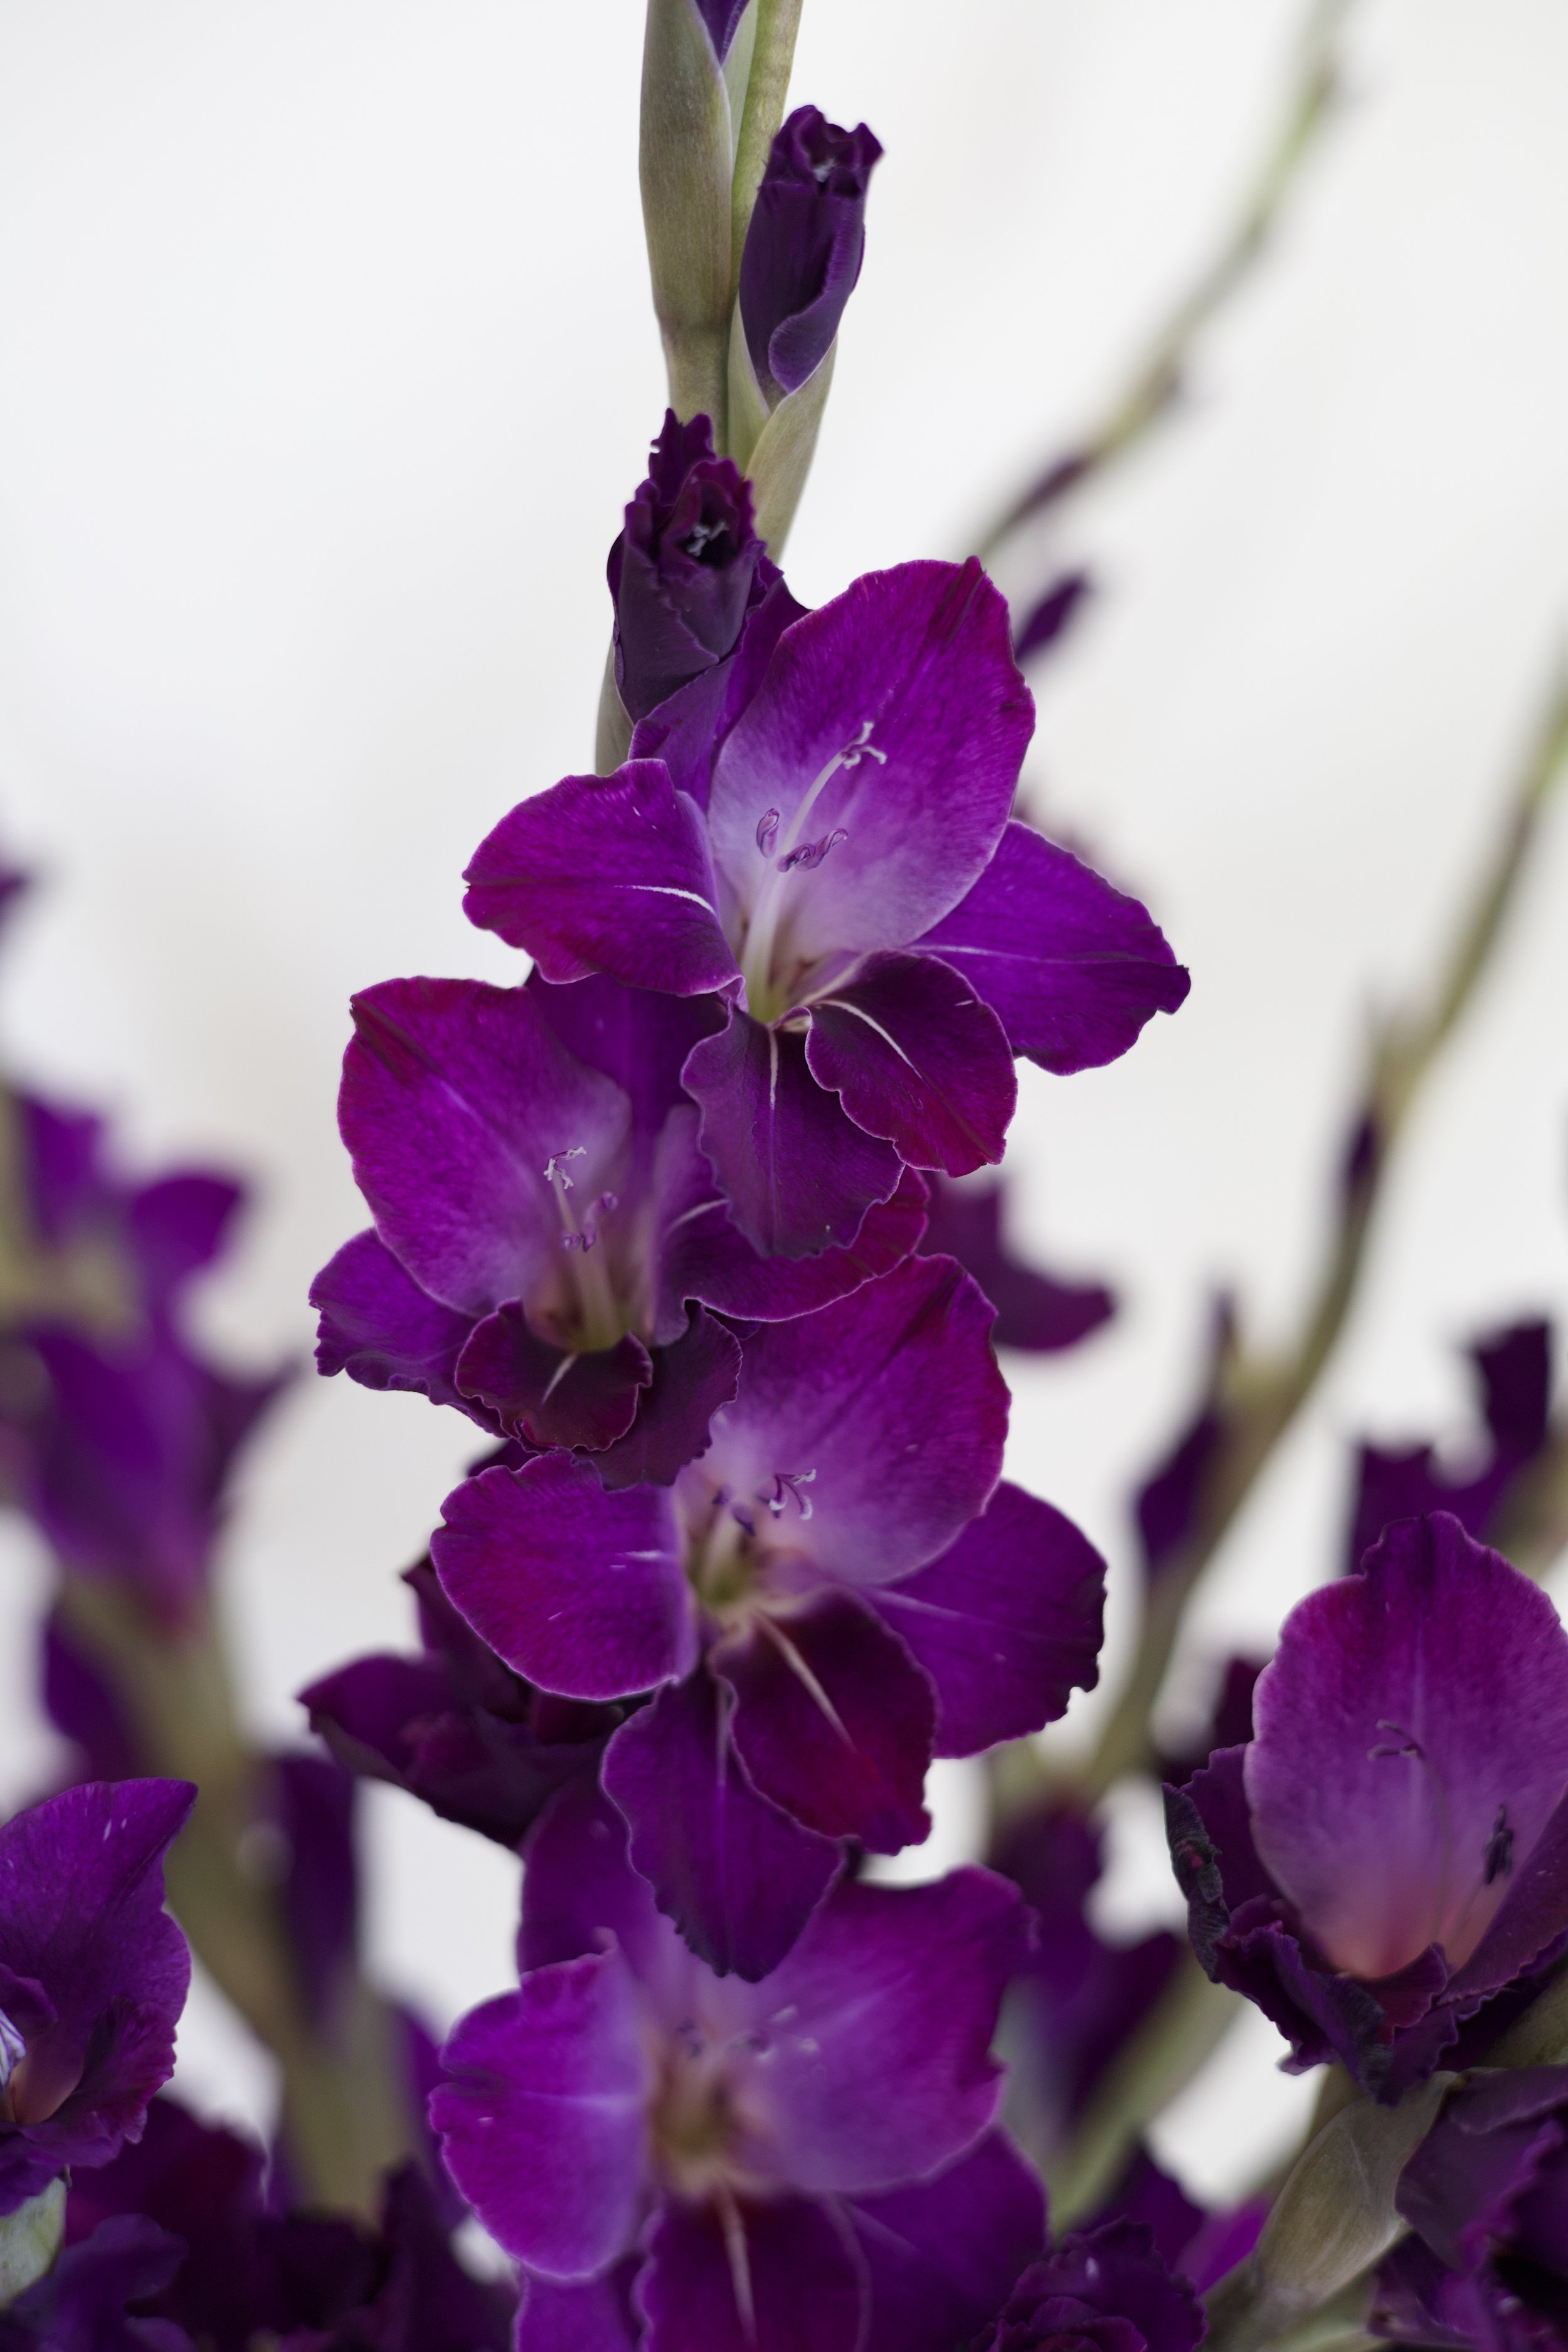
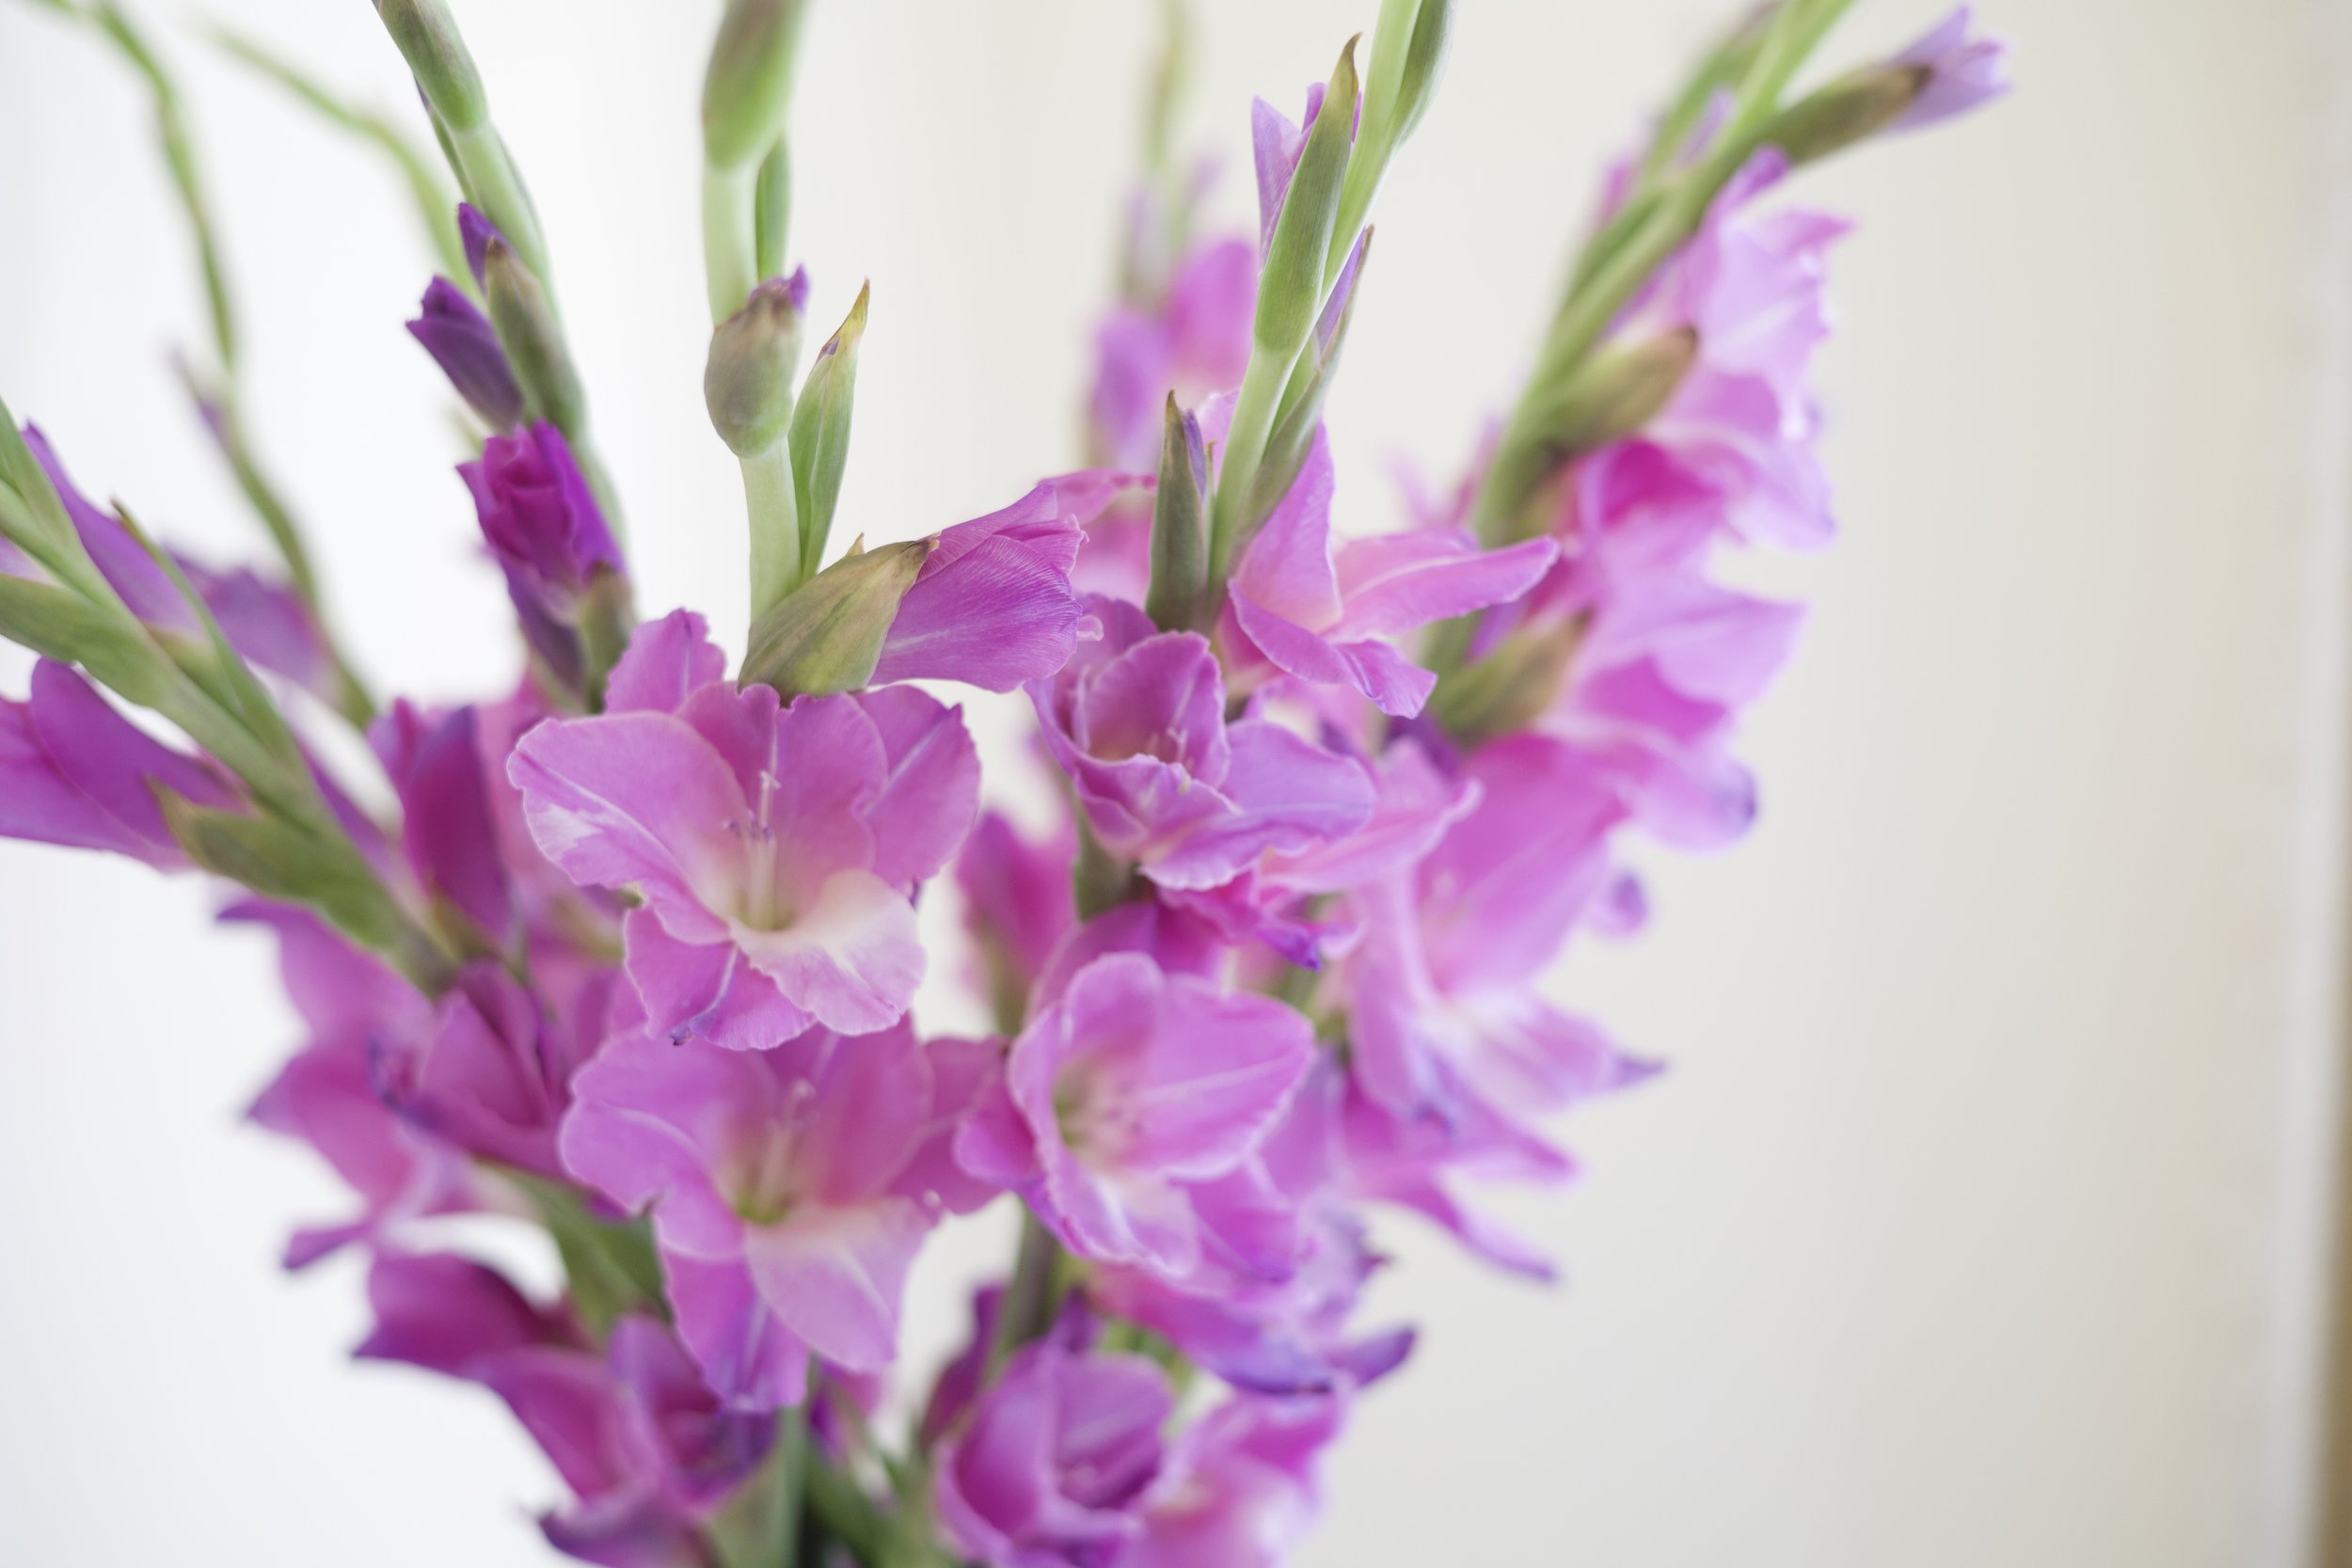
This mix includes a medley of all of our gladiolus colors.
Light Conditions: Sun
Days to Bloom: 65 - 70
Height: 45" – 60"
Hardiness Zone: 8 - 10
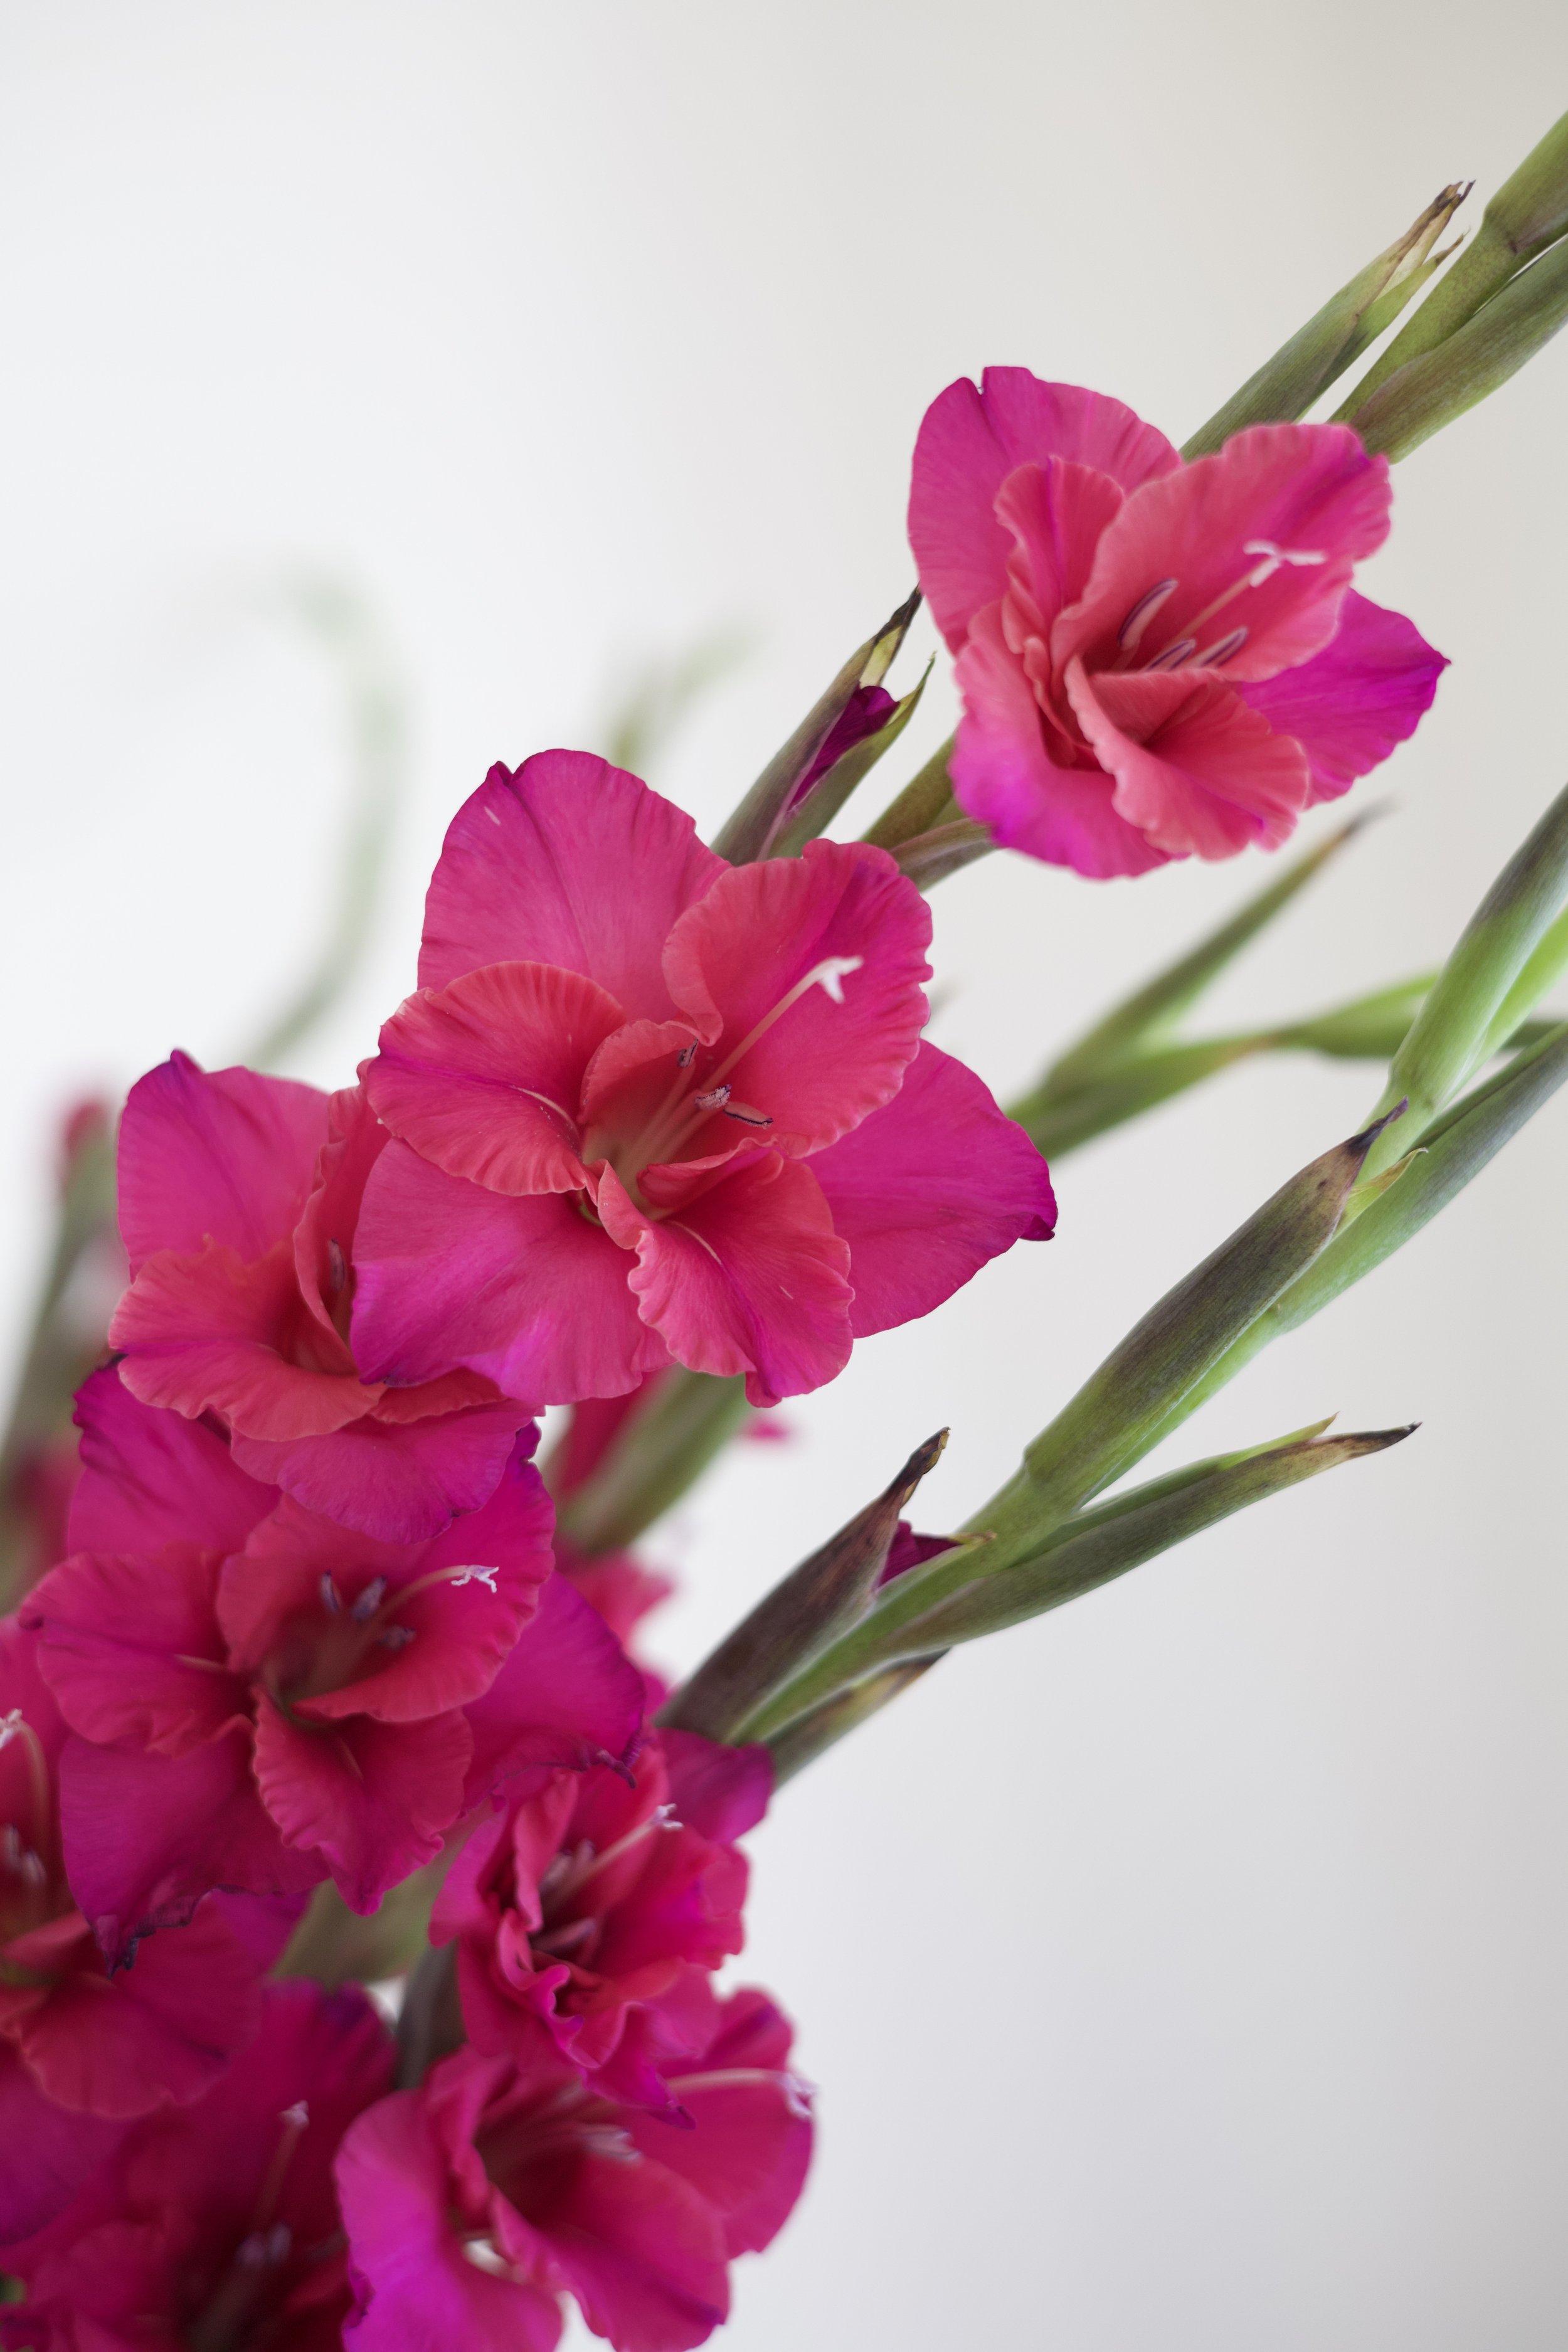
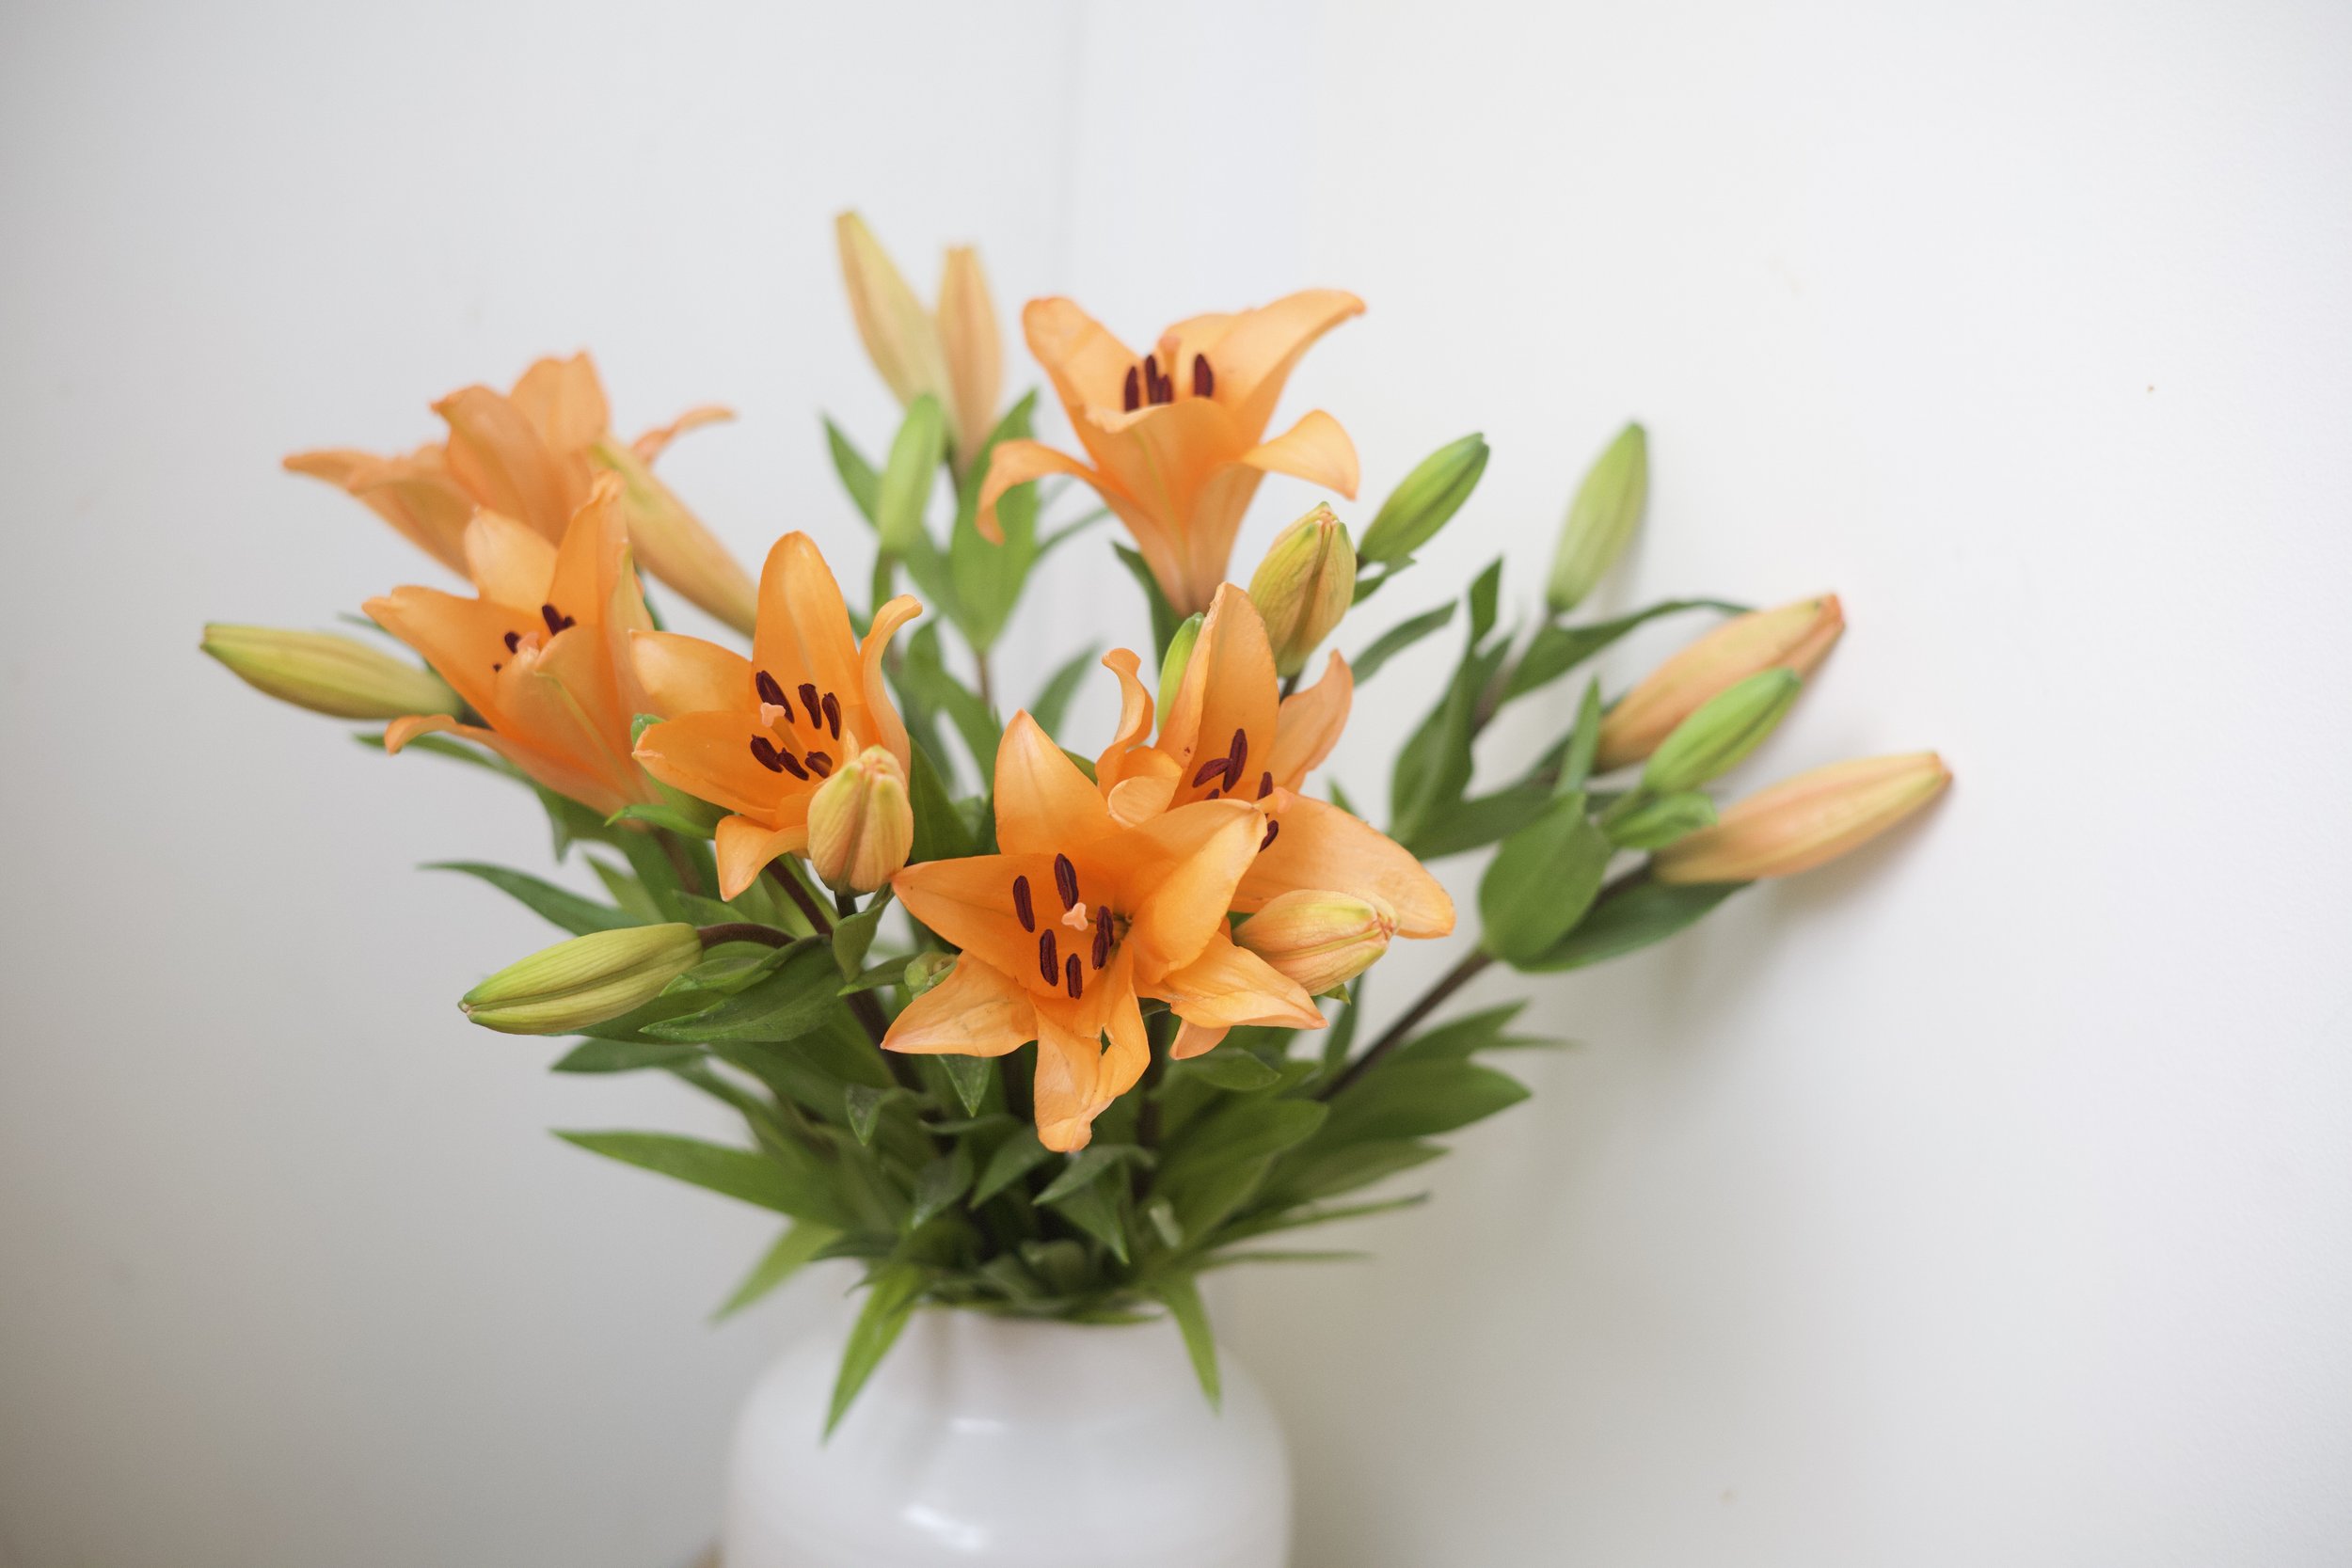
10 Bulbs per Order
Light Conditions: Sun
Days to Bloom: 75 - 80
Height: 50" – 60"
Hardiness Zone: 8 - 10
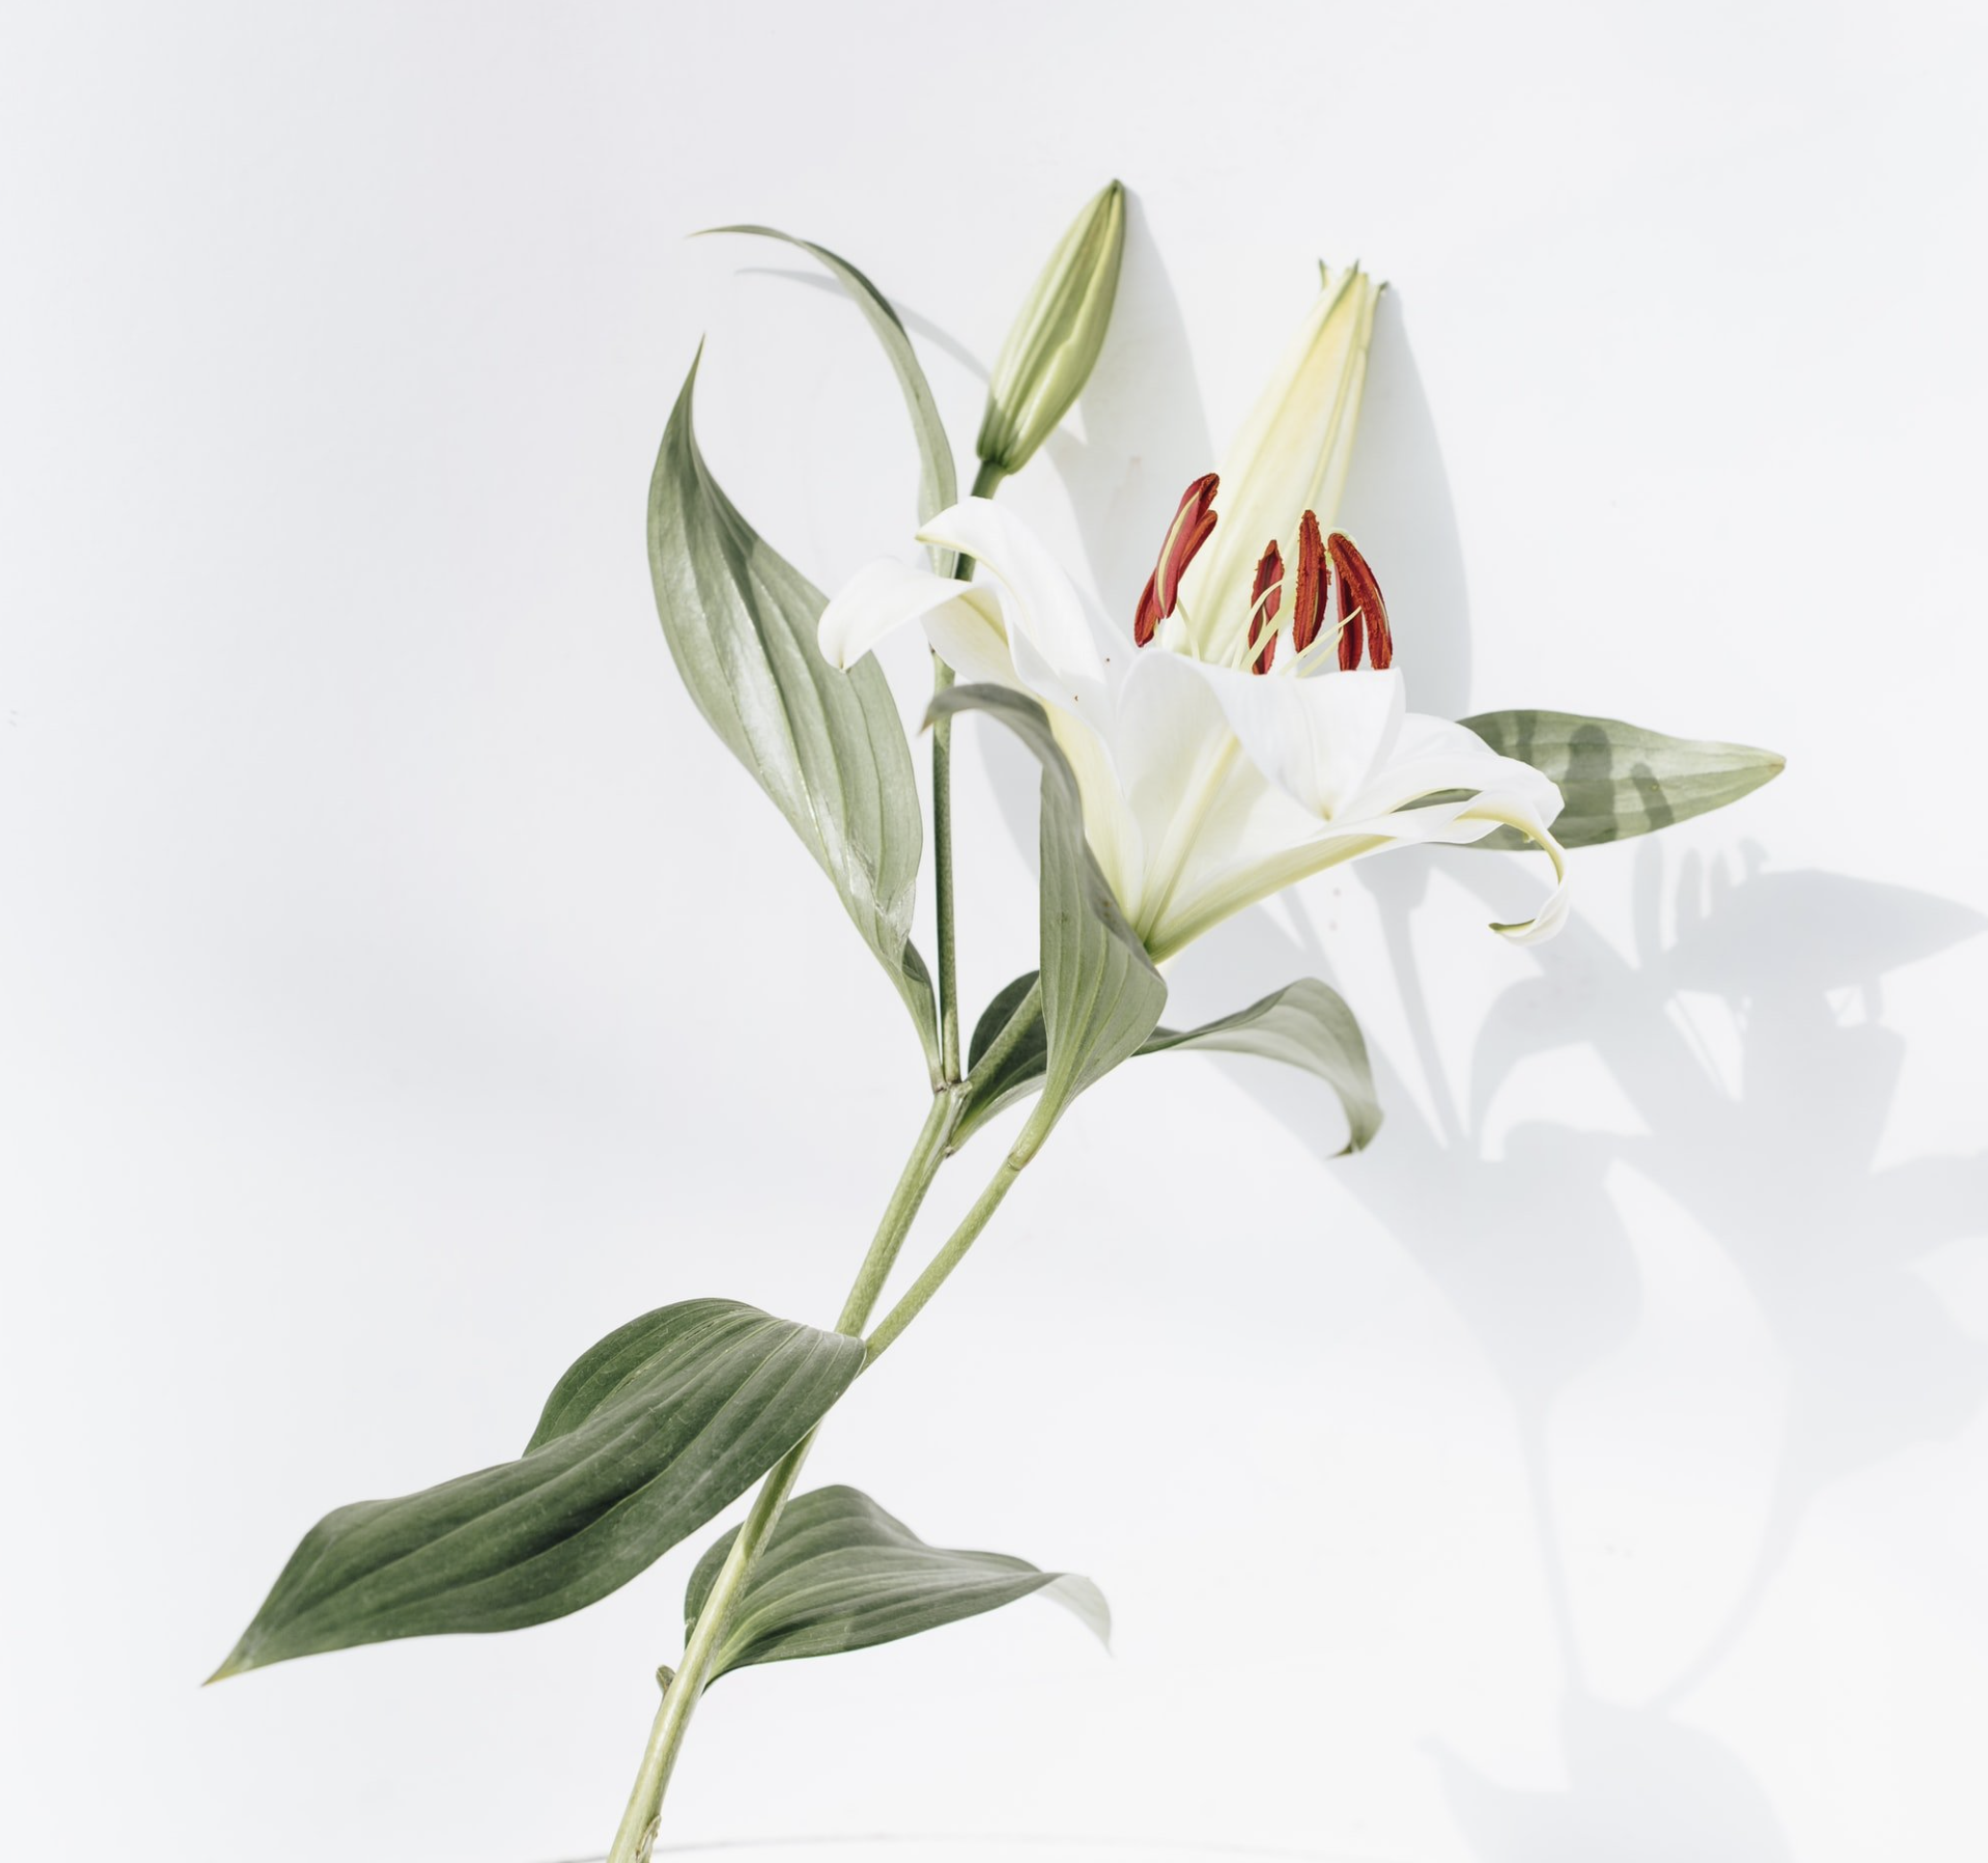
10 Bulbs per Order
Light Conditions: Sun
Days to Bloom: 75 - 80
Height: 50" – 60"
Hardiness Zone: 8 - 10
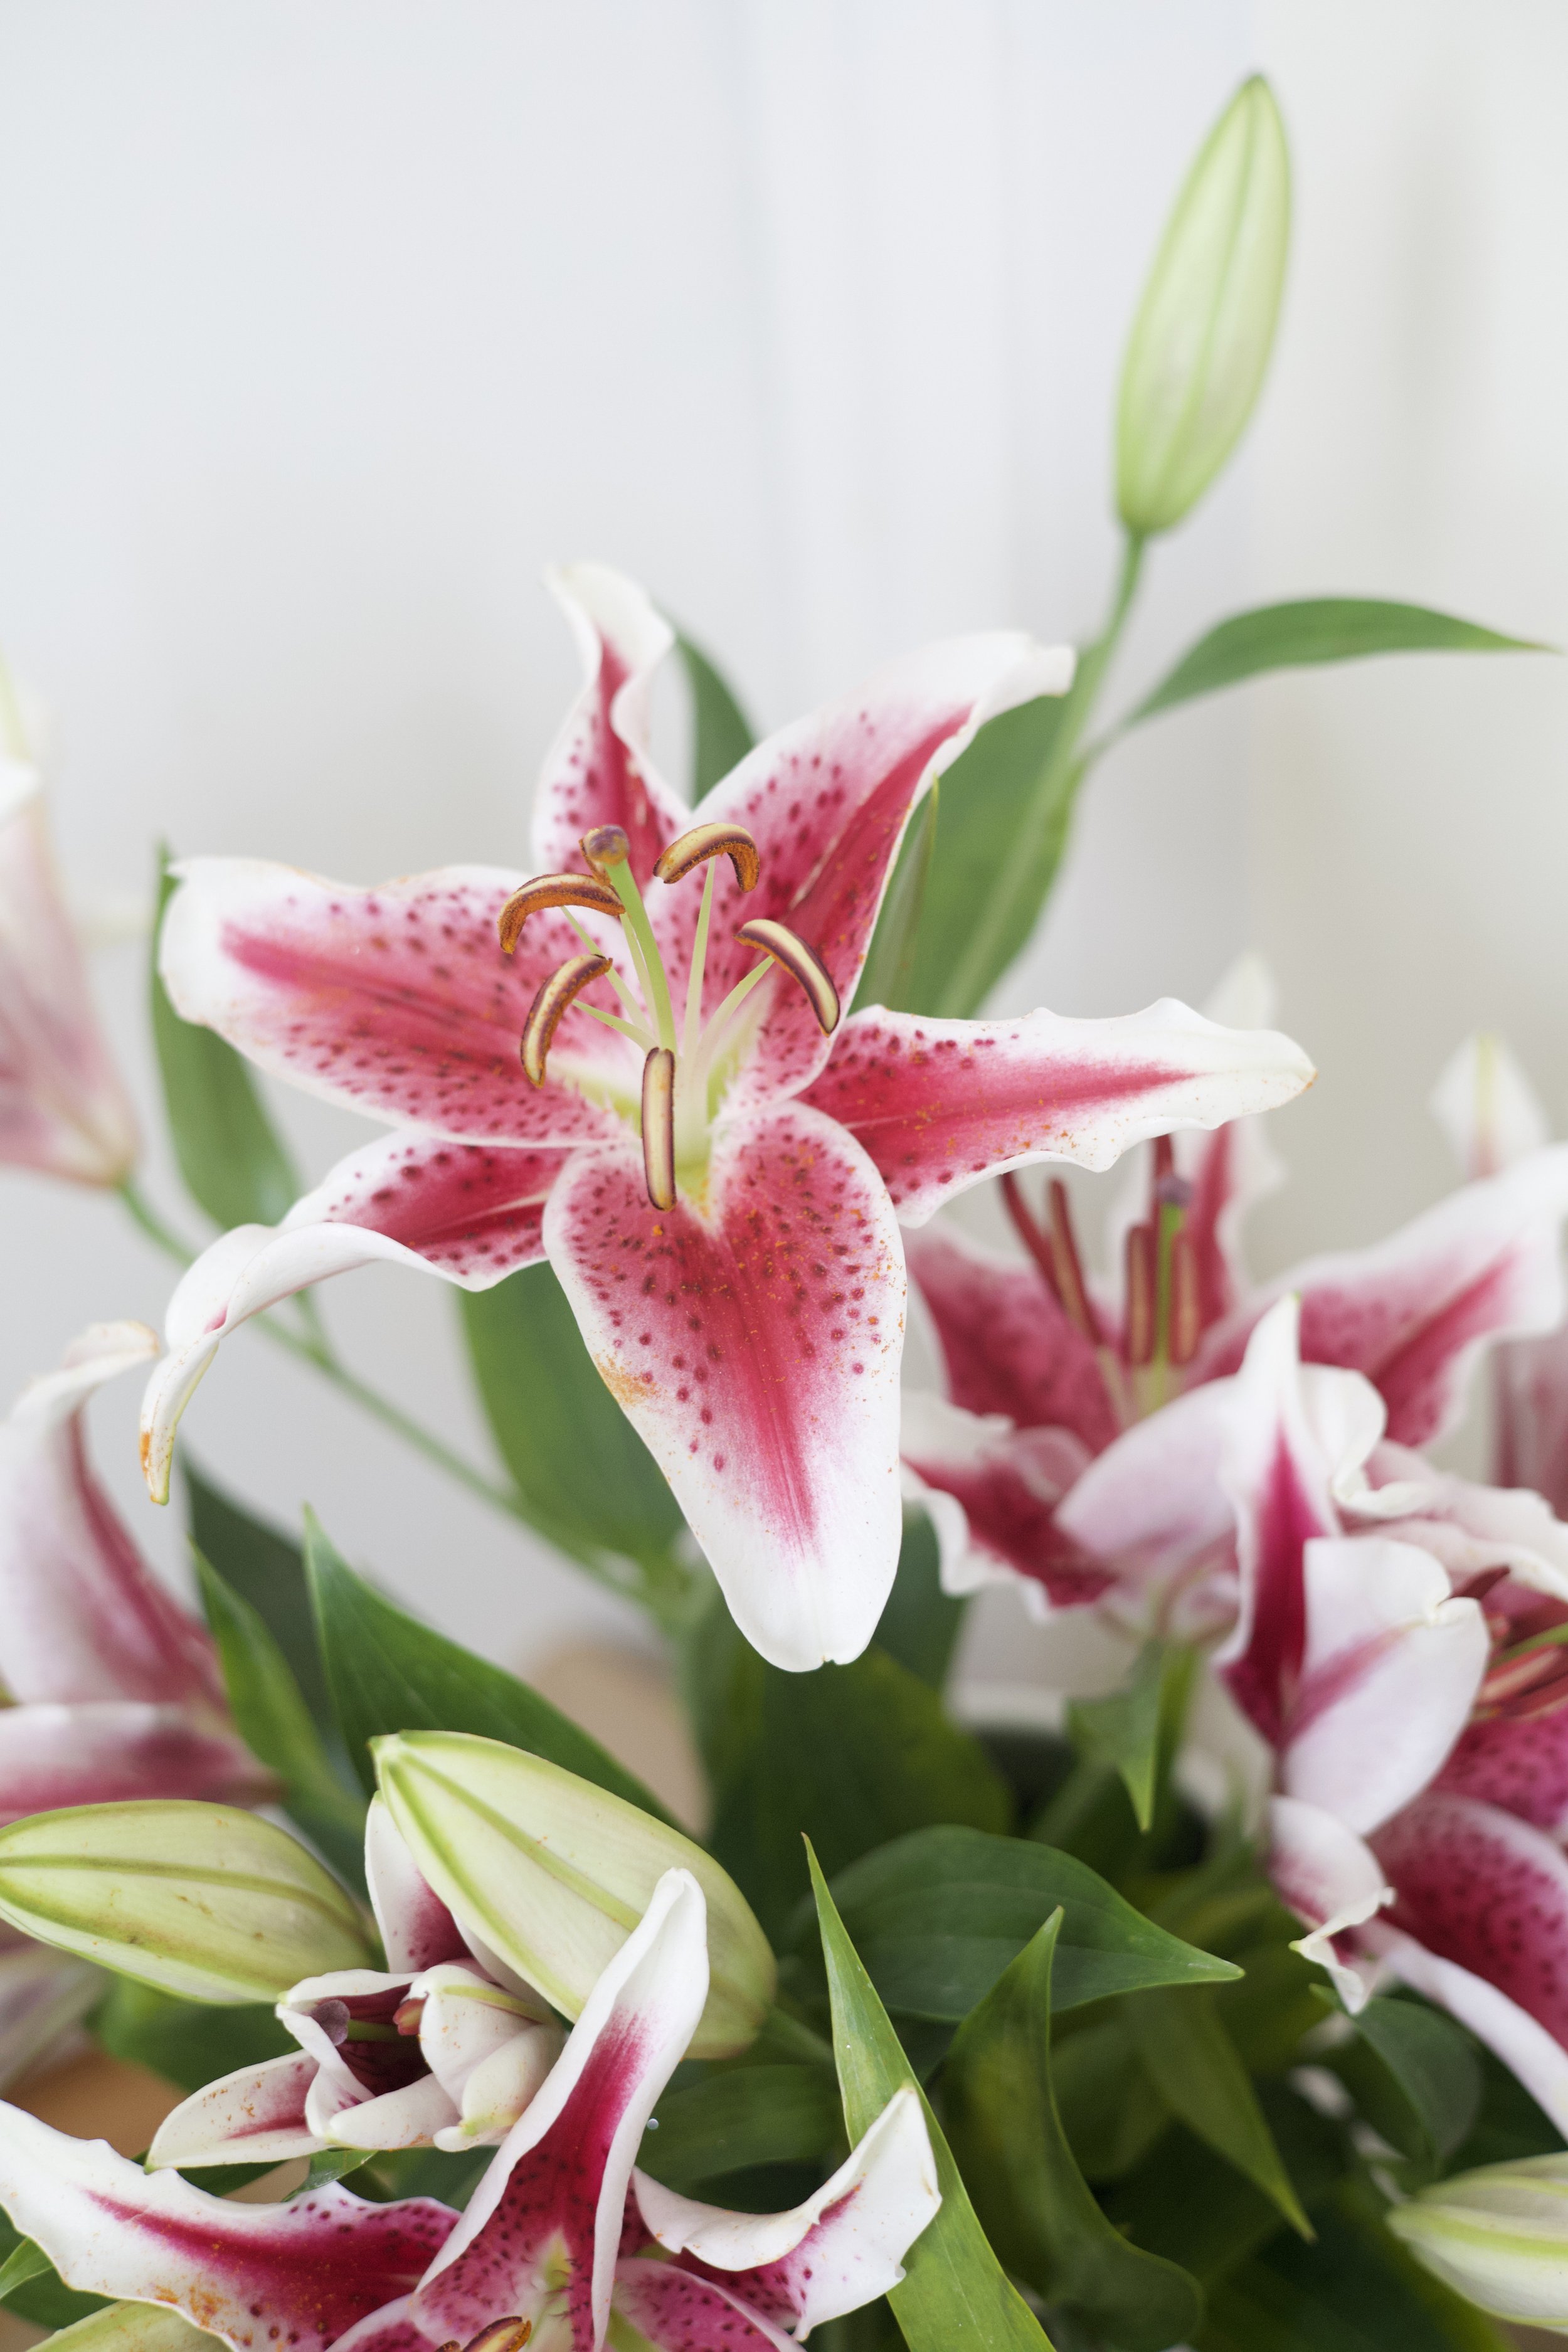
5 Bulbs per Order
How To Grow:
1. Prepare the soil by adding compost or manure.
2. Place the bulb in a hole that is 3 times deeper than the size of the bulb.
3. Water thoroughly and regularly allowing the soil to dry between watering.
4. Keep weed-free.
5 Bulbs per order
How To Grow:
1. Prepare the soil by adding compost or manure.
2. Place the bulb in a hole that is 3 times deeper than the size of the bulb.
3. Water thoroughly and regularly allowing the soil to dry between watering.
4. Keep weed-free.
5 Bulbs per order
How To Grow:
1. Prepare the soil by adding compost or manure.
2. Place the bulb in a hole that is 3 times deeper than the size of the bulb.
3. Water thoroughly and regularly allowing the soil to dry between watering.
4. Keep weed-free.
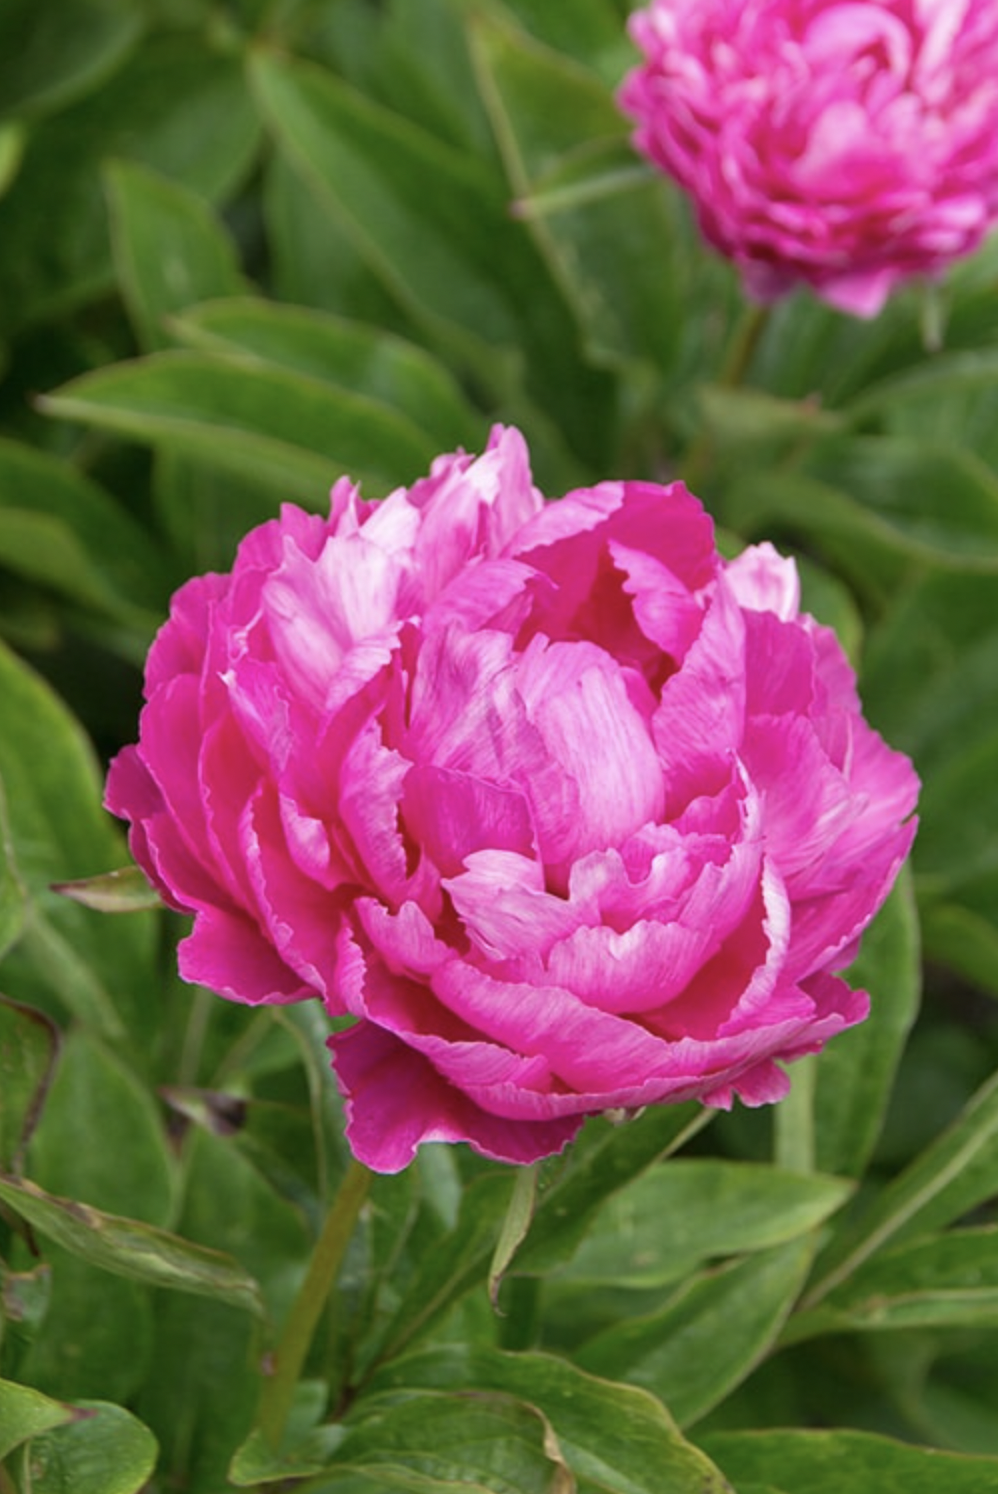
Price is for 1 Root
Peony Planting and Care Guide
Plant your peony roots when the soil can be worked and isn’t frozen, or heavily saturated. If you can’t plant your peonies right away then keep them inside the plastic bag for up to 4 weeks at 40F. Make sure the roots feel slightly damp throughout storage, mist if necessary since dry roots can lead to plant death. Plant your peonies as soon as possible for optimal success.
Container Started Peonies: Select a container with drainage holes that is at least 18” deep and 12” wide. Select a porous potting mix without fertilizer. Bury the root so the eyes (buds) are at 1” depth for zones 7-8, and 2” depth for zones 2-6. Water peonies in and store them at temperatures of 40-55F until buds begin to emerge and move them to a location receiving 6-8 hours of direct, unfiltered sunlight or 12-14 hours of artificial light. Water only when the soil begins to dry out. Fertilize sparingly after the buds have appeared. Once roots have filled container transplant into your garden at least 6-8 weeks before the first frost date.
Site: Select a location that has a minimum of 6-8 hours of direct sunlight each day. Spacing your plants 3-4’ apart will allow adequate air circulation preventing disease and will limit competition between neighboring plants. Choose your site with care since plant growth can be set back with transplanting or damage to their roots.
Soil Preparation: Peonies prefer a pH of 6-7, and well draining soil. Only add soil amendments if the soil is heavy clay or lacking in key nutrients which can be determined through the use of a soil test. Be careful not to over fertilize which can damage the young plant. Dig a hole large enough to accomodate the size and width of the roots. Then use a shovel to loosen the soil at the bottom of the hole to remove any rocks and allow the roots to spread. If any amendments are needed, dig a foot deeper into the hole and incorporate into the loose soil before planting the roots. Planting in the native soil is typically the best method to encourage growth of the young plants.
Plant Preparation: Soak peony roots in lukewarm water for 30 minutes before planting. Remove any damaged or rotting tubers.
Plant Burial: Planting at the right depth is essential for flower formation. The red buds on the roots should be facing upwards and be about 1” below the soil surface in zones 7-8 and 2” below the soil surface in zones 2-6. Deeper plantings will result in rotting buds and poor flower formation. After backfilling with soil press the soil down firmly and water in your newly planted peony tubers to ensure there are no air pockets.
Watering: Peonies require 1-2” of water a week but this need may vary depending on rainfall, time of year, and growth of the plant. Avoid watering late in the evening or splashing on the leaves which can result in disease.
Fertilizing: Begin fertilizing in the second year of growth and select a ratio of 3-5-5 or 5-10-10 which will be specified on the fertilizer label. Apply in two parts, half when buds emerge from the soil and the second half when flowering has finished.
Diseases and Pests: Peonies are prone to fungal diseases, including blight, which can rot the base of the stems, and powdery mildew, which coats the leaves in white. Fungicide may be required to lessen issues and products should be selected that can specifically be used for peonies and the disease problem. Always follow the directions on product labels and don’t spray if the plant is drought stressed or the temperature exceeds 80F which can damage the plant.
Pruning: Do not cut the stems of your peonies for cut flowers the first 3 years they are growing. Leaving the stems and leaves will encourage the plant to produce roots and more flowers in the future. In the fall, after the leaves and stems have died back, prune the stems 2-5 inches from the ground and remove from the site to prevent the spread of disease.
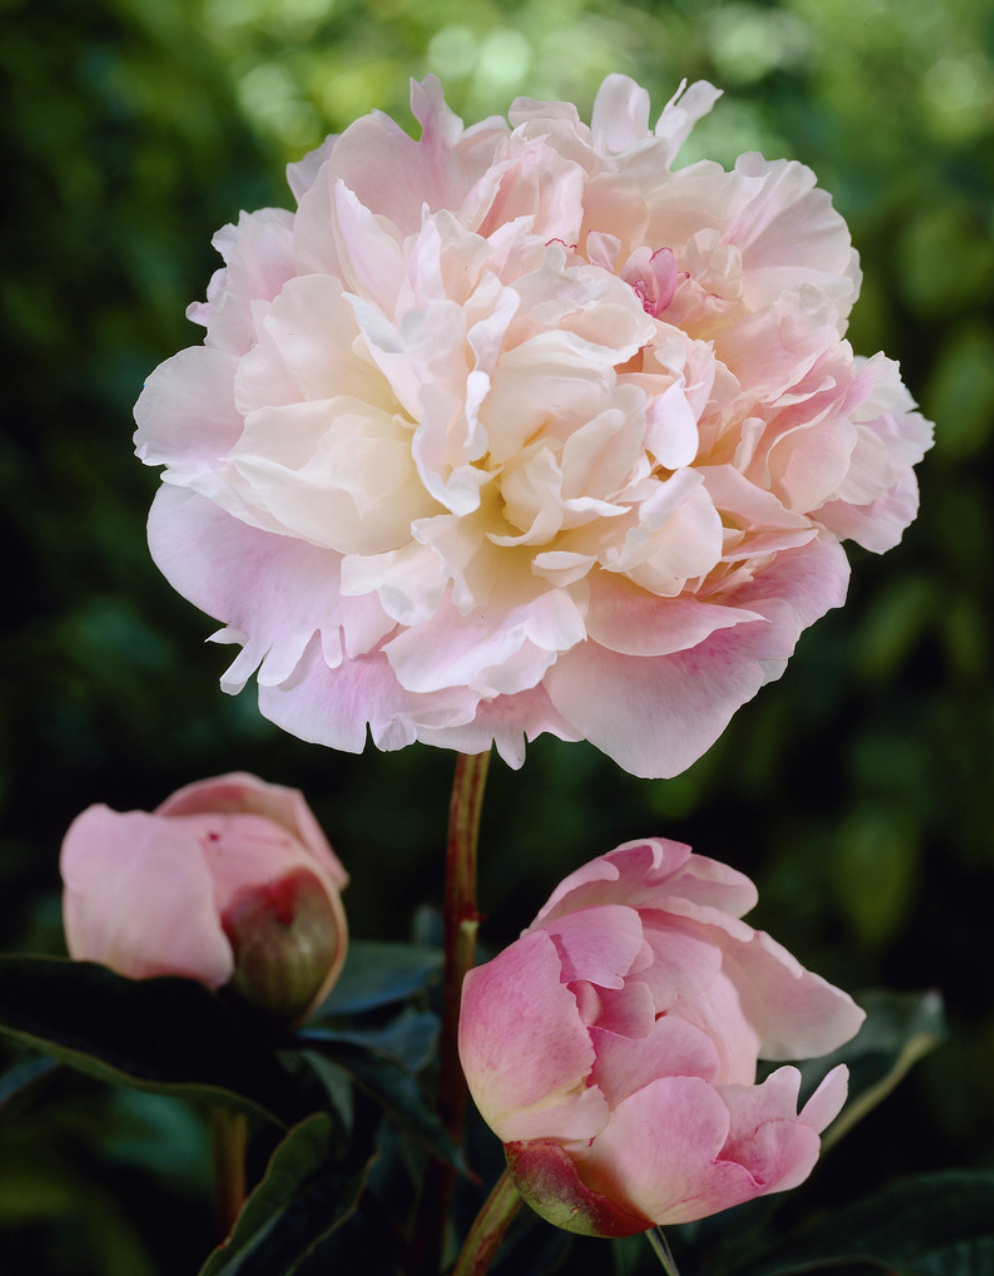
Price is for 1 root
Peony Planting and Care Guide
Plant your peony roots when the soil can be worked and isn’t frozen, or heavily saturated. If you can’t plant your peonies right away then keep them inside the plastic bag for up to 4 weeks at 40F. Make sure the roots feel slightly damp throughout storage, mist if necessary since dry roots can lead to plant death. Plant your peonies as soon as possible for optimal success.
Container Started Peonies: Select a container with drainage holes that is at least 18” deep and 12” wide. Select a porous potting mix without fertilizer. Bury the root so the eyes (buds) are at 1” depth for zones 7-8, and 2” depth for zones 2-6. Water peonies in and store them at temperatures of 40-55F until buds begin to emerge and move them to a location receiving 6-8 hours of direct, unfiltered sunlight or 12-14 hours of artificial light. Water only when the soil begins to dry out. Fertilize sparingly after the buds have appeared. Once roots have filled container transplant into your garden at least 6-8 weeks before the first frost date.
Site: Select a location that has a minimum of 6-8 hours of direct sunlight each day. Spacing your plants 3-4’ apart will allow adequate air circulation preventing disease and will limit competition between neighboring plants. Choose your site with care since plant growth can be set back with transplanting or damage to their roots.
Soil Preparation: Peonies prefer a pH of 6-7, and well draining soil. Only add soil amendments if the soil is heavy clay or lacking in key nutrients which can be determined through the use of a soil test. Be careful not to over fertilize which can damage the young plant. Dig a hole large enough to accomodate the size and width of the roots. Then use a shovel to loosen the soil at the bottom of the hole to remove any rocks and allow the roots to spread. If any amendments are needed, dig a foot deeper into the hole and incorporate into the loose soil before planting the roots. Planting in the native soil is typically the best method to encourage growth of the young plants.
Plant Preparation: Soak peony roots in lukewarm water for 30 minutes before planting. Remove any damaged or rotting tubers.
Plant Burial: Planting at the right depth is essential for flower formation. The red buds on the roots should be facing upwards and be about 1” below the soil surface in zones 7-8 and 2” below the soil surface in zones 2-6. Deeper plantings will result in rotting buds and poor flower formation. After backfilling with soil press the soil down firmly and water in your newly planted peony tubers to ensure there are no air pockets.
Watering: Peonies require 1-2” of water a week but this need may vary depending on rainfall, time of year, and growth of the plant. Avoid watering late in the evening or splashing on the leaves which can result in disease.
Fertilizing: Begin fertilizing in the second year of growth and select a ratio of 3-5-5 or 5-10-10 which will be specified on the fertilizer label. Apply in two parts, half when buds emerge from the soil and the second half when flowering has finished.
Diseases and Pests: Peonies are prone to fungal diseases, including blight, which can rot the base of the stems, and powdery mildew, which coats the leaves in white. Fungicide may be required to lessen issues and products should be selected that can specifically be used for peonies and the disease problem. Always follow the directions on product labels and don’t spray if the plant is drought stressed or the temperature exceeds 80F which can damage the plant.
Pruning: Do not cut the stems of your peonies for cut flowers the first 3 years they are growing. Leaving the stems and leaves will encourage the plant to produce roots and more flowers in the future. In the fall, after the leaves and stems have died back, prune the stems 2-5 inches from the ground and remove from the site to prevent the spread of disease.
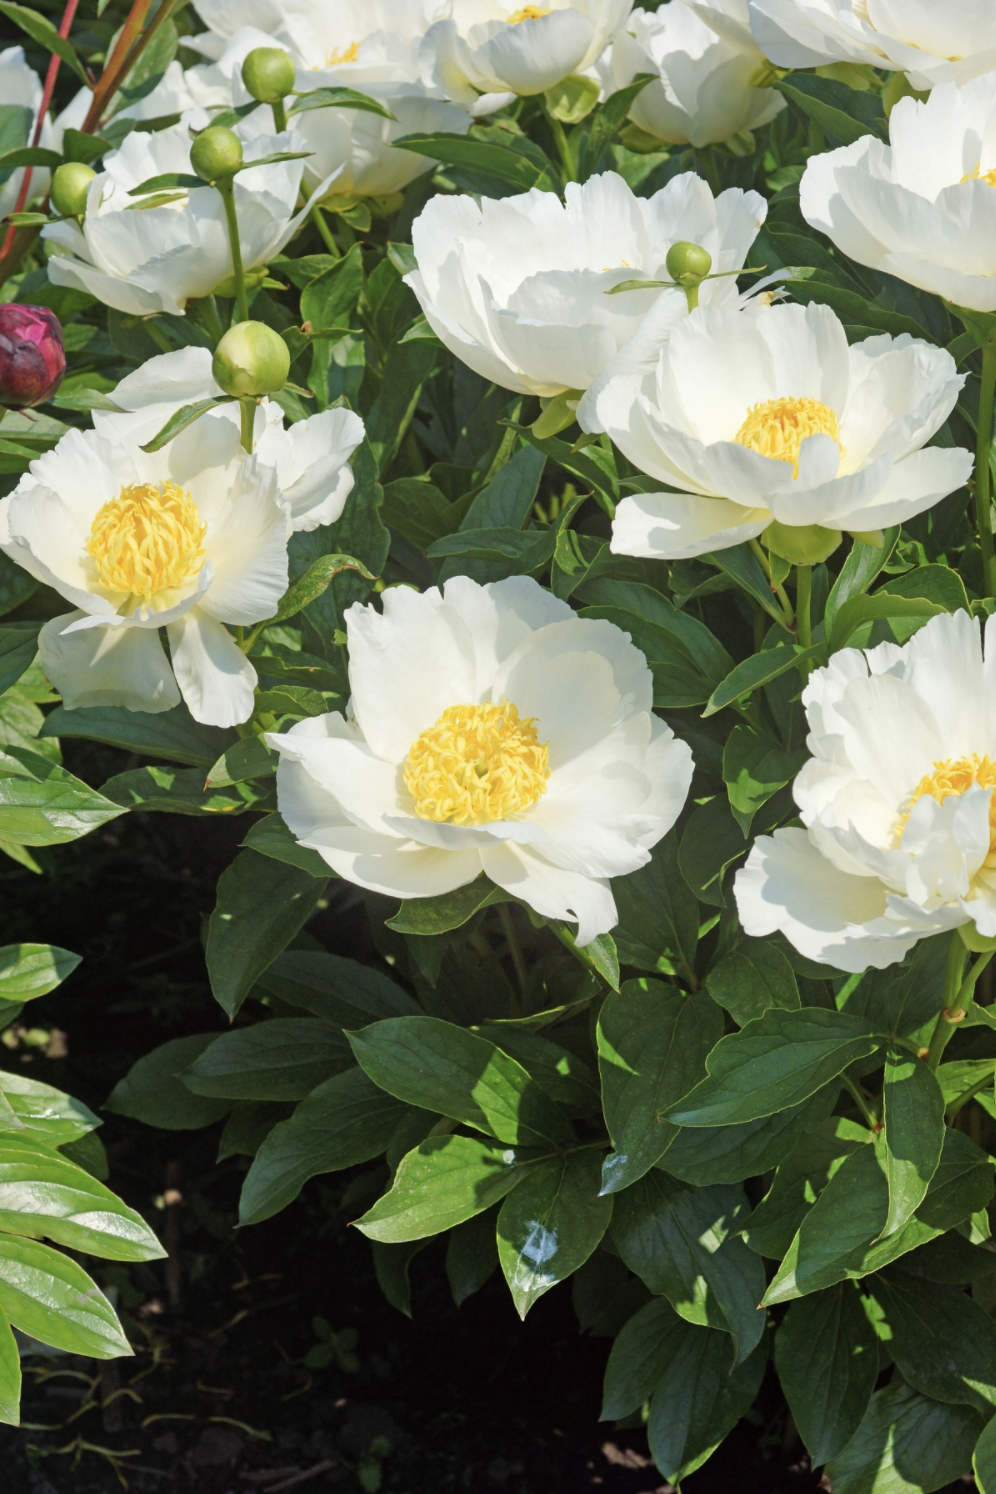
Price is for 1 root
Peony Planting and Care Guide
Plant your peony roots when the soil can be worked and isn’t frozen, or heavily saturated. If you can’t plant your peonies right away then keep them inside the plastic bag for up to 4 weeks at 40F. Make sure the roots feel slightly damp throughout storage, mist if necessary since dry roots can lead to plant death. Plant your peonies as soon as possible for optimal success.
Container Started Peonies: Select a container with drainage holes that is at least 18” deep and 12” wide. Select a porous potting mix without fertilizer. Bury the root so the eyes (buds) are at 1” depth for zones 7-8, and 2” depth for zones 2-6. Water peonies in and store them at temperatures of 40-55F until buds begin to emerge and move them to a location receiving 6-8 hours of direct, unfiltered sunlight or 12-14 hours of artificial light. Water only when the soil begins to dry out. Fertilize sparingly after the buds have appeared. Once roots have filled container transplant into your garden at least 6-8 weeks before the first frost date.
Site: Select a location that has a minimum of 6-8 hours of direct sunlight each day. Spacing your plants 3-4’ apart will allow adequate air circulation preventing disease and will limit competition between neighboring plants. Choose your site with care since plant growth can be set back with transplanting or damage to their roots.
Soil Preparation: Peonies prefer a pH of 6-7, and well draining soil. Only add soil amendments if the soil is heavy clay or lacking in key nutrients which can be determined through the use of a soil test. Be careful not to over fertilize which can damage the young plant. Dig a hole large enough to accomodate the size and width of the roots. Then use a shovel to loosen the soil at the bottom of the hole to remove any rocks and allow the roots to spread. If any amendments are needed, dig a foot deeper into the hole and incorporate into the loose soil before planting the roots. Planting in the native soil is typically the best method to encourage growth of the young plants.
Plant Preparation: Soak peony roots in lukewarm water for 30 minutes before planting. Remove any damaged or rotting tubers.
Plant Burial: Planting at the right depth is essential for flower formation. The red buds on the roots should be facing upwards and be about 1” below the soil surface in zones 7-8 and 2” below the soil surface in zones 2-6. Deeper plantings will result in rotting buds and poor flower formation. After backfilling with soil press the soil down firmly and water in your newly planted peony tubers to ensure there are no air pockets.
Watering: Peonies require 1-2” of water a week but this need may vary depending on rainfall, time of year, and growth of the plant. Avoid watering late in the evening or splashing on the leaves which can result in disease.
Fertilizing: Begin fertilizing in the second year of growth and select a ratio of 3-5-5 or 5-10-10 which will be specified on the fertilizer label. Apply in two parts, half when buds emerge from the soil and the second half when flowering has finished.
Diseases and Pests: Peonies are prone to fungal diseases, including blight, which can rot the base of the stems, and powdery mildew, which coats the leaves in white. Fungicide may be required to lessen issues and products should be selected that can specifically be used for peonies and the disease problem. Always follow the directions on product labels and don’t spray if the plant is drought stressed or the temperature exceeds 80F which can damage the plant.
Pruning: Do not cut the stems of your peonies for cut flowers the first 3 years they are growing. Leaving the stems and leaves will encourage the plant to produce roots and more flowers in the future. In the fall, after the leaves and stems have died back, prune the stems 2-5 inches from the ground and remove from the site to prevent the spread of disease.
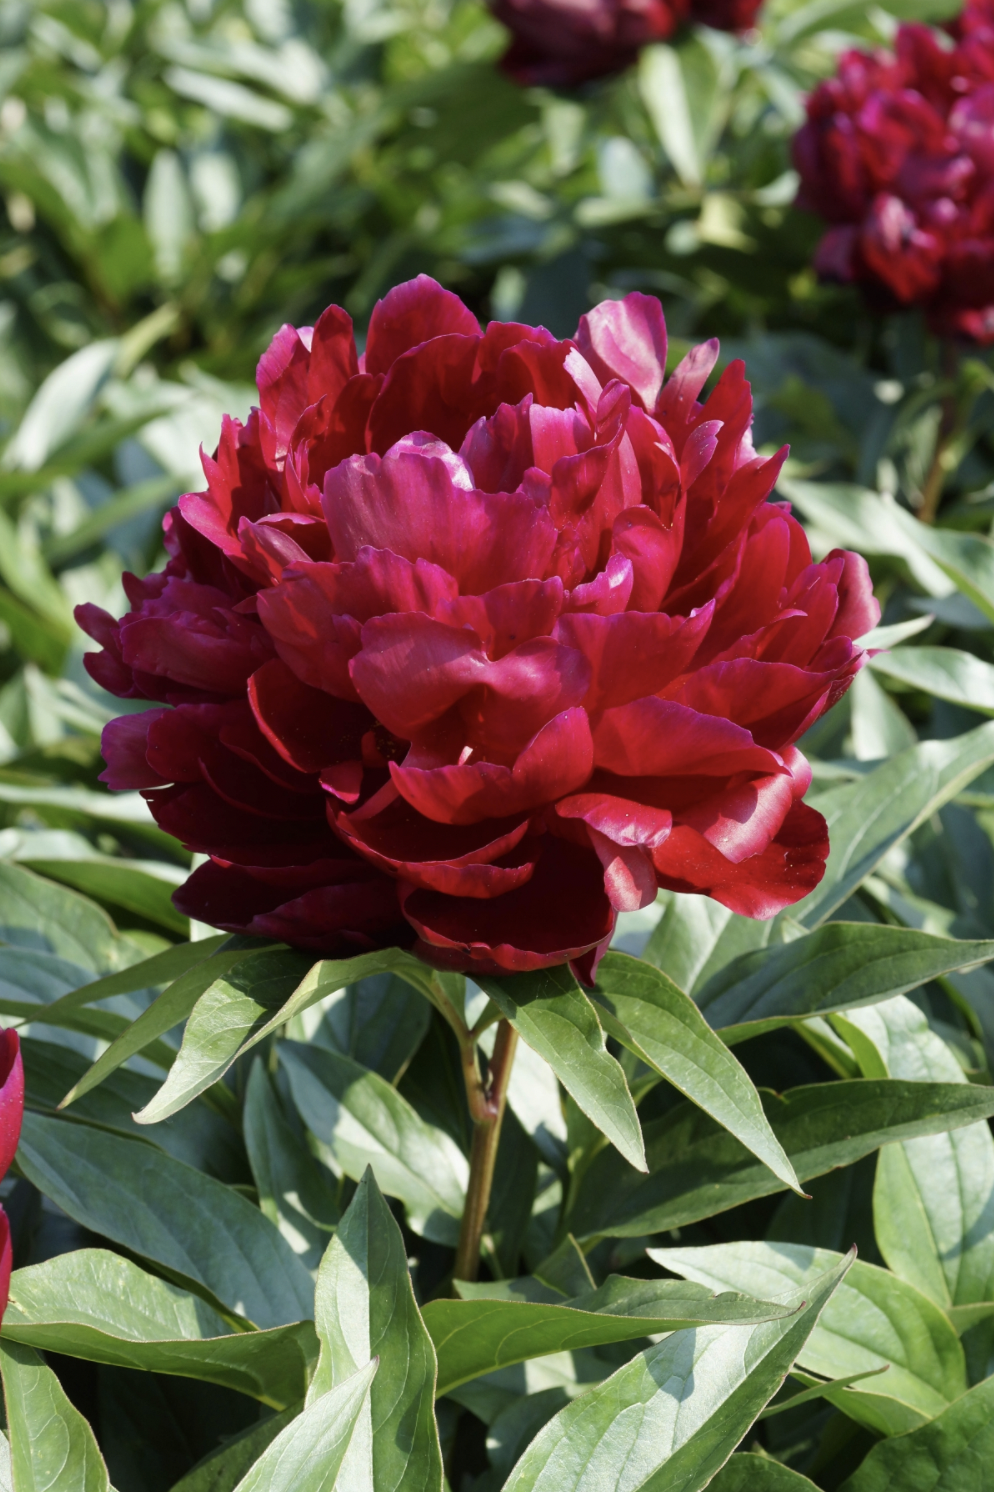
Dark maroon red soft fragrant flowers floriferous variety. Excellent for border and cutflower
Peony Planting and Care Guide
Plant your peony roots when the soil can be worked and isn’t frozen, or heavily saturated. If you can’t plant your peonies right away then keep them inside the plastic bag for up to 4 weeks at 40F. Make sure the roots feel slightly damp throughout storage, mist if necessary since dry roots can lead to plant death. Plant your peonies as soon as possible for optimal success.
Container Started Peonies: Select a container with drainage holes that is at least 18” deep and 12” wide. Select a porous potting mix without fertilizer. Bury the root so the eyes (buds) are at 1” depth for zones 7-8, and 2” depth for zones 2-6. Water peonies in and store them at temperatures of 40-55F until buds begin to emerge and move them to a location receiving 6-8 hours of direct, unfiltered sunlight or 12-14 hours of artificial light. Water only when the soil begins to dry out. Fertilize sparingly after the buds have appeared. Once roots have filled container transplant into your garden at least 6-8 weeks before the first frost date.
Site: Select a location that has a minimum of 6-8 hours of direct sunlight each day. Spacing your plants 3-4’ apart will allow adequate air circulation preventing disease and will limit competition between neighboring plants. Choose your site with care since plant growth can be set back with transplanting or damage to their roots.
Soil Preparation: Peonies prefer a pH of 6-7, and well draining soil. Only add soil amendments if the soil is heavy clay or lacking in key nutrients which can be determined through the use of a soil test. Be careful not to over fertilize which can damage the young plant. Dig a hole large enough to accomodate the size and width of the roots. Then use a shovel to loosen the soil at the bottom of the hole to remove any rocks and allow the roots to spread. If any amendments are needed, dig a foot deeper into the hole and incorporate into the loose soil before planting the roots. Planting in the native soil is typically the best method to encourage growth of the young plants.
Plant Preparation: Soak peony roots in lukewarm water for 30 minutes before planting. Remove any damaged or rotting tubers.
Plant Burial: Planting at the right depth is essential for flower formation. The red buds on the roots should be facing upwards and be about 1” below the soil surface in zones 7-8 and 2” below the soil surface in zones 2-6. Deeper plantings will result in rotting buds and poor flower formation. After backfilling with soil press the soil down firmly and water in your newly planted peony tubers to ensure there are no air pockets.
Watering: Peonies require 1-2” of water a week but this need may vary depending on rainfall, time of year, and growth of the plant. Avoid watering late in the evening or splashing on the leaves which can result in disease.
Fertilizing: Begin fertilizing in the second year of growth and select a ratio of 3-5-5 or 5-10-10 which will be specified on the fertilizer label. Apply in two parts, half when buds emerge from the soil and the second half when flowering has finished.
Diseases and Pests: Peonies are prone to fungal diseases, including blight, which can rot the base of the stems, and powdery mildew, which coats the leaves in white. Fungicide may be required to lessen issues and products should be selected that can specifically be used for peonies and the disease problem. Always follow the directions on product labels and don’t spray if the plant is drought stressed or the temperature exceeds 80F which can damage the plant.
Pruning: Do not cut the stems of your peonies for cut flowers the first 3 years they are growing. Leaving the stems and leaves will encourage the plant to produce roots and more flowers in the future. In the fall, after the leaves and stems have died back, prune the stems 2-5 inches from the ground and remove from the site to prevent the spread of disease.
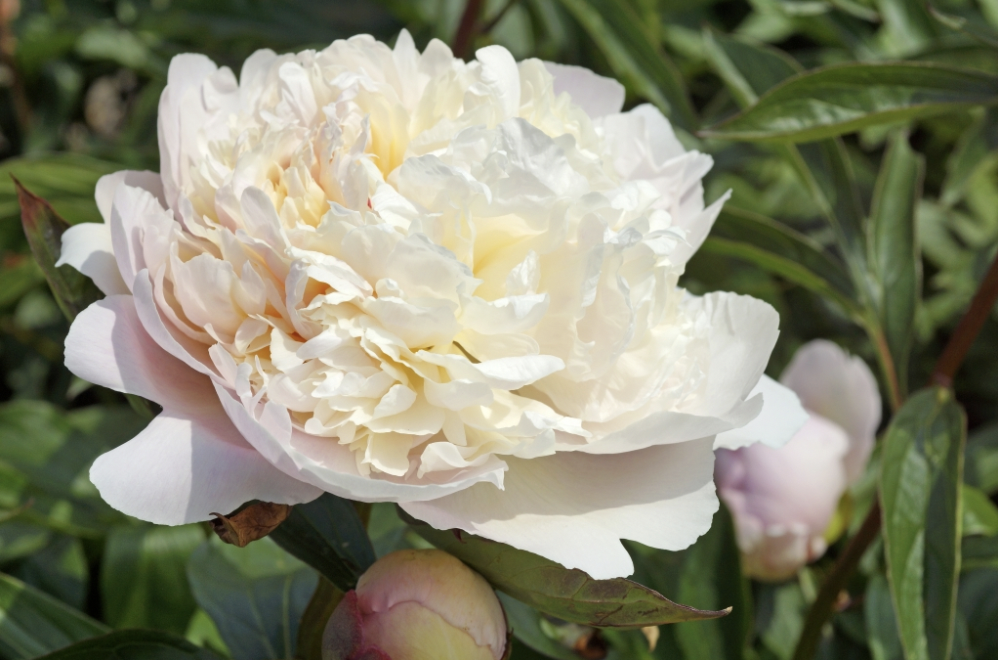
1 Tuber.
Tubers ship in March/April
Bloom Time: Late Spring to Early Summer
Light: Sun to Part Shade
Height: 30-32 Inches
Spacing: 24-36 Inches
Zones: 3-8
Perennial
Do not plant tubers too deep. Keep in mind that peony shrubs take 2-3 years to establish and will not bloom the first year. Highly fragrant and beautiful, they are worth the wait. If using for cutting, harvest before buds open, when they’re soft like a marshmallow. They will open in the vase. Cut foliage to the ground every fall.
Photo by @kaijamarita
Peonies do best when planted in fall and they will only grow if temps get below 40F in the winter so zones 8 may be possible but consider this our caution statement for people ordering above that zone.
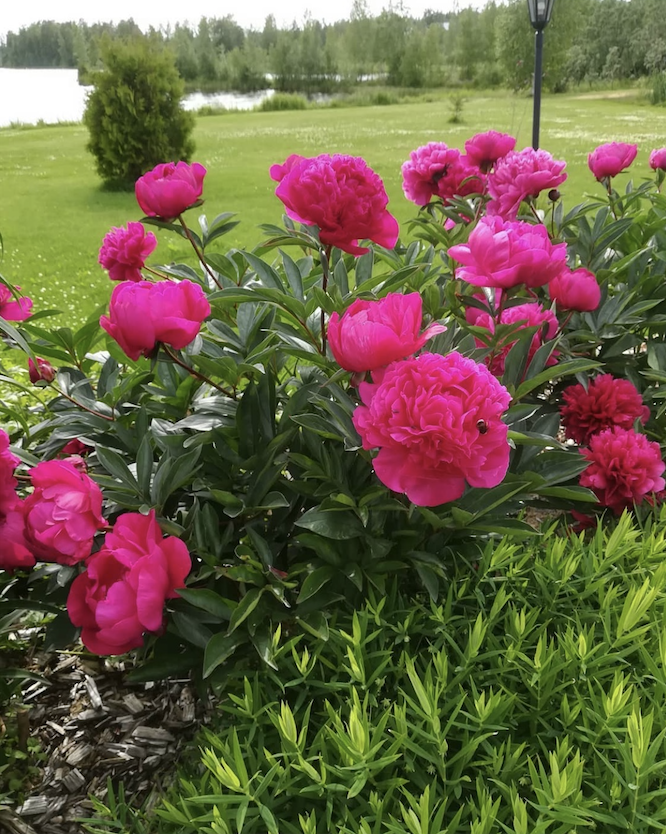
1 Root per order
Bloom Time: Late spring and early summer
Light: Sun to Part Shade
Height: 28-32 Inches
Space: 28-32 Inches
Zones: 4-8
Perennial
Photo by @gardenbyj and @anne.tuomaala
Peonies do best when planted in fall and they will only grow if temps get below 40F in the winter so zones 8 may be possible but consider this our caution statement for people ordering above that zone.
Peony Planting and Care Guide
Plant your peony roots when the soil can be worked and isn’t frozen, or heavily saturated. If you can’t plant your peonies right away then keep them inside the plastic bag for up to 4 weeks at 40F. Make sure the roots feel slightly damp throughout storage, mist if necessary since dry roots can lead to plant death. Plant your peonies as soon as possible for optimal success.
Container Started Peonies: Select a container with drainage holes that is at least 18” deep and 12” wide. Select a porous potting mix without fertilizer. Bury the root so the eyes (buds) are at 1” depth for zones 7-8, and 2” depth for zones 2-6. Water peonies in and store them at temperatures of 40-55F until buds begin to emerge and move them to a location receiving 6-8 hours of direct, unfiltered sunlight or 12-14 hours of artificial light. Water only when the soil begins to dry out. Fertilize sparingly after the buds have appeared. Once roots have filled container transplant into your garden at least 6-8 weeks before the first frost date.
Site: Select a location that has a minimum of 6-8 hours of direct sunlight each day. Spacing your plants 3-4’ apart will allow adequate air circulation preventing disease and will limit competition between neighboring plants. Choose your site with care since plant growth can be set back with transplanting or damage to their roots.
Soil Preparation: Peonies prefer a pH of 6-7, and well draining soil. Only add soil amendments if the soil is heavy clay or lacking in key nutrients which can be determined through the use of a soil test. Be careful not to over fertilize which can damage the young plant. Dig a hole large enough to accomodate the size and width of the roots. Then use a shovel to loosen the soil at the bottom of the hole to remove any rocks and allow the roots to spread. If any amendments are needed, dig a foot deeper into the hole and incorporate into the loose soil before planting the roots. Planting in the native soil is typically the best method to encourage growth of the young plants.
Plant Preparation: Soak peony roots in lukewarm water for 30 minutes before planting. Remove any damaged or rotting tubers.
Plant Burial: Planting at the right depth is essential for flower formation. The red buds on the roots should be facing upwards and be about 1” below the soil surface in zones 7-8 and 2” below the soil surface in zones 2-6. Deeper plantings will result in rotting buds and poor flower formation. After backfilling with soil press the soil down firmly and water in your newly planted peony tubers to ensure there are no air pockets.
Watering: Peonies require 1-2” of water a week but this need may vary depending on rainfall, time of year, and growth of the plant. Avoid watering late in the evening or splashing on the leaves which can result in disease.
Fertilizing: Begin fertilizing in the second year of growth and select a ratio of 3-5-5 or 5-10-10 which will be specified on the fertilizer label. Apply in two parts, half when buds emerge from the soil and the second half when flowering has finished.
Diseases and Pests: Peonies are prone to fungal diseases, including blight, which can rot the base of the stems, and powdery mildew, which coats the leaves in white. Fungicide may be required to lessen issues and products should be selected that can specifically be used for peonies and the disease problem. Always follow the directions on product labels and don’t spray if the plant is drought stressed or the temperature exceeds 80F which can damage the plant.
Pruning: Do not cut the stems of your peonies for cut flowers the first 3 years they are growing. Leaving the stems and leaves will encourage the plant to produce roots and more flowers in the future. In the fall, after the leaves and stems have died back, prune the stems 2-5 inches from the ground and remove from the site to prevent the spread of disease.
Sunflowers
True stars of the summer garden. Sunflowers now come in all kinds of beautiful variations. You can direct sow them right into the soil and then stand back and watch as summer’s beauty emerges. Grown from seed sown in the spring, sunflowers are a good flower for beginners.

Helianthus annuus
This mix includes ‘all sorts’ of sunflowers and is perfect if you can’t choose just one, and ensures you will have staggered blooming times. Cultivars in this mix include, ‘Autumn Beauty’, ‘Grey Stripe’, ‘Lemon Queen’, ‘Sungold Tall’, ‘Teddy Bear’, ‘Sunspot Dwarf’ and ‘Velvet Queen’. They vary in height by 2-12’ and bloom size by 8-12”. Sunflowers add late-summer color to your garden and floral arrangements. This drought tolerant crop attracts pollinators and birds throughout late-fall. Sunflowers can be harvested as a cut flower or left on the stock for seed production.
Plant Height: 2-12’
Light Requirements: full sun
Soil Preference: average fertility, well-draining soil, pH 6-7.5
USDA Zones: 2-10 (annual)
How to Grow
Germination: 7-21 days at 65-750F, light required for germination
Seeding Depth: 1/2” depth, light required
Spacing: 4-6” (direct seed spacing), 8-12” (mature spacing)
Days to Maturity: 90-120 days
Early-Season Seeding: Direct seed outdoors after the last frost date has passed. Starting seed indoors is not recommended since plants dislike being transplanted but they can be started 2-3 weeks before your last frost date and planted out after frost has passed for early blooming.
Late-Season Seeding: Direct seed outdoors at least 16 weeks before the first fall frost date to ensure all cultivars in this mix will bloom.
Growing Tips: Sunflowers can shade other plants so put them at the northern end of your garden. They also require staking and protection from wind when they are young so planting near a fence or using a stake or trellis is best. Pinching is not recommended and will lower yields. Don’t grow near potatoes or beans since seeds emit a substance that can inhibit the growth of certain plants. Sunflowers produce abnormal flowers if given too much nitrogen fertilizer. Sunflowers are drought tolerant once established and overly saturated soils should be avoided to prevent disease.
Cut Flower: Harvest when flower buds are just showing color or when they are fully open. Strip a majority of the leaves off to increase the vase-life.
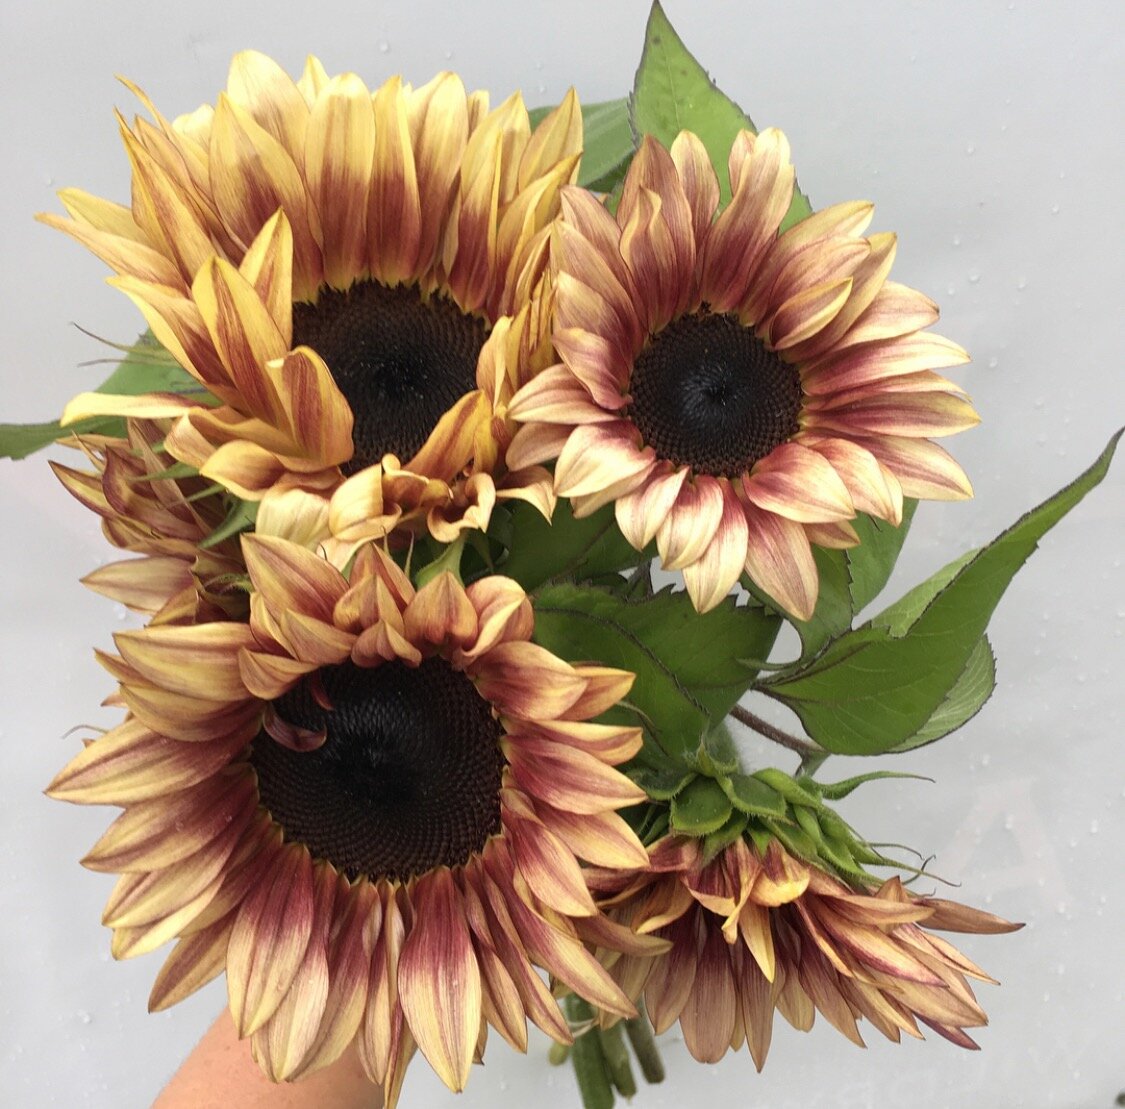
Helianthus annuus
Petals fade from burgundy to creamy white similar to a plum that has been freshly bitten into adding beautiful contrasting tones late-summer through fall to your garden and floral arrangements. This drought tolerant crop attracts pollinators and birds throughout late-fall. Sunflowers can be harvested as a cut flower or left on the stock for seed production.
Seed Count: approximately 10 seeds
Plant Height: 5-6’
Light Requirements: full sun
Soil Preference: average fertility, well-draining soil, pH 6-7.5
USDA Zones: 2-10 (annual)
How to Grow
Germination: 7-21 days at 65-750F
Seeding Depth: 1/2” depth
Spacing: 4-6” (direct seed spacing), 12-18” (mature spacing)
Days to Maturity: 50-65 days
Early-Season Seeding: Direct seed outdoors after the last frost date has passed. Starting seed indoors is not recommended since plants dislike being transplanted but they can be started 2-3 weeks before your last frost date and planted out after frost has passed for early blooming.
Late-Season Seeding: Direct seed outdoors at least 12 weeks before the first fall frost.
Growing Tips: Sunflowers can shade other plants so put them at the northern end of your garden. They also require staking and protection from wind when they are young so planting near a fence or using a stake or trellis is best. Pinching is not recommended and will lower yields. Don’t grow near potatoes or beans since seeds emit a substance that can inhibit the growth of certain plants. Sunflowers produce abnormal flowers if given too much nitrogen fertilizer and overly saturated soils should be avoided to prevent disease.
Cut Flower: Harvest when flower buds are just showing color or when they are fully open. Strip a majority of the leaves off to increase the vase-life.
Photo by @jackie.gold1 and @wildryefarm
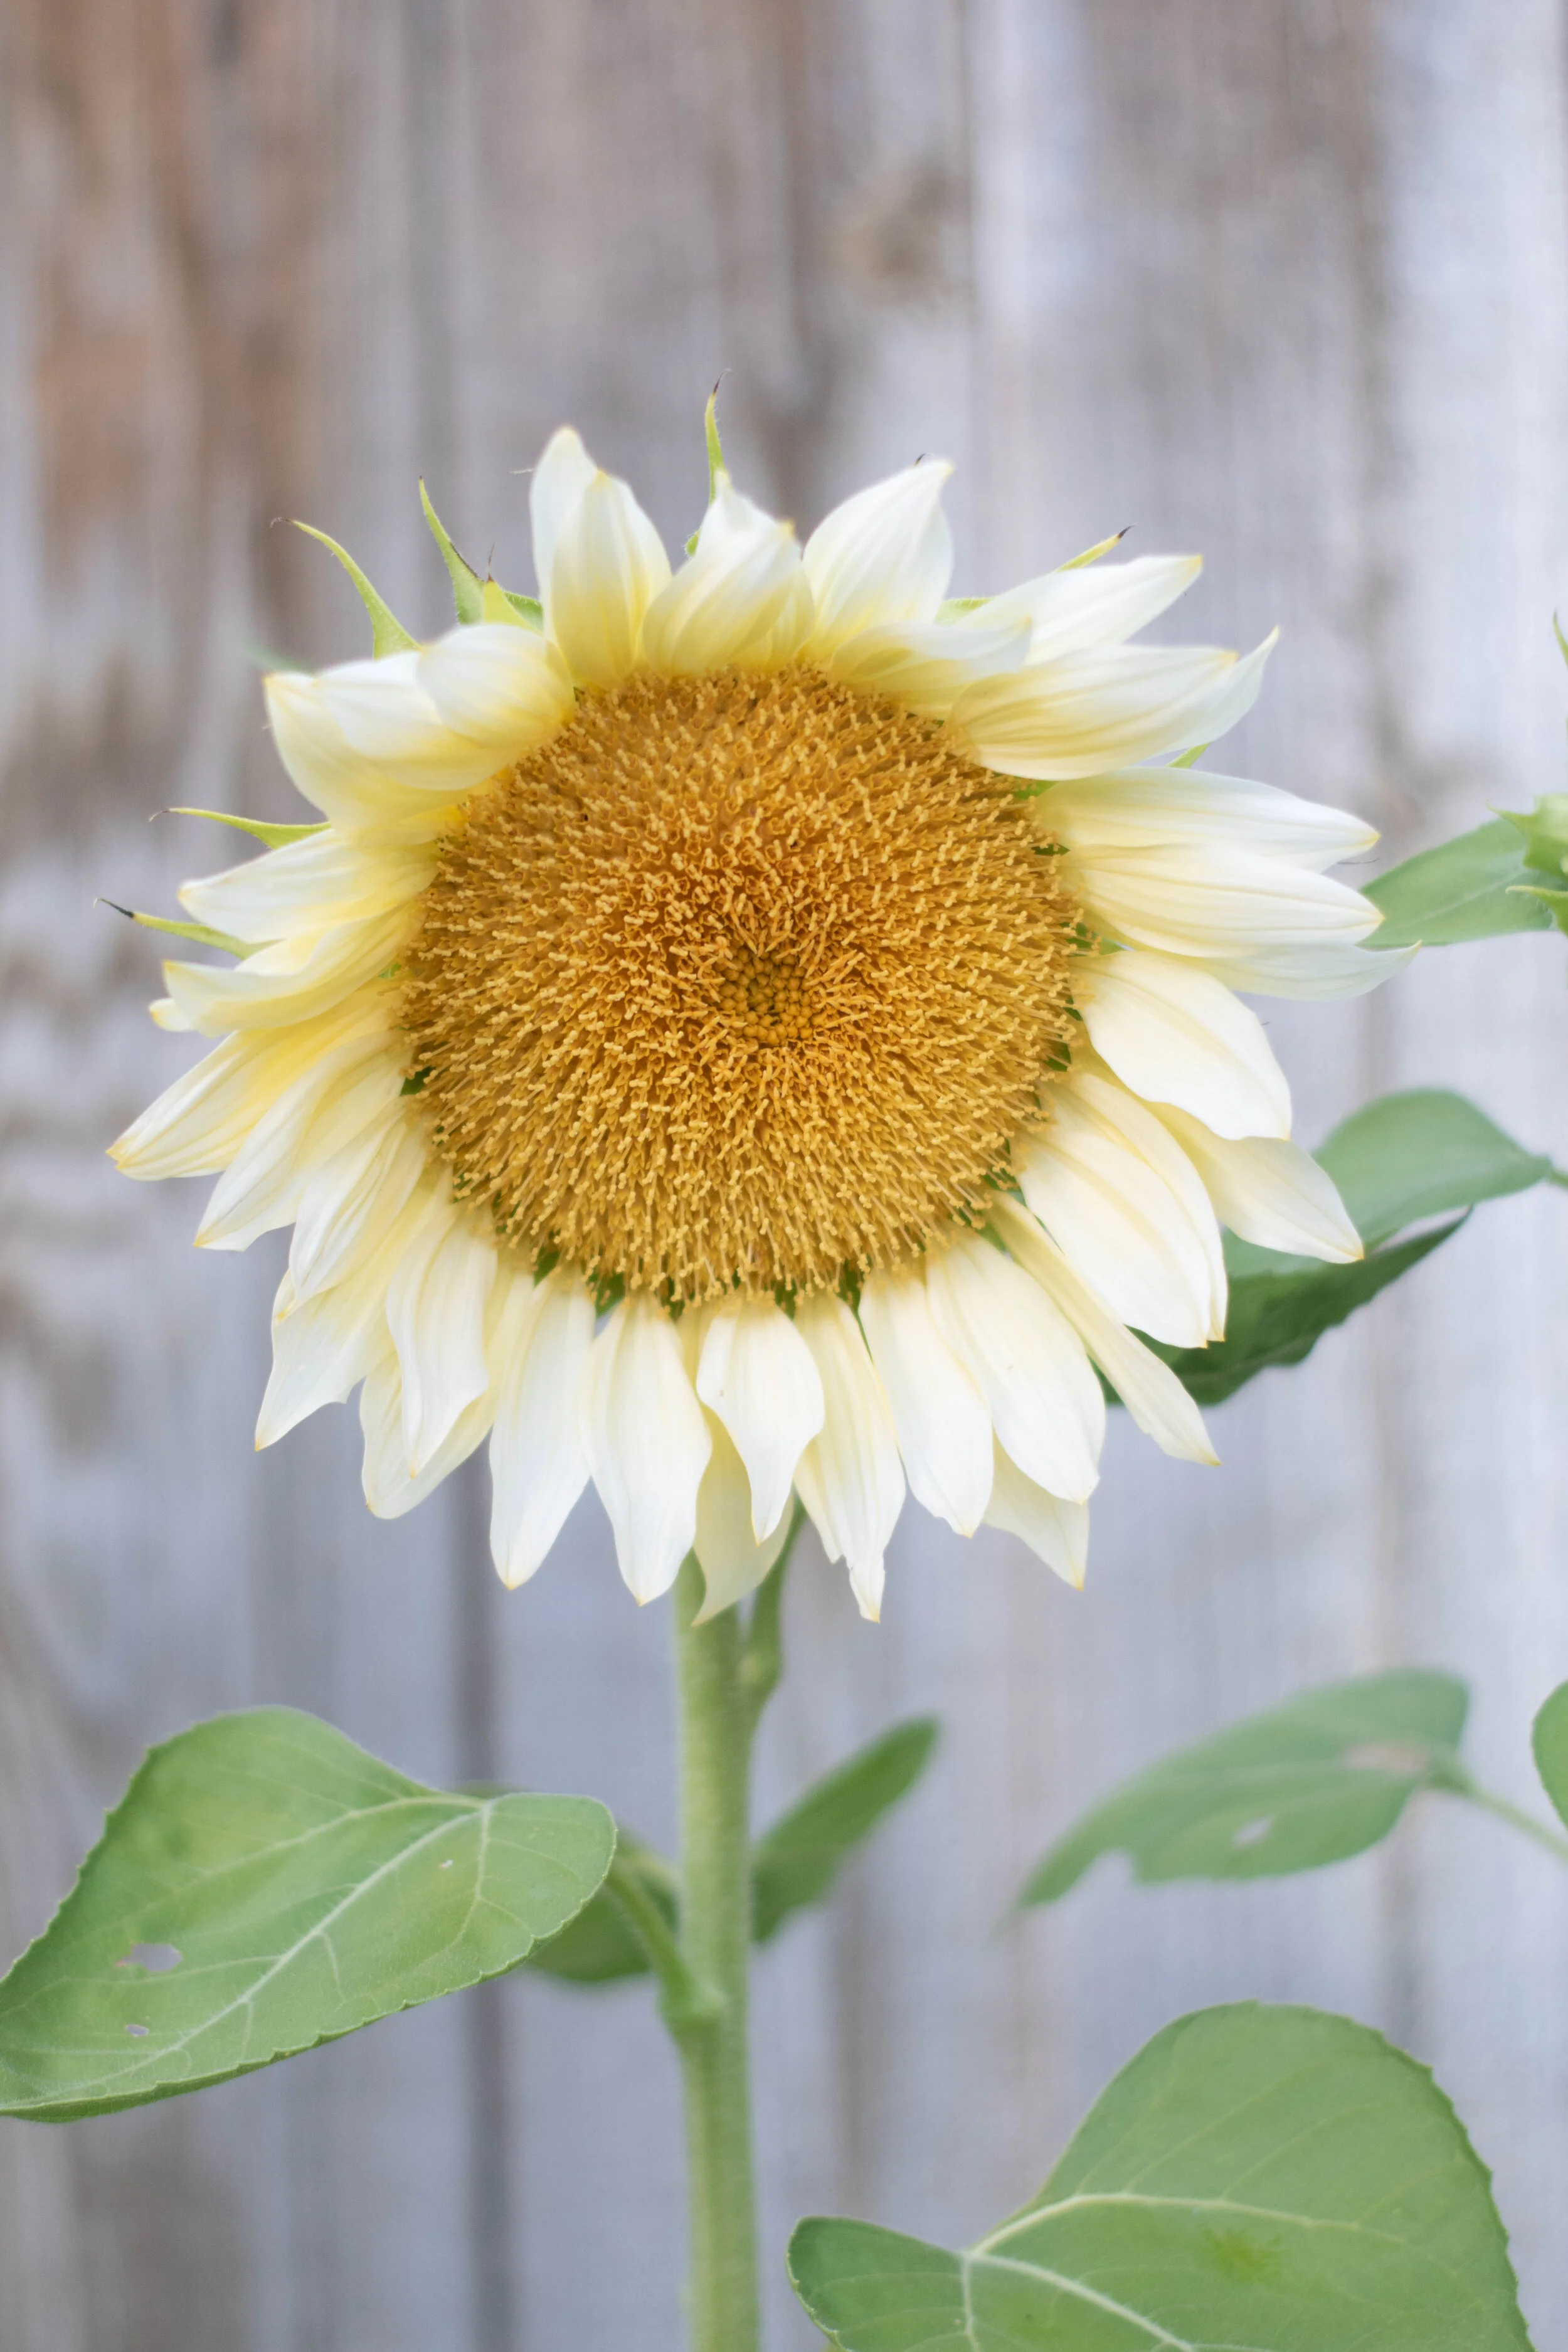
Helianthus annuus
Pale cream, nearly white petals catch the light and contrast against the deep yellow center. Sunflowers add late-summer through fall to your garden and floral arrangements. This drought tolerant crop attracts pollinators and birds throughout late-fall. Sunflowers can be harvested as a cut flower or left on the stock for seed production.
Seed Count: approximately 10 seeds
Plant Height: 5-6’
Light Requirements: full sun
Soil Preference: average fertility, well-draining soil, pH 6-7.5
USDA Zones: 2-10 (annual)
How to Grow
Germination: 7-21 days at 65-750F
Seeding Depth: 1/2” depth
Spacing: 4-6” (direct seed spacing), 12-18” (mature spacing)
Days to Maturity: 50-65 days
Early-Season Seeding: Direct seed outdoors after the last frost date has passed. Starting seed indoors is not recommended since plants dislike being transplanted but they can be started 2-3 weeks before your last frost date and planted out after frost has passed for early blooming.
Late-Season Seeding: Direct seed outdoors at least 12 weeks before the first fall frost.
Growing Tips: Sunflowers can shade other plants so put them at the northern end of your garden. They also require staking and protection from wind when they are young so planting near a fence or using a stake or trellis is best. Pinching is not recommended and will lower yields. Don’t grow near potatoes or beans since seeds emit a substance that can inhibit the growth of certain plants. Sunflowers produce abnormal flowers if given too much nitrogen fertilizer and overly saturated soils should be avoided to prevent disease.
Cut Flower: Harvest when flower buds are just showing color or when they are fully open. Strip a majority of the leaves off to increase the vase-life.
Photo by @melanies_garden

Helianthus annuus
Pale cream, nearly white petals are reminiscent of the moon against the dark center. These contrasting beauties add color late-summer through fall to your garden and floral arrangements. This drought tolerant crop attracts pollinators and birds throughout late-fall. Sunflowers can be harvested as a cut flower or left on the stock for seed production.
Seed Count: Approximately 10 seeds
Plant Height: 5-6’
Light Requirements: full sun
Soil Preference: average fertility, well-draining soil, pH 6-7.5
USDA Zones: 2-10 (annual)
How to Grow
Germination: 7-21 days at 65-750F
Seeding Depth: 1/2” depth
Spacing: 4-6” (direct seed spacing), 12-18” (mature spacing)
Days to Maturity: 50-65 days
Early-Season Seeding: Direct seed outdoors after the last frost date has passed. Starting seed indoors is not recommended since plants dislike being transplanted but they can be started 2-3 weeks before your last frost date and planted out after frost has passed for early blooming.
Late-Season Seeding: Direct seed outdoors at least 12 weeks before the first fall frost.
Growing Tips: Sunflowers can shade other plants so put them at the northern end of your garden. They also require staking and protection from wind when they are young so planting near a fence or using a stake or trellis is best. Pinching is not recommended and will lower yields. Don’t grow near potatoes or beans since seeds emit a substance that can inhibit the growth of certain plants. Sunflowers produce abnormal flowers if given too much nitrogen fertilizer and overly saturated soils should be avoided to prevent disease.
Cut Flower: Harvest when flower buds are just showing color or when they are fully open. Strip a majority of the leaves off to increase the vase-life.
Photo by @the_ct_colonial
Helianthus annuus
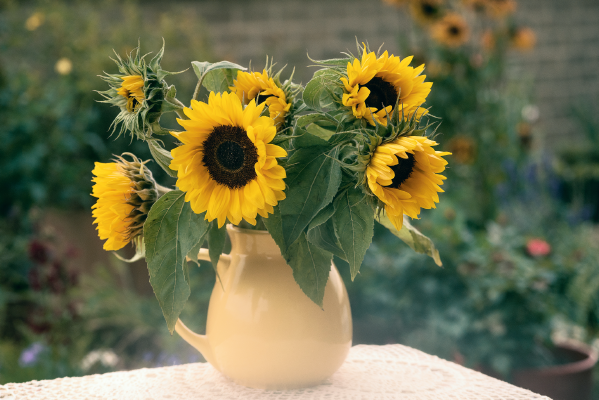
Pollen free flowers that are perfect for those who struggle with allergies but still want a classic sunflower with golden-yellow petals and a dark center stand tall on their stems. Sunflowers add color late-summer through fall to your garden and floral arrangements. This drought tolerant crop attracts pollinators and birds throughout late-fall. Sunflowers can be harvested as a cut flower or left on the stock for seed production.
Plant Height: 3-5’
Light Requirements: full sun
Soil Preference: average fertility, well-draining soil, pH 6-7.5
USDA Zones: 2-10 (annual)
How to Grow
Germination: 7-21 days at 65-750F
Seeding Depth: 1/2” depth
Spacing: 4-6” (direct seed spacing), 12-18” (mature spacing)
Days to Maturity: 60-80 days
Early-Season Seeding: Direct seed outdoors after the last frost date has passed. Starting seed indoors is not recommended since plants dislike being transplanted but they can be started 2-3 weeks before your last frost date and planted out after frost has passed for early blooming.
Late-Season Seeding: Direct seed outdoors at least 11 weeks before the first fall frost.
Growing Tips: Sunflowers can shade other plants so put them at the northern end of your garden. They also require staking and protection from wind when they are young so planting near a fence or using a stake or trellis is best. Pinching is not recommended and will lower yields. Don’t grow near potatoes or beans since seeds emit a substance that can inhibit the growth of certain plants. Sunflowers produce abnormal flowers if given too much nitrogen fertilizer and overly saturated soils should be avoided to prevent disease.
Cut Flower: Harvest when flower buds are just showing color or when they are fully open. Strip a majority of the leaves off to increase the vase-life.
Zinnias
Grown from seed sown in the spring, just a few of these easy-to-grow plants will churn out buckets of blooms all year. There’s a reason these gorgeous heat lovers are a staple of the cut flower garden and a favorite to add height and color in the yard.


Zinnia elegans
Double lilac flowers on tall stems blooming summer through fall. This plant does well in warm temperatures and plants will branch out and become quite large if given enough water. Flowers attract a variety of pollinators. Their cheery flowers add color to containers, gardens, and cut flower arrangements.
Seed Count: Approximately 50 seeds
Plant Height: 4-5’
Light Requirements: full sun
Soil Preference: average fertility and moist soil, pH 5.5-7.5
USDA Zones: 3-10 (annual)
How to Grow
Germination: 3-7 days at 80-85F, light required for germination
Seeding Depth: 1/4” depth
Plant Spacing: 9-12”
Days to Maturity: 75-90 days
Early-Season Seeding: Start seed indoors 4-6 weeks before the last frost date, transplant after the danger of frost has passed. Direct seeding is recommended after the last frost date.
Late-Season Seeding: Start seed indoors at least 12 weeks before the first frost date.
Growing Tips: Plants can be sown in successions every 2-3 weeks for continuous blooms. Pinching is not required for this crop but will encourage higher yields. Pinch plants when they are 8-12” by cutting out the top 2-4”. Plants require horizontal trellising to support stems for cut flower production. Avoid disturbing the roots when transplanting. Remove stems after they have bloomed to promote more flowering.
Cut Flower: Harvest when the stems are stiff and flowers are opened. Vase-life will last 7-10 days with preservative. Adding 1-2 drops of bleach to the water will keep it clean.
photo by @fanna_and_flora

Zinnia elegans
Double lime green flowers on tall stems blooming summer through fall. This plant does well in warm temperatures and plants will branch out and become quite large if given enough water. Flowers attract a variety of pollinators. Their cheery flowers add color to containers, gardens, and cut flower arrangements.
Seed Count: approximately 50 seeds
Plant Height: 4-5’
Light Requirements: full sun
Soil Preference: average fertility and moist soil, pH 5.5-7.5
USDA Zones: 3-10 (annual)
How to Grow
Germination: 3-7 days at 80-85F, light required for germination
Seeding Depth: 1/4” depth
Plant Spacing: 9-12”
Days to Maturity: 75-90 days
Early-Season Seeding: Start seed indoors 4-6 weeks before the last frost date, transplant after the danger of frost has passed. Direct seeding is recommended after the last frost date.
Late-Season Seeding: Start seed indoors at least 12 weeks before the first frost date.
Growing Tips: Plants can be sown in successions every 2-3 weeks for continuous blooms. Pinching is not required for this crop but will encourage higher yields. Pinch plants when they are 8-12” by cutting out the top 2-4”. Plants require horizontal trellising to support stems for cut flower production. Avoid disturbing the roots when transplanting. Remove stems after they have bloomed to promote more flowering.
Cut Flower: Harvest when the stems are stiff and flowers are opened. Vase-life will last 7-10 days with preservative. Adding 1-2 drops of bleach to the water will keep it clean.
photo by @labbrown
Seed Count: 100

Zinnia elegans
Petals of dark pink fade to salmon after they open up. Double blooms on tall stems blooming summer through fall. This plant does well in warm temperatures and plants will branch out and become quite large if given enough water. Flowers attract a variety of pollinators. Their cheery flowers add color to containers, gardens, and cut flower arrangements.
Seed Count: approximately 50 seeds
Plant Height: 4-5’
Light Requirements: full sun
Soil Preference: average fertility and moist soil, pH 5.5-7.5
USDA Zones: 3-10 (annual)
How to Grow
Germination: 3-7 days at 80-85F, light required for germination
Seeding Depth: 1/4” depth
Plant Spacing: 9-12”
Days to Maturity: 75-90 days
Early-Season Seeding: Start seed indoors 4-6 weeks before the last frost date, transplant after the danger of frost has passed. Direct seeding is recommended after the last frost date.
Late-Season Seeding: Start seed indoors at least 12 weeks before the first frost date.
Growing Tips: Plants can be sown in successions every 2-3 weeks for continuous blooms. Pinching is not required for this crop but will encourage higher yields. Pinch plants when they are 8-12” by cutting out the top 2-4”. Plants require horizontal trellising to support stems for cut flower production. Avoid disturbing the roots when transplanting. Remove stems after they have bloomed to promote more flowering.
Cut Flower: Harvest when the stems are stiff and flowers are opened. Vase-life will last 7-10 days with preservative. Adding 1-2 drops of bleach to the water will keep it clean.
photo by @laurenbrookslife and @3sistersgrow
Seed Count: 75

Zinnia elegans
Double deep wine colored flowers on tall stems blooming summer through fall. This plant does well in warm temperatures and plants will branch out and become quite large if given enough water. Flowers attract a variety of pollinators. Their cheery flowers add color to containers, gardens, and cut flower arrangements.
Seed Count: Approximately 50 seeds
Plant Height: 4-5’
Light Requirements: full sun
Soil Preference: average fertility and moist soil, pH 5.5-7.5
USDA Zones: 3-10 (annual)
How to Grow
Germination: 3-7 days at 80-85F, light required for germination
Seeding Depth: 1/4” depth
Plant Spacing: 9-12”
Days to Maturity: 75-90 days
Early-Season Seeding: Start seed indoors 4-6 weeks before the last frost date, transplant after the danger of frost has passed. Direct seeding is recommended after the last frost date.
Late-Season Seeding: Start seed indoors at least 12 weeks before the first frost date.
Growing Tips: Plants can be sown in successions every 2-3 weeks for continuous blooms. Pinching is not required for this crop but will encourage higher yields. Pinch plants when they are 8-12” by cutting out the top 2-4”. Plants require horizontal trellising to support stems for cut flower production. Avoid disturbing the roots when transplanting. Remove stems after they have bloomed to promote more flowering.
Cut Flower: Harvest when the stems are stiff and flowers are opened. Vase-life will last 7-10 days with preservative. Adding 1-2 drops of bleach to the water will keep it clean.

Large bloom heads. This plant does well in warm temperatures and plants will branch out and become quite large if given enough water. Flowers attract a variety of pollinators. Their cheery flowers add color to containers, gardens, and cut flower arrangements.
Plant Height: 2-3’
Light Requirements: full sun
Soil Preference: average fertility and moist soil, pH 5.5-7.5
USDA Zones: 3-10 (annual)
How to Grow
Germination: 3-7 days at 80-85F, light required for germination
Seeding Depth: 1/4” depth
Plant Spacing: 9-12”
Days to Maturity: 75-90 days
Early-Season Seeding: Start seed indoors 4-6 weeks before the last frost date, transplant after the danger of frost has passed. Direct seeding is recommended after the last frost date.
Late-Season Seeding: Start seed indoors at least 12 weeks before the first frost date.
Growing Tips: Plants can be sown in successions every 2-3 weeks for continuous blooms. Pinching is not required for this crop but will encourage higher yields. Pinch plants when they are 8-12” by cutting out the top 2-4”. Plants require horizontal trellising to support stems for cut flower production. Avoid disturbing the roots when transplanting. Remove stems after they have bloomed to promote more flowering.
Cut Flower: Harvest when the stems are stiff and flowers are opened. Vase-life will last 7-10 days with preservative. Adding 1-2 drops of bleach to the water will keep it clean.
Photo by @tabi.gandee

Zinnia elegans
Huge bloom heads and excellent plant health. This flower does well in warm temperatures and plants will branch out and become quite large if given enough water. Flowers attract a variety of pollinators. Their cheery flowers add color to containers, gardens, and cut flower arrangements.
Plant Height: 2-4’
Light Requirements: full sun
Soil Preference: average fertility and moist soil, pH 5.5-7.5
USDA Zones: 3-10 (annual)
How to Grow
Germination: 3-7 days at 80-85F, light required for germination
Seeding Depth: 1/4” depth
Plant Spacing: 9-12”
Days to Maturity: 75-90 days
Early-Season Seeding: Start seed indoors 4-6 weeks before the last frost date, transplant after the danger of frost has passed. Direct seeding is recommended after the last frost date.
Late-Season Seeding: Start seed indoors at least 12 weeks before the first frost date.
Growing Tips: Plants can be sown in successions every 2-3 weeks for continuous blooms. Pinching is not required for this crop but will encourage higher yields. Pinch plants when they are 8-12” by cutting out the top 2-4”. Plants require horizontal trellising to support stems for cut flower production. Avoid disturbing the roots when transplanting. Remove stems after they have bloomed to promote more flowering.
Cut Flower: Harvest when the stems are stiff and flowers are opened. Vase-life will last 7-10 days with preservative. Adding 1-2 drops of bleach to the water will keep it clean.'
Photo by @thebluebandedbee and @the_spaceborn and @amandadphotoart

Zinnia elegans
Double golden-yellow flowers blooming summer through fall. This plant does well in warm temperatures and plants will branch out and become quite large if given enough water. Flowers attract a variety of pollinators. Their cheery flowers add color to containers, gardens, and cut flower arrangements.
Plant Height: 4-5’
Light Requirements: full sun
Soil Preference: average fertility and moist soil, pH 5.5-7.5
USDA Zones: 3-10 (annual)
How to Grow
Germination: 3-7 days at 80-85F, light required for germination
Seeding Depth: 1/4” depth
Plant Spacing: 9-12”
Days to Maturity: 75-90 days
Early-Season Seeding: Start seed indoors 4-6 weeks before the last frost date, transplant after the danger of frost has passed. Direct seeding is recommended after the last frost date.
Late-Season Seeding: Start seed indoors at least 12 weeks before the first frost date.
Growing Tips: Plants can be sown in successions every 2-3 weeks for continuous blooms. Pinching is not required for this crop but will encourage higher yields. Pinch plants when they are 8-12” by cutting out the top 2-4”. Plants require horizontal trellising to support stems for cut flower production. Avoid disturbing the roots when transplanting. Remove stems after they have bloomed to promote more flowering.
Cut Flower: Harvest when the stems are stiff and flowers are opened. Vase-life will last 7-10 days with preservative. Adding 1-2 drops of bleach to the water will keep it clean.
Photo by @willard9teen56, @claresaxby01

Zinnia elegans
Double flowers begin with dark-pink that fades to pale-pink as they age and bloom summer through fall. This plant does well in warm temperatures and plants will branch out and become quite large if given enough water. Flowers attract a variety of pollinators. Their cheery flowers add color to containers, gardens, and cut flower arrangements.
Plant Height: 2-4’
Light Requirements: full sun
Soil Preference: average fertility and moist soil, pH 5.5-7.5
USDA Zones: 3-10 (annual)
How to Grow
Germination: 3-7 days at 80-85F, light required for germination
Seeding Depth: 1/4” depth
Plant Spacing: 9-12”
Days to Maturity: 75-90 days
Early-Season Seeding: Start seed indoors 4-6 weeks before the last frost date, transplant after the danger of frost has passed. Direct seeding is recommended after the last frost date.
Late-Season Seeding: Start seed indoors at least 12 weeks before the first frost date.
Growing Tips: Plants can be sown in successions every 2-3 weeks for continuous blooms. Pinching is not required for this crop but will encourage higher yields. Pinch plants when they are 8-12” by cutting out the top 2-4”. Plants require horizontal trellising to support stems for cut flower production. Avoid disturbing the roots when transplanting. Remove stems after they have bloomed to promote more flowering.
Cut Flower: Harvest when the stems are stiff and flowers are opened. Vase-life will last 7-10 days with preservative. Adding 1-2 drops of bleach to the water will keep it clean.
Photo by @graingerfieldfarm

Zinnia elegans
Creamy white single flowers blooming summer through fall. This plant does well in warm temperatures and plants will branch out and become quite large if given enough water. Flowers attract a variety of pollinators. Their cheery flowers add color to containers, gardens, and cut flower arrangements.
Seed Count: approximately 50 seeds
Plant Height: 2-4’
Light Requirements: full sun
Soil Preference: average fertility and moist soil, pH 5.5-7.5
USDA Zones: 3-10 (annual)
How to Grow
Germination: 3-7 days at 70-85F, light required for germination
Seeding Depth: 1/4” depth
Plant Spacing: 9-12”
Days to Maturity: 60-80 days
Early-Season Seeding: Start seed indoors 4-6 weeks before the last frost date, transplant after the danger of frost has passed. Direct seeding is recommended after the last frost date.
Late-Season Seeding: Start seed indoors at least 12 weeks before the first frost date.
Growing Tips: Plants can be sown in successions every 2-3 weeks for continuous blooms. Pinching is not required for this crop but will encourage higher yields. Pinch plants when they are 8-12” by cutting out the top 2-4”. Plants require horizontal trellising to support stems for cut flower production. Avoid disturbing the roots when transplanting. Remove stems after they have bloomed to promote more flowering.
Cut Flower: Harvest when the stems are stiff and flowers are opened. Vase-life will last 7-10 days with preservative. Adding 1-2 drops of bleach to the water will keep it clean.

Zinnia elegans
Bi-color green, magenta, and red double flowers blooming summer through fall. This plant does well in warm temperatures and plants will branch out and become quite large if given enough water. Flowers attract a variety of pollinators adding color to containers, and gardens.
Plant Height: 3-4’
Light Requirements: full sun
Soil Preference: average fertility and moist soil, pH 5.5-7.5
USDA Zones: 3-10 (annual)
How to Grow
Germination: 3-7 days at 70-85F, light required for germination
Seeding Depth: 1/4” depth
Plant Spacing: 9-12”
Days to Maturity: 75-85 days
Early-Season Seeding: Start seed indoors 4-6 weeks before the last frost date, transplant after the danger of frost has passed. Direct seeding is recommended after the last frost date.
Late-Season Seeding: Start seed indoors at least 12 weeks before the first frost date.
Growing Tips: Plants can be sown in successions every 2-3 weeks for continuous blooms. Pinching is not required for this crop but will encourage higher yields. Pinch plants when they are 8-12” by cutting out the top 2-4”. Plants require horizontal trellising to support stems for cut flower production. Avoid disturbing the roots when transplanting. Remove stems after they have bloomed to promote more flowering.
Cut Flower: Harvest when the stems are stiff and flowers are opened. Vase-life will last 7-10 days with preservative. Adding 1-2 drops of bleach to the water will keep it clean.
”Photo by @sewit98

Zinnia elegans
Pale pink flowers with large outer petals and thin, frilly inner petals with a hint of lilac and peach tones, blooming summer through fall. This plant does well in warm temperatures and plants will branch out and become quite large if given enough water. Flowers attract a variety of pollinators adding color to containers, and gardens.
Seed Count: approximately 50 seeds
Plant Height: 2-3’
Light Requirements: full sun
Soil Preference: average fertility and moist soil, pH 5.5-7.5
USDA Zones: 3-10 (annual)
How to Grow
Germination: 3-7 days at 70-85F, light required for germination
Seeding Depth: 1/4” depth
Plant Spacing: 9-12”
Days to Maturity: 75-90 days
Early-Season Seeding: Start seed indoors 4-6 weeks before the last frost date, transplant after the danger of frost has passed. Direct seeding is recommended after the last frost date.
Late-Season Seeding: Start seed indoors at least 12 weeks before the first frost date.
Growing Tips: Plants can be sown in successions every 2-3 weeks for continuous blooms. Pinching is not required for this crop but will encourage higher yields. Pinch plants when they are 8-12” by cutting out the top 2-4”. Plants require horizontal trellising to support stems for cut flower production. Avoid disturbing the roots when transplanting. Remove stems after they have bloomed to promote more flowering.
Cut Flower: Harvest when the stems are stiff and flowers are opened. Vase-life will last 7-10 days with preservative. Adding 1-2 drops of bleach to the water will keep it clean.
Photos by @cutflowerallotment
Zinnia elegans
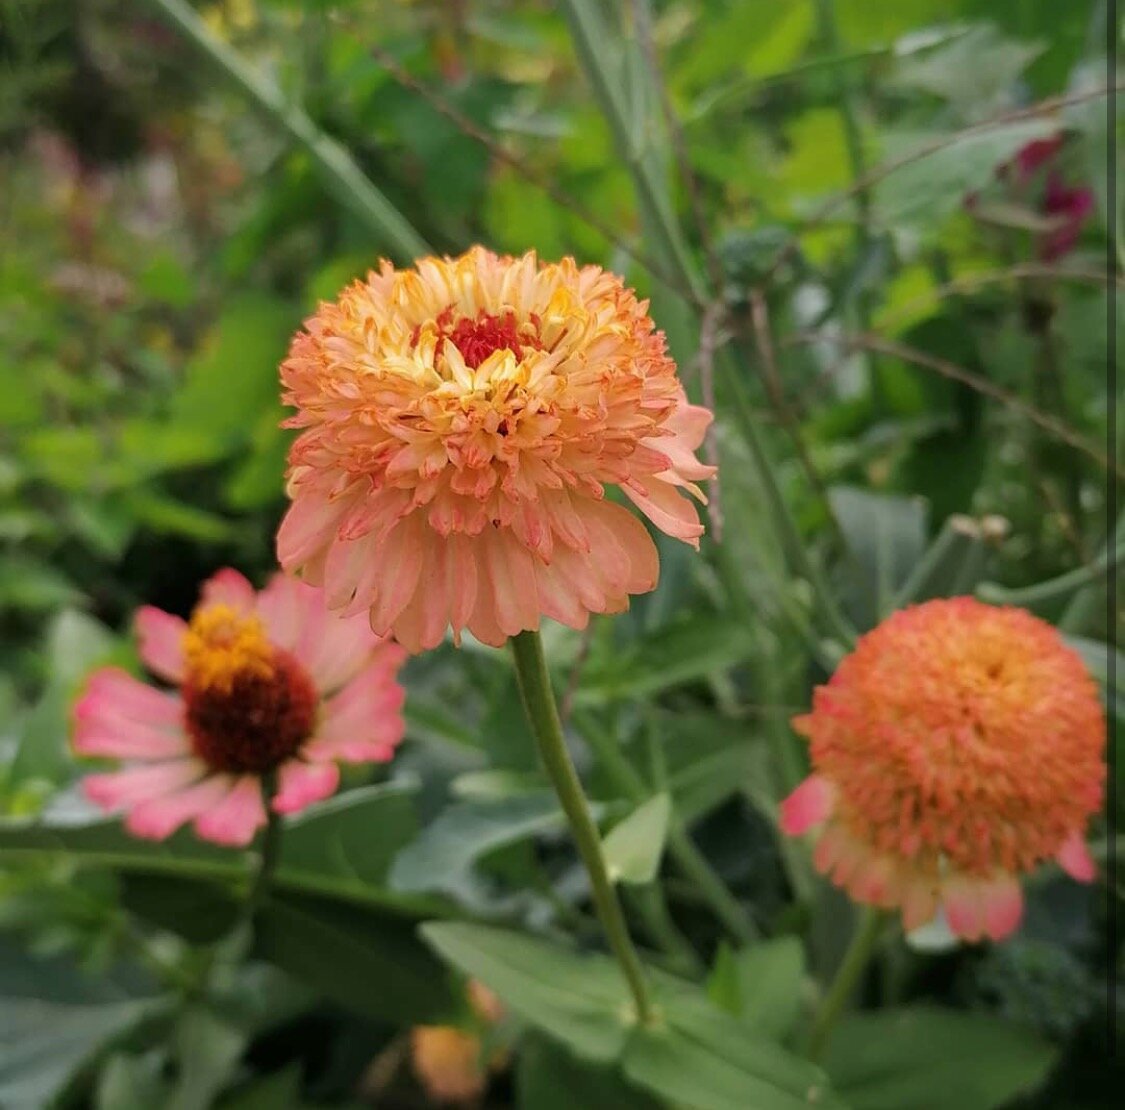
Peach flowers with large outer petals and thin, frilly inner petals with a hint of yellow and magenta tones, blooming summer through fall. This plant does well in warm temperatures and plants will branch out and become quite large if given enough water. Flowers attract a variety of pollinators adding color to containers, and gardens.
Seed Count: approximately 50 seeds
Plant Height: 2-3’
Light Requirements: full sun
Soil Preference: average fertility and moist soil, pH 5.5-7.5
USDA Zones: 3-10 (annual)
How to Grow
Germination: 3-7 days at 70-85F, light required for germination
Seeding Depth: 1/4” depth
Plant Spacing: 9-12”
Days to Maturity: 75-90 days
Early-Season Seeding: Start seed indoors 4-6 weeks before the last frost date, transplant after the danger of frost has passed. Direct seeding is recommended after the last frost date.
Late-Season Seeding: Start seed indoors at least 12 weeks before the first frost date.
Growing Tips: Plants can be sown in successions every 2-3 weeks for continuous blooms. Pinching is not required for this crop but will encourage higher yields. Pinch plants when they are 8-12” by cutting out the top 2-4”. Plants require horizontal trellising to support stems for cut flower production. Avoid disturbing the roots when transplanting. Remove stems after they have bloomed to promote more flowering.
Cut Flower: Harvest when the stems are stiff and flowers are opened. Vase-life will last 7-10 days with preservative. Adding 1-2 drops of bleach to the water will keep it clean.
Photo by @leeninwonderland

Cosmos bipinnatus
With varying shades of pink and scarlet, you won’t want to miss out on planting these blooms. They’ll add just the right touch of cheerfulness to your garden and arrangements blooming summer through fall. Their fine texture leaves and 2-4” blossoms add texture and interest. Cosmos are drought tolerant and attract pollinators of all kinds making them a great companion plant in your vegetable garden.
Seed Count: approximately 50 seeds
Plant Height: 36-48”
Light Requirements: full sun
Soil Preference: average fertility and moderate water conditions
USDA Zones: 2-11 (annual)
How to Grow
Germination: 7-10 days at 68-80F
Seeding Depth: 1/8-1/4” depth, light required for germination
Plant Spacing: 12”
Days to Maturity: 75-90 days
Early-Season Seeding: Start seed indoors 4-5 weeks before the last frost date, transplant after the danger of frost has passed. Direct seed outdoors after the last frost date or when soil temperature is above 60F.
Late-Season Seeding: Start seed indoors or direct seed outdoors at least 13 weeks before the first frost date.
Growing Tips: Trellis may be required to support thin stems in windy conditions. Cut spent blooms to encourage more flowering or allow them to go to seed and self sow. These prefer less frequent fertilization as too much nitrogen can promote foliage but limit flower growth.
Cut Flower: Pinch the growing point when the plant is 1’ tall to promote multi-stem growth. Harvest when flower buds are starting to open but before pollination occurs to ensure a longer vase life. Single flowers bloom 4-6 days when using flower food. The bloom period can be extended by harvesting stems with several buds at differing maturities to stagger blooming times.
Photo by @nellarosefarms
Warm Season

Lupinus polyphyllus
Heirloom lupine seeds come in a range of colors including cream, pink, purple, and blue. Masses of petals bloom on tall spikes begin to bloom in June and the blooms last for no more than 3 weeks. Stiff stems add height to gardens or floral arrangements. Flowers attract a variety of pollinators, and readily reseed.
Seed Count: approximately 25 seeds
Plant Height: 12-24”
Light Requirements: full sun, partial shade
Soil Preference: rich, moist, well-draining soil
USDA Zones: 3-9 (perennial)
How to Grow
Germination: 14-21 days at 65-75F
Seeding Depth: 1/4” depth, darkness aids germination, scarify and soak seeds
Plant Spacing: 12-14”
Days to Maturity: 365 days
Early-Season Seeding: Starting seeds indoors 4-8 weeks before planting out. Plant outdoors after the danger of frost has passed. Direct seed in early-spring as soon as soil can be worked.
Late-Season Seeding: Direct seed in early fall.
Growing Tips: The seed must be scarified (scratched) and then soaked for 24 hours to enhance germination. Do not wait to transplant as roots do not tolerate being transplanted. Plants can develop powdery mildew in late summer after blooming and can be trimmed back. Remove flowers after blooming to prevent re-seeding.
Cut Flower: Harvest when 80% of the florets on a stem are open. Allowing flowers to be open for too long and pollinated by bees will cause a shorter vase-life.
Photo by @shroom_momma
Helianthus annuus
Pale cream, nearly white petals catch the light and contrast against the deep yellow center. Sunflowers add late-summer through fall to your garden and floral arrangements. This drought tolerant crop attracts pollinators and birds throughout late-fall. Sunflowers can be harvested as a cut flower or left on the stock for seed production.
Seed Count: approximately 10 seeds
Plant Height: 5-6’
Light Requirements: full sun
Soil Preference: average fertility, well-draining soil, pH 6-7.5
USDA Zones: 2-10 (annual)
How to Grow
Germination: 7-21 days at 65-750F
Seeding Depth: 1/2” depth
Spacing: 4-6” (direct seed spacing), 12-18” (mature spacing)
Days to Maturity: 50-65 days
Early-Season Seeding: Direct seed outdoors after the last frost date has passed. Starting seed indoors is not recommended since plants dislike being transplanted but they can be started 2-3 weeks before your last frost date and planted out after frost has passed for early blooming.
Late-Season Seeding: Direct seed outdoors at least 12 weeks before the first fall frost.
Growing Tips: Sunflowers can shade other plants so put them at the northern end of your garden. They also require staking and protection from wind when they are young so planting near a fence or using a stake or trellis is best. Pinching is not recommended and will lower yields. Don’t grow near potatoes or beans since seeds emit a substance that can inhibit the growth of certain plants. Sunflowers produce abnormal flowers if given too much nitrogen fertilizer and overly saturated soils should be avoided to prevent disease.
Cut Flower: Harvest when flower buds are just showing color or when they are fully open. Strip a majority of the leaves off to increase the vase-life.
Photo by @melanies_garden
There’s a reason it’s the most sought after dahlia on the market. From creamy white to pale lavender and perky peach, if you’re planning a wedding arrangement, you’ll definitely want to take these blooms into consideration. They bloom in a wide array of pinks and add a gentle touch to any arrangement.
Flower Type: Dinner plate
Plant Height: 3-4’
Flower Diameter: 6-8”
Light Requirements: full sun, part sun
Soil Preference: well-draining soil
USDA Zones: 2-7 (annual), 8-11 (perennial)
Days to Maturity: 80-100 days
How to Grow
Planting Depth: 1-2” (sprouting inside), 4-6” depth (outside)
Plant Spacing: 12-18”
When to plant: Sprout tuber indoors 4-6 weeks before the last frost date, transplant after the danger of frost has passed. Plant tubers directly outdoors after the danger of frost has passed.
Growing Tips: Tubers rot easily so avoid giving them too much water until the plant has begun to sprout (2-3 weeks after planting). Pinch top of stem when plants are 10-12” to promote branching. Add compost or fertilizer to soil before planting, or fertilize every 3-4 weeks with a well-balanced fertilizer after growth is visible. Trellis or staking is recommended to keep plants upright.
Cut Flower: Flowers can be harvested when petals are 3/4 open. Sear stems in 160-170F water or use a hydrating product to achieve 5-7 day vase-life.
Storing and Dividing Tubers: After frost has turned the top growth brown, cut the stem back a few inches above the soil. Then carefully dig carefully around the roots and rinse off excess dirt from and remove any tubers that may be rotting or damaged. Allow tubers to dry for several weeks allowing the roots to develop a slight wrinkled appearance before placing them in storage following the same storage procedures as above. Tubers can be divided in spring by cutting the tuber root segments apart with a sharp knife, making sure each has at least one visible eye (bud). Tubers can then be planted.
photo by @urbanveggiepatch and @vikingflowerpatch and @wildryefarm and @hellobardeaux